Powering the Ripple-2 Node
TIP: It is recommended that the RF tray be removed prior to installing the power adapter cable kit.
Tools
• 3/4" crow foot wrench
• Medium flat-blade screwdriver
1. Remove the RF tray:
a. Disconnect the RF tray side of the coax jumpers that connect to the Pebble-2 module(s).
b. Disconnect the RF tray side of the DC cable that connects to the lid motherboard.
c. Loosen the six RF tray hold-down screws with a medium flat-blade screwdriver.
d. Remove the RF tray using the tray’s handles.
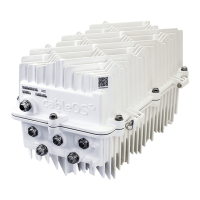
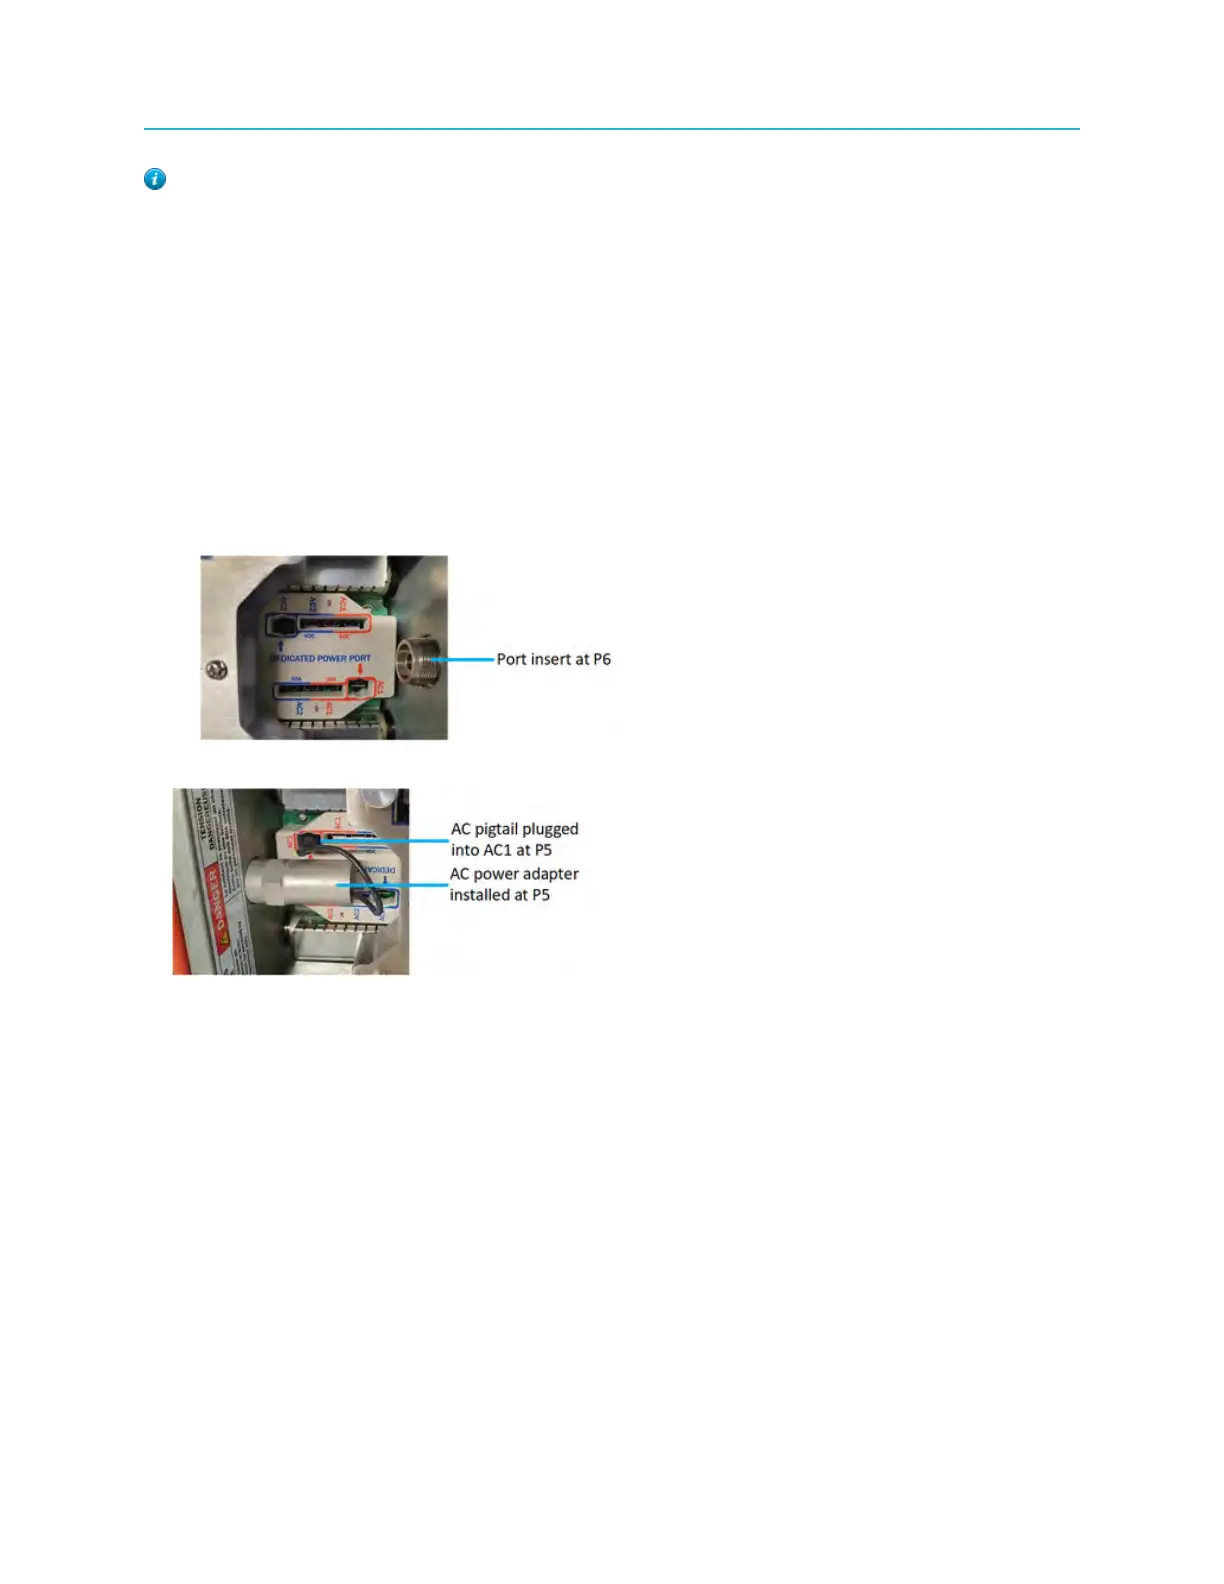
2. Install the power adapter inside the node at P5 or P6.
a. Manually screw the power adapter onto the special port insert of P5 or P6 until it is tight.
b. Torque the power adapter to 8 ft.-lbs with a 3/4" wrench.
3. Plug the AC pigtail to the special AC1 or AC2 port as needed.
4. Follow Ripple-2 node AC configuration instructions as per <<hyperlink to Routing power through the
Ripple node>>.
5. Re-install RF tray:
a. Tighten the six RF tray hold-down screws.
1. Tighten the center screws first, followed by the outer screws.
2. Tighten to 10-12 in.-lbs of torque.
b. Connect the RF tray side of the DC cable that connects to the lid motherboard.
c. Connect the RF tray side of the coax jumpers that connect to the Pebble-2 module(s).
Installation du kit de câble d’adaptateur électrique
Le kit de câble d’adaptateur électrique, branché à P5 et/ou P6, offre un port d’alimentation dédié
permettant à l’opérateur de connecter un bloc d’alimentation directement au noeud sans utiliser
77 Installation Guide