Replacing or installing power supply modules
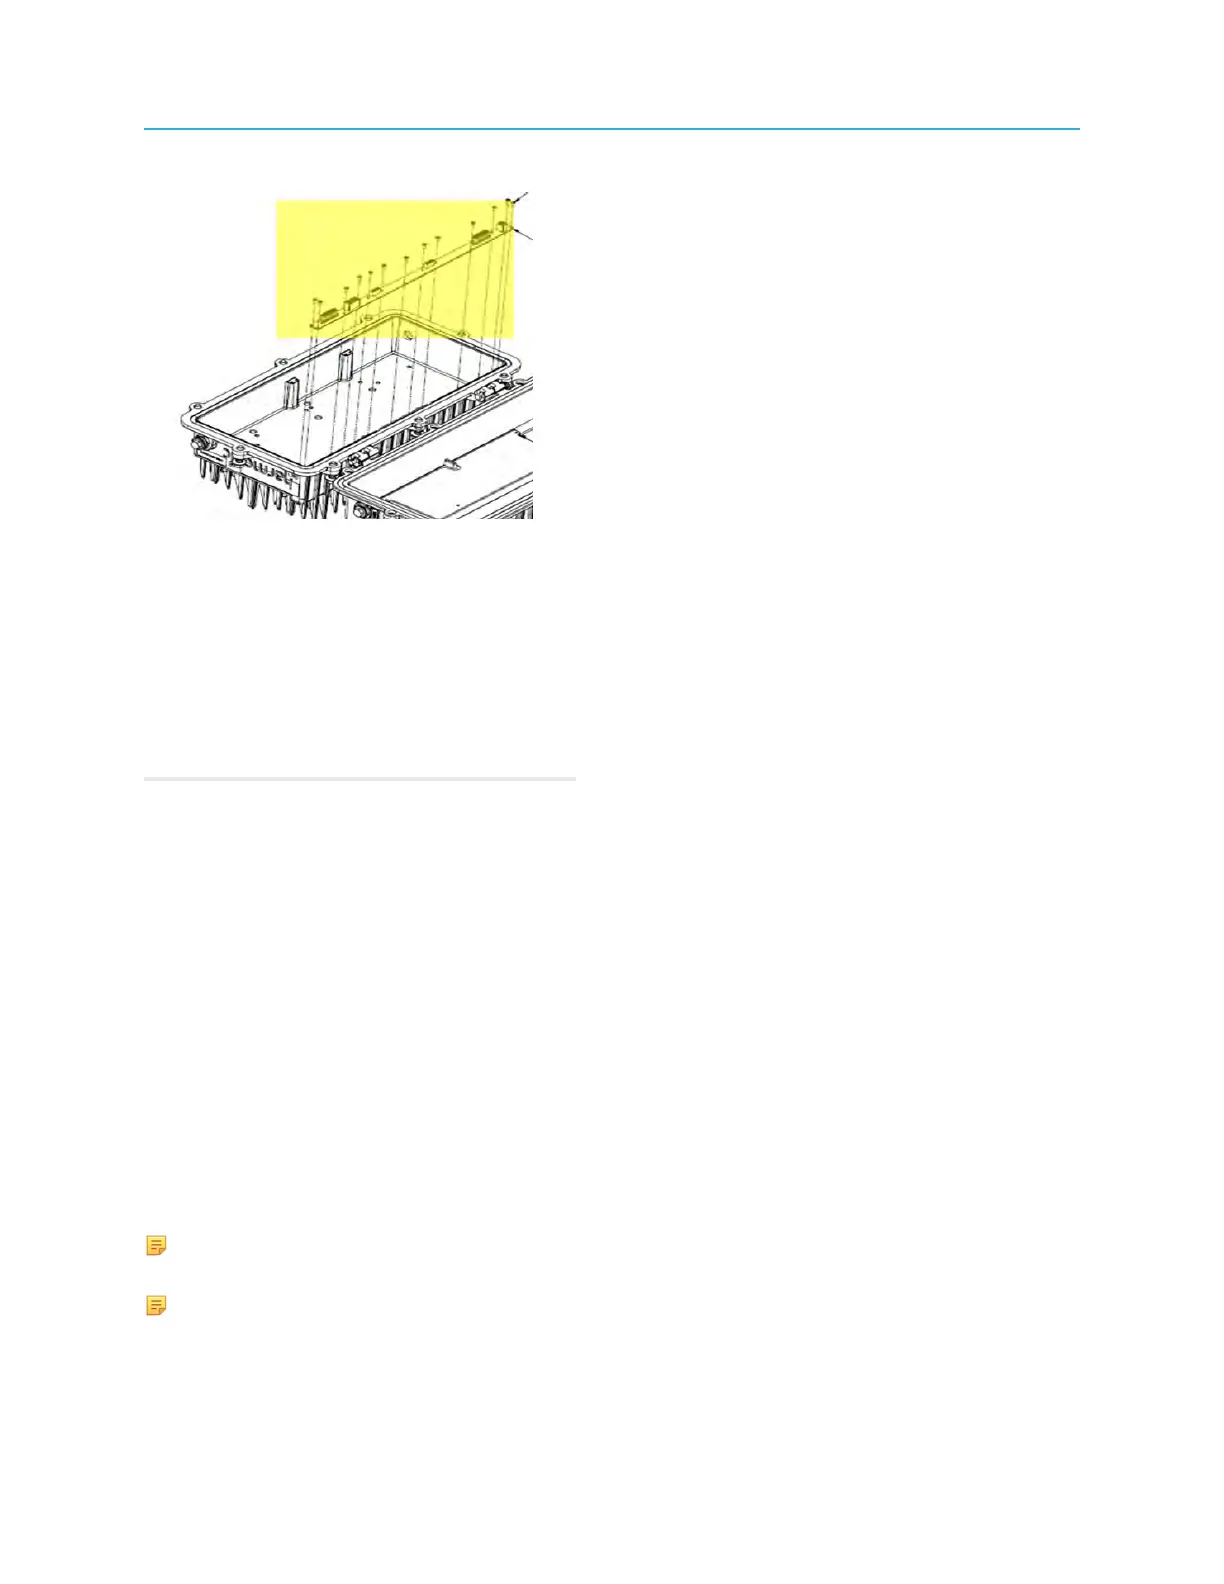
5. Remove the 13 screws that secure the LMB to the lid assembly.
6. Remove the existing LMB.
7. Insert the replacement LMB into the lid assembly, aligning the screw holes.
8. Secure the LMB to the lid assembly with 13 screws.
9. Replace all modules that were removed from the LMB: Power supplies, Buoy, Pebble, Jetty.
10.Close the node housing.
11.Re-connect the node to AC power.
Related information
Tools, test equipment, and fasteners
Opening the Ripple-2 Node housing
Replacing a Pebble-2 module
Replacing a Jetty-1 module
Closing the Ripple-2 Node housing
Post maintenance testing
Replacing or installing power supply modules
One or two power supply modules can be installed in the Ripple-2 node lid. When only one power supply
module is installed, it is installed next to the module installed in slot 1.
Installing an additional power supply module or replacing a power supply module can be performed as a
maintenance procedure. The modules are plug-and-play to allow installation/replacement on a working
Ripple-2 node.
NOTE: If you are replacing a failed single power supply in a node, shut off all AC power to the node
before replacement. (The node is not in service.)
NOTE: If you are adding a redundant power supply or replacing a failed power supply in an in-
service node (with (power-supply redundancy), do not cut off AC power.
87 Installation Guide