Remote FTTx Switch installation
Installing a Jetty-1 module
One Jetty-1 module can be installed in module slot 1 of the Ripple-2 node.
IMPORTANT:
• The Jetty-1 is shipped with a software version that is not approved for use in a production
environment. It must be upgraded to a Harmonic-approved software release prior to “going live”.
Contact Harmonic Support if further assistance is needed.
• The software upgrade procedure is described in the Upgrade section of the Jetty-1 Release
Notes.
Installing the Jetty-1 module can be performed for a new installation or as a maintenance procedure to
replace a module or add a second module.
Tools
• Torque wrench with 6-point 1/2" socket
• Medium flat-blade screwdriver
1. Detach all the node lid bolts with a torque wrench and open the lid to expose the module slots.
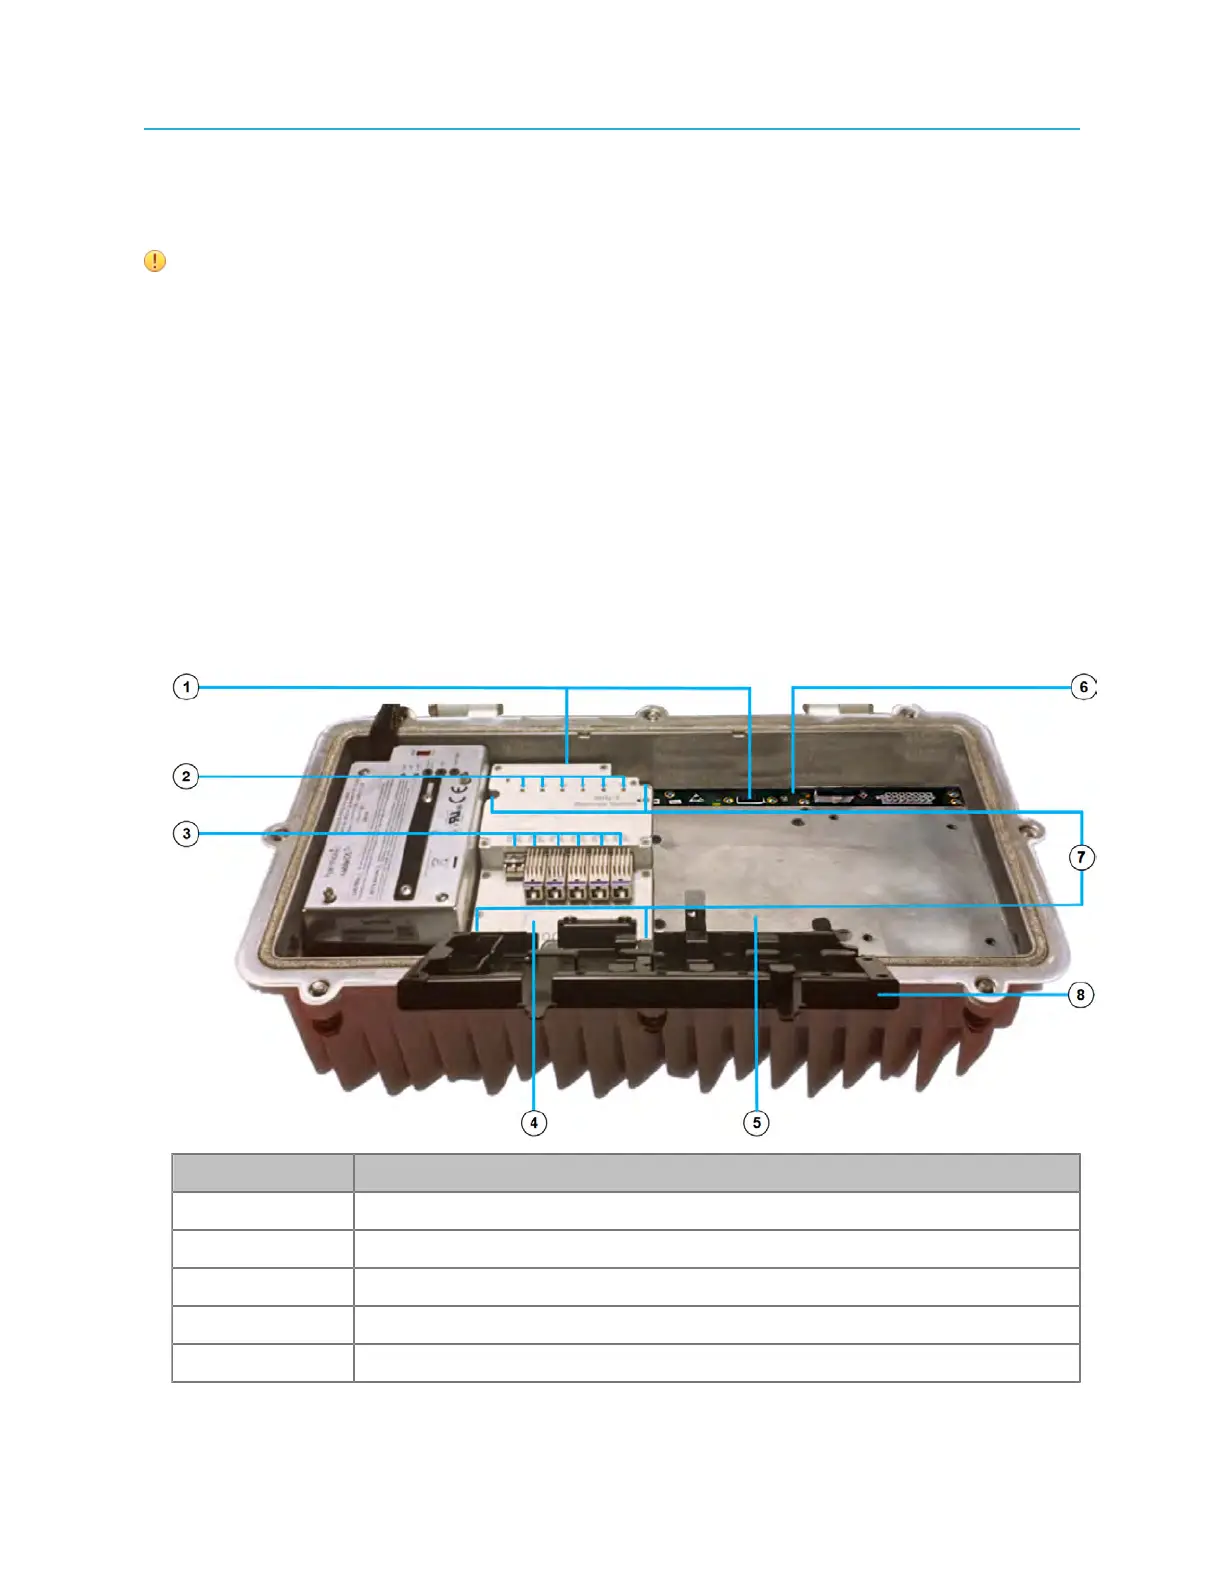
Figure 4-7: Jetty-1 module installed in module slot 1, empty module slot 2
Number Description
1 Module connectors
2 Status LEDs
3 SFP+ transceiver ports
4 Jetty-1 installed in module slot 1
5 Module slot2 (empty)
41 Installation Guide