10515-0372-4200, Rev. R
19
3.7 POWER ON AND SET VOLUME
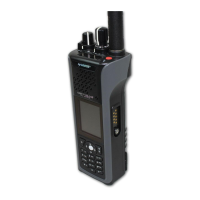
The power switch and volume control are the same knob on top of the radio (see Figure 3-1).
1. Turn clockwise to power on XG-100P.
2. Set to desired volume level.
Minimum volume levels may be programmed into the radio to prevent missed calls due to
a low volume setting.
The radio can be programmed to require the entry of a PIN in order to operate the radio.
Check with your System Administrator if you forget your PIN. As the PIN is entered, an
asterisk is displayed for each digit. The actual value is not displayed.
3.8 NOISE CANCELLATION
The XG-100P features Harris’ proprietary noise suppression capability to provide clear and crisp voice
quality in high-noise environments. This can be used in any mode, including analog and digital
communications.
The XG-100P has two microphones; one located on the front (primary) and one on the rear (secondary).
The primary microphone operates in exactly the same manner as a normal radio and is the one you talk
into. The secondary microphone is used to pick up the surrounding noise when noise cancellation is
turned on.
In the case where noise cancellation is enabled and a speaker microphone is attached to the XG-100P, talk
into the speaker microphone. In this mode, XG-100P front microphone is used to pick up the surrounding
noise, and the rear microphone is unused. See Section 3.8.4 for more information. If the secondary
microphone is blocked, the XG-100P operates as though noise cancellation is turned off.
3.8.1 Enable Noise Cancellation
To enable Noise Cancellation:
1. Select MENU
SETTINGS AUDIO SETTINGS.
2. Highlight and enable NOISE CANCELLATION using .
Figure 3-4: Enable Noise Cancellation
Refer to Section 4.6.1 for more information on the Audio Settings menu.

 Loading...