REPLACING THE REAR BRAKE PADS
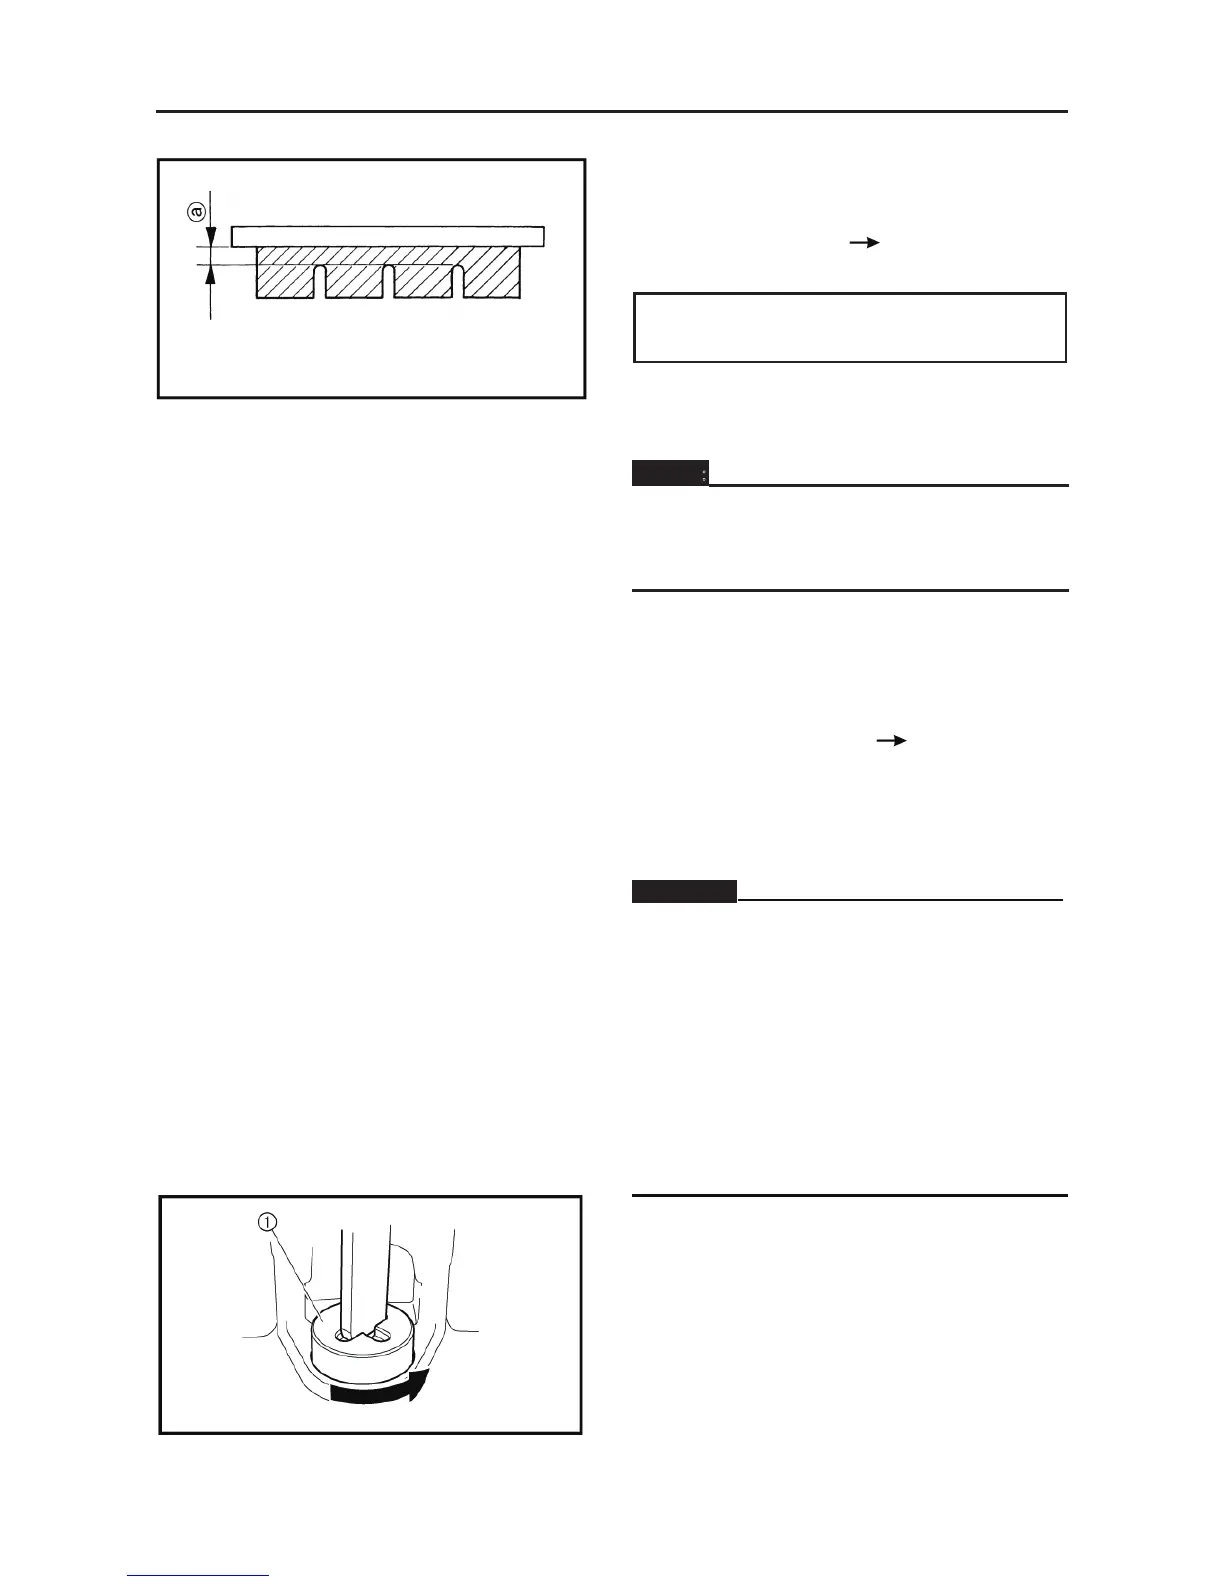
1. Measure:
• brake pad wear limit ○
a
Out of specification
Replace the brake
pads as a set.
Brake pad wear limit
1.5 mm (0.06 in)
2. Install:
• brake pads
• brake pad spring
1NOTE:
Always install new brake pads, new brake
pad shims, new insulators, and a new brake
pad spring as a set.
3. Check:
• brake fluid level
4. Check:
• brake pedal operation
Soft or spongy feeling
Bleed the brake
system.
DISASSEMBLING THE REAR BRAKE
CALIPER
WARNING:
• Brake caliper is one of the most important
security components. Disassembly and
maintenance must have a rich experience
in technology and complete tool.
•Wrong disassembly and reassembly may
cause serious injury and even death.
Replace damaged brake caliper.
•If only replace the brake caliper of one side,
lease check carefully whether the braking
force of right and left are balance and equal.
1. Remove:
• brake caliper piston ①
• dust seal ②
• caliper piston seal ③
a. Turn the brake caliper piston counterclockwise
to remove it.
CHASSIS
- 195-
b. Remove the dust seal and caliper piston seal.
1WARNING
:
ll internal brake components should be
cleaned in new brake fluid only. Do not use
solvents as they will cause seals to swell and
distort.
1. Check:
• brake caliper pistons ①
Scratches/rust/wear
Replace the brake
caliper assembly.
• brake caliper cylinders ②
Wear/scratches
Replace the brake
Caliper assembly.
• brake caliper body ③
Cracks/damage
Replace.
• brake fluid delivery passage (brake caliper
body)
Blockage
Blow out with compressed air.
1WARNING
:
Replace the caliper piston seals and dust
seals whenever the brake caliper is
disassembled.
ASSEMBLING THE REAR BRAKE CALIPER
1WARNING
:
• All internal brake components should be
cleaned and lubricated with new brake fluid
only before installation.
Must use DOT4 Brake Fluid
• Replace the caliper piston seal and dust
seal whenever a brake caliper is
disassembled.
1. Install:
• caliper piston seal ①
• dust seal ②
2. Install: