Installing a USB enablement kit
1. Put on an anti-static wrist strap.
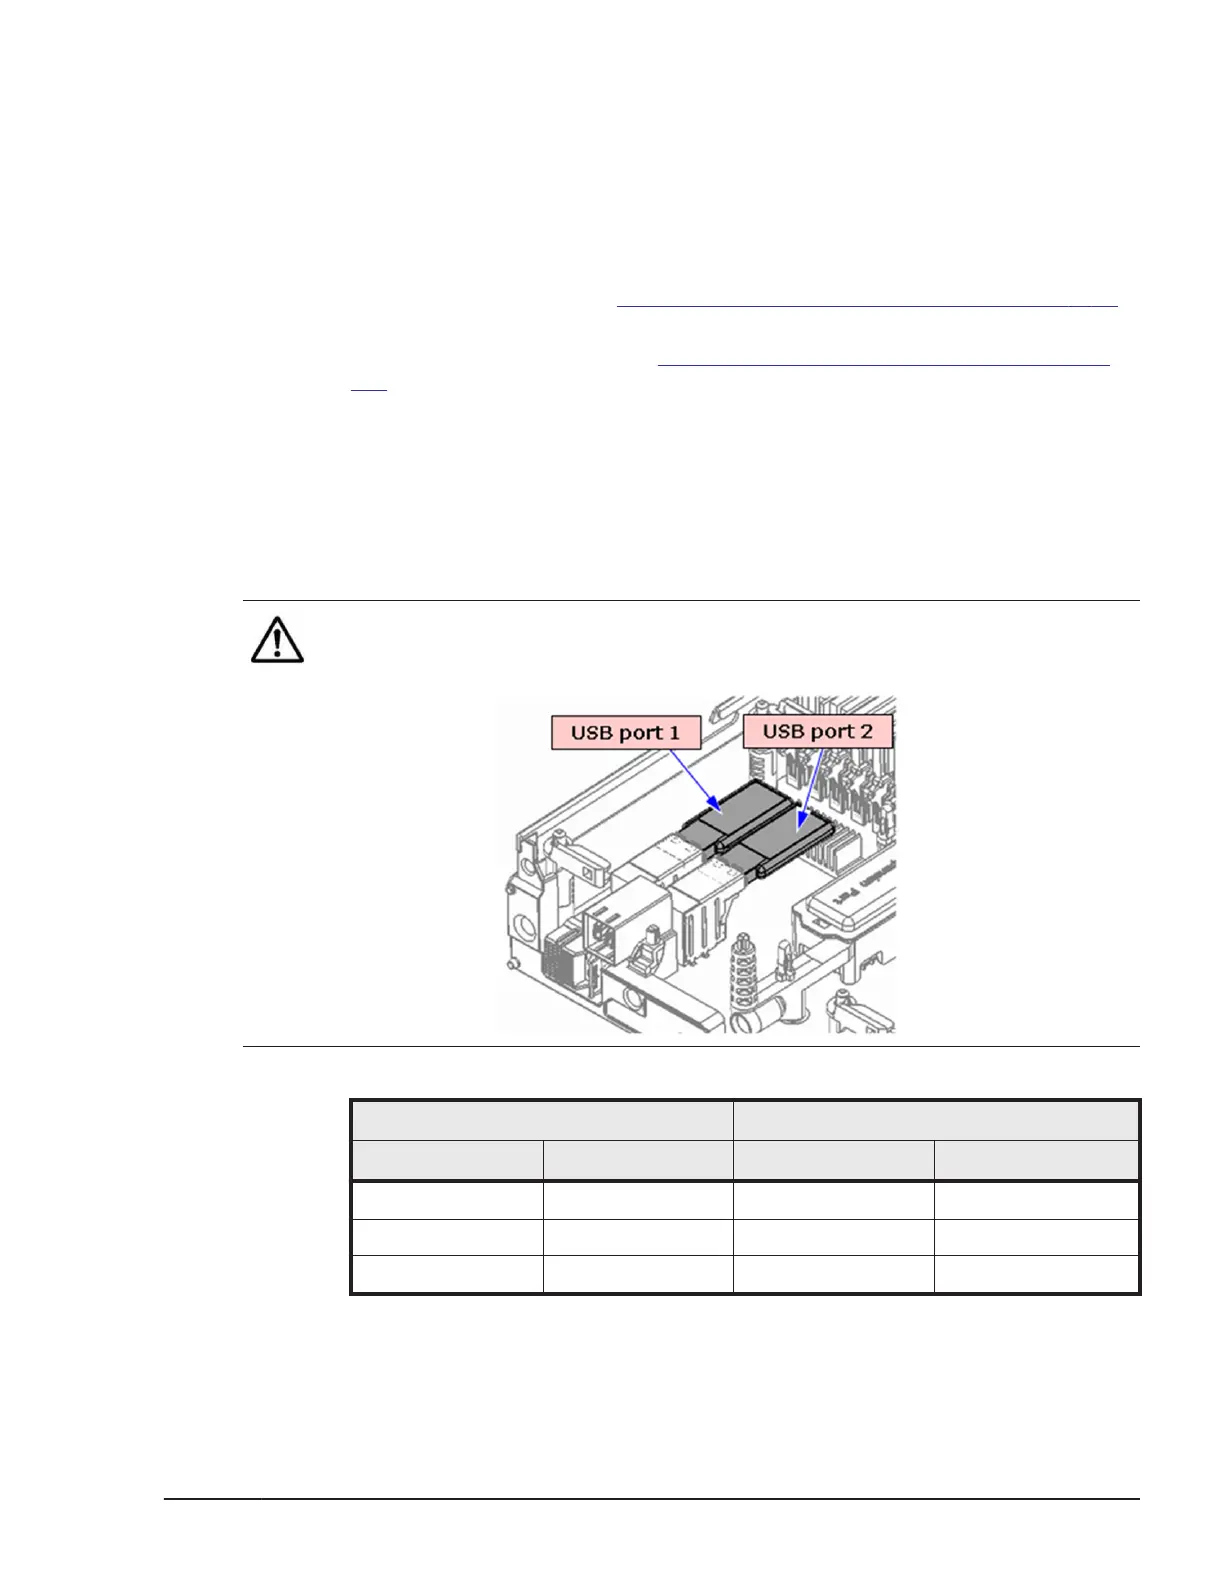
2. While holding the connector of the USB enablement kit, align the bumps
on the connector with the slits in the receptor on the main board, and
then insert the connector straight downward into the receptor.
3. Put in the air duct portion onto the DIMM.
4. Close the top cover. See
Closing a top cover, Server blade on page 5-39
section.
5. Install the server blade. See Installing a half-wide server blade on page
5-5 section.
Replacing a USB in CB 520X B1/B2/B3
This procedure describes how to replace the USB from CB 520X B1/B2/B3.
Removing a USB
Note: The indicator of the USB location in the OS message varies depending
on the number of installed USBs.
Confirm the location of replaced USB depending on the following table.
[USB is not installed in the USB port on the front panel of the server blade]
USB port Location indicator
port 1 port 2 port 1 port 2
Installed N/A /dev/sda N/A
N/A Installed N/A /dev/sda
Installed Installed /dev/sda /dev/sdb
[USB is installed in the USB port on the front panel of the server blade]
Replacing parts
5-59
Hitachi Compute Blade 500 Series System Service Manual

 Loading...


