Replacing a SAS HDD kit in CB 520X B1/B2/B3
Removing a SAS HDD kit
1. Put on an anti-static wrist strap.
2. Remove the target server blade.
See
Removing a full-wide server blade on page 5-6 section.
3. Open the top cover of the server blade. See
Opening a top cover, Server
blade on page 5-38 section.
4. Remove a disk drive.
See Removing a disk drive on page 5-36 section.
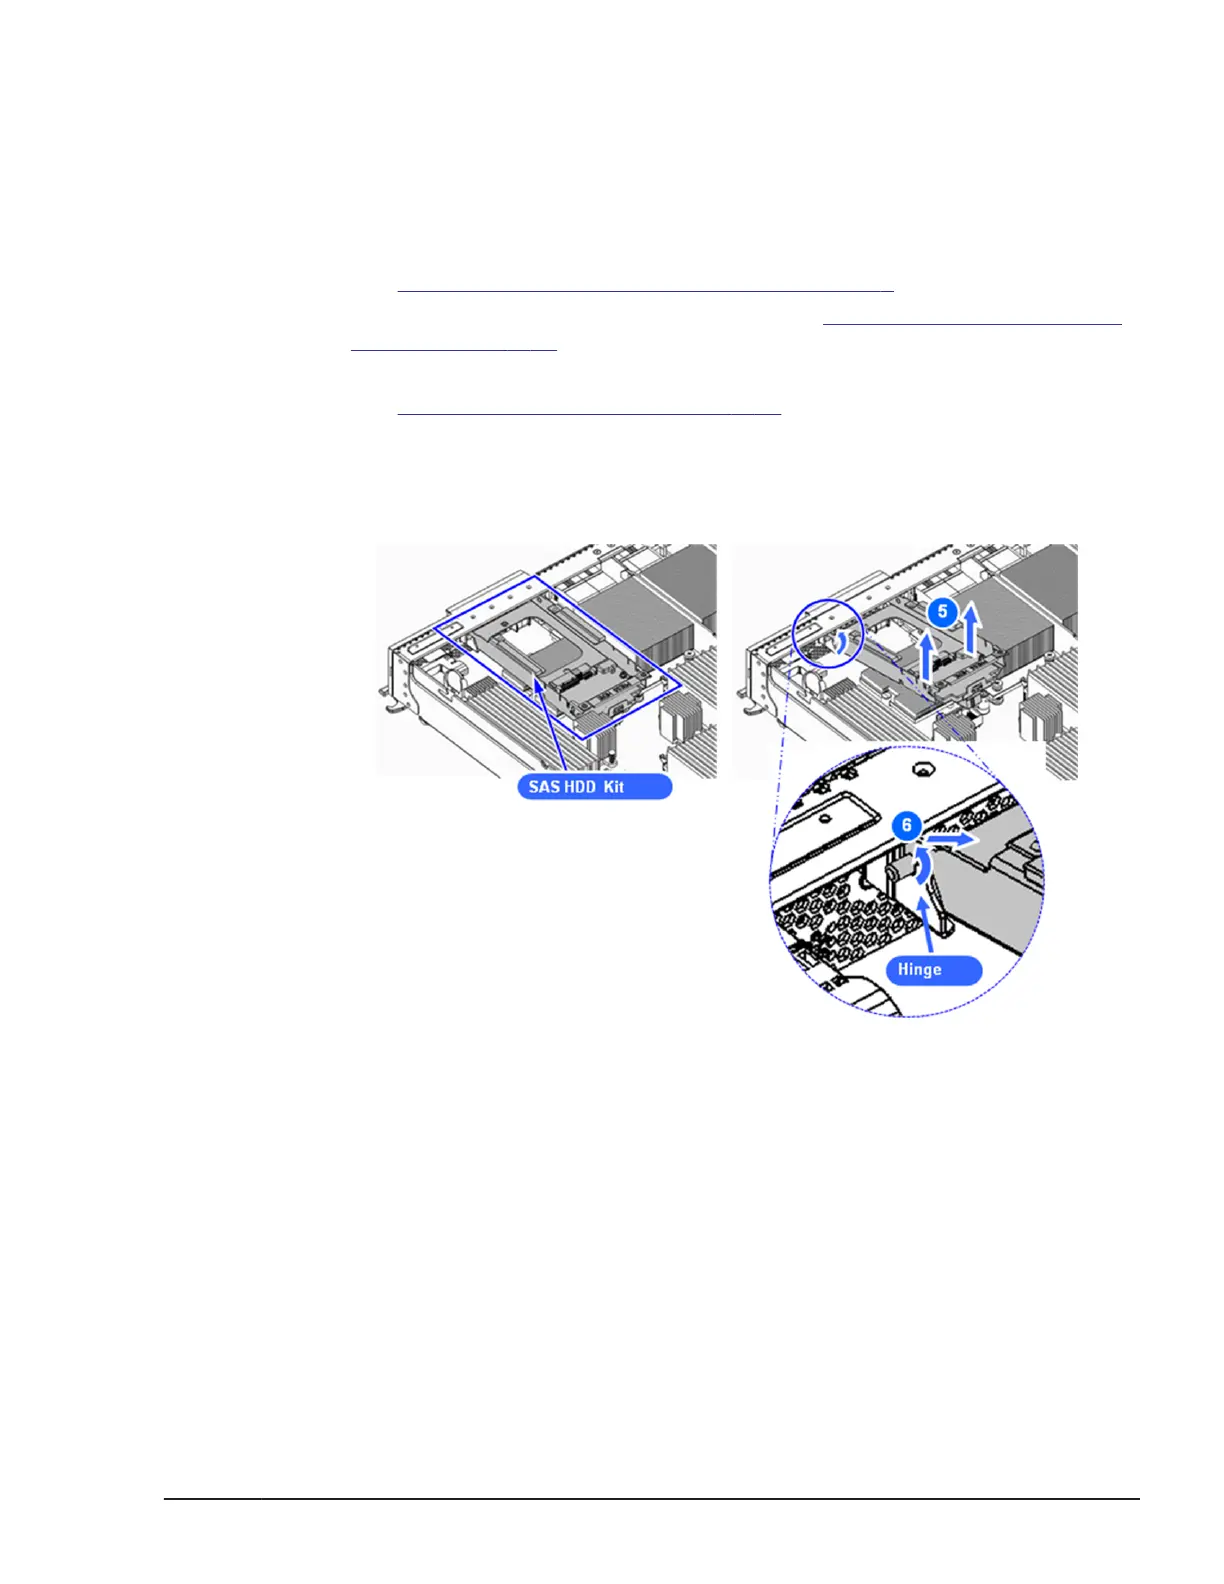
5. Pull up the connector side of SAS HDD kit while holding the near portion
of the connector of enclosure by both hands.
6. Pull up the front panel side of SAS HDD kit, and then release the pins
from the hinge brackets.
Figure 5-128 Removing SAS HDD kit
Installing a SAS HDD kit
1. Put on an anti-static wrist strap.
2. Slide in the pins of SAS HDD kit on the front side into the hinge brackets
on the front side of the enclosure.
3. Press the portion indicated PRESS HERE on the SAS HDD kit.
Replacing parts
5-99
Hitachi Compute Blade 500 Series System Service Manual

 Loading...


