4-4
4.2 Main Ink Tank Replacement Procedure
1Drain the ink in the main ink tank.
(Execute “Ink Drainage” or drain ink from the drain tube.)
2Turn off the power supply.
3 Perform “4.1.2 Approach to the parts on the front side of the equipment”.
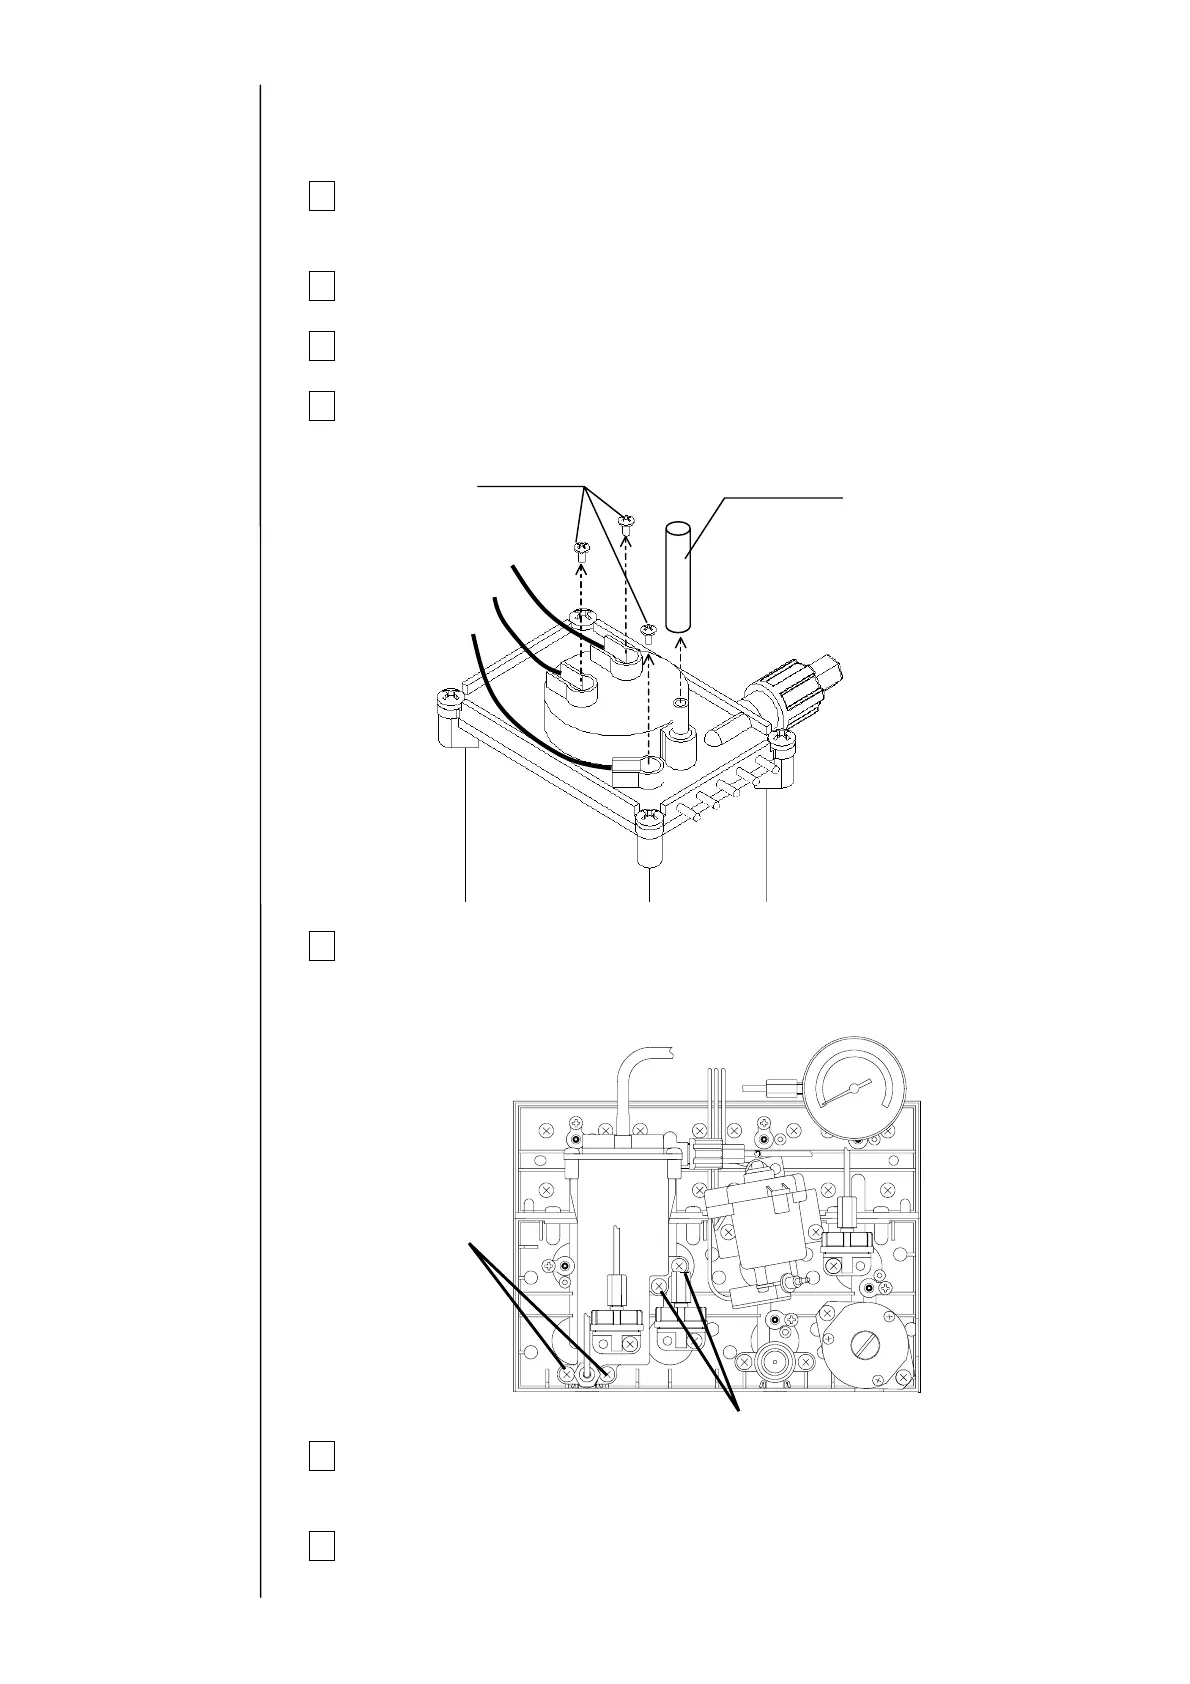
4 Remove the wire connecting part screws (3 positions) of the liquid level
sensor in the main ink tank and the exhaust tube.
5 Remove the fixing screws (4 positions) of the main ink tank and take out
the main tank.
"Caution" Put wiping paper under the main ink tank to provide for an ink
drip.
6 Clean the portion stained with ink and then install the main ink tank by
reversing the above procedure.
7 Perform “Ink Replenishment” and make sure that there is no ink leak.
Fixing screw
Exhaust tube
Black (long)
White
Black (short)
Fixing screws
Fixing screws