4-18
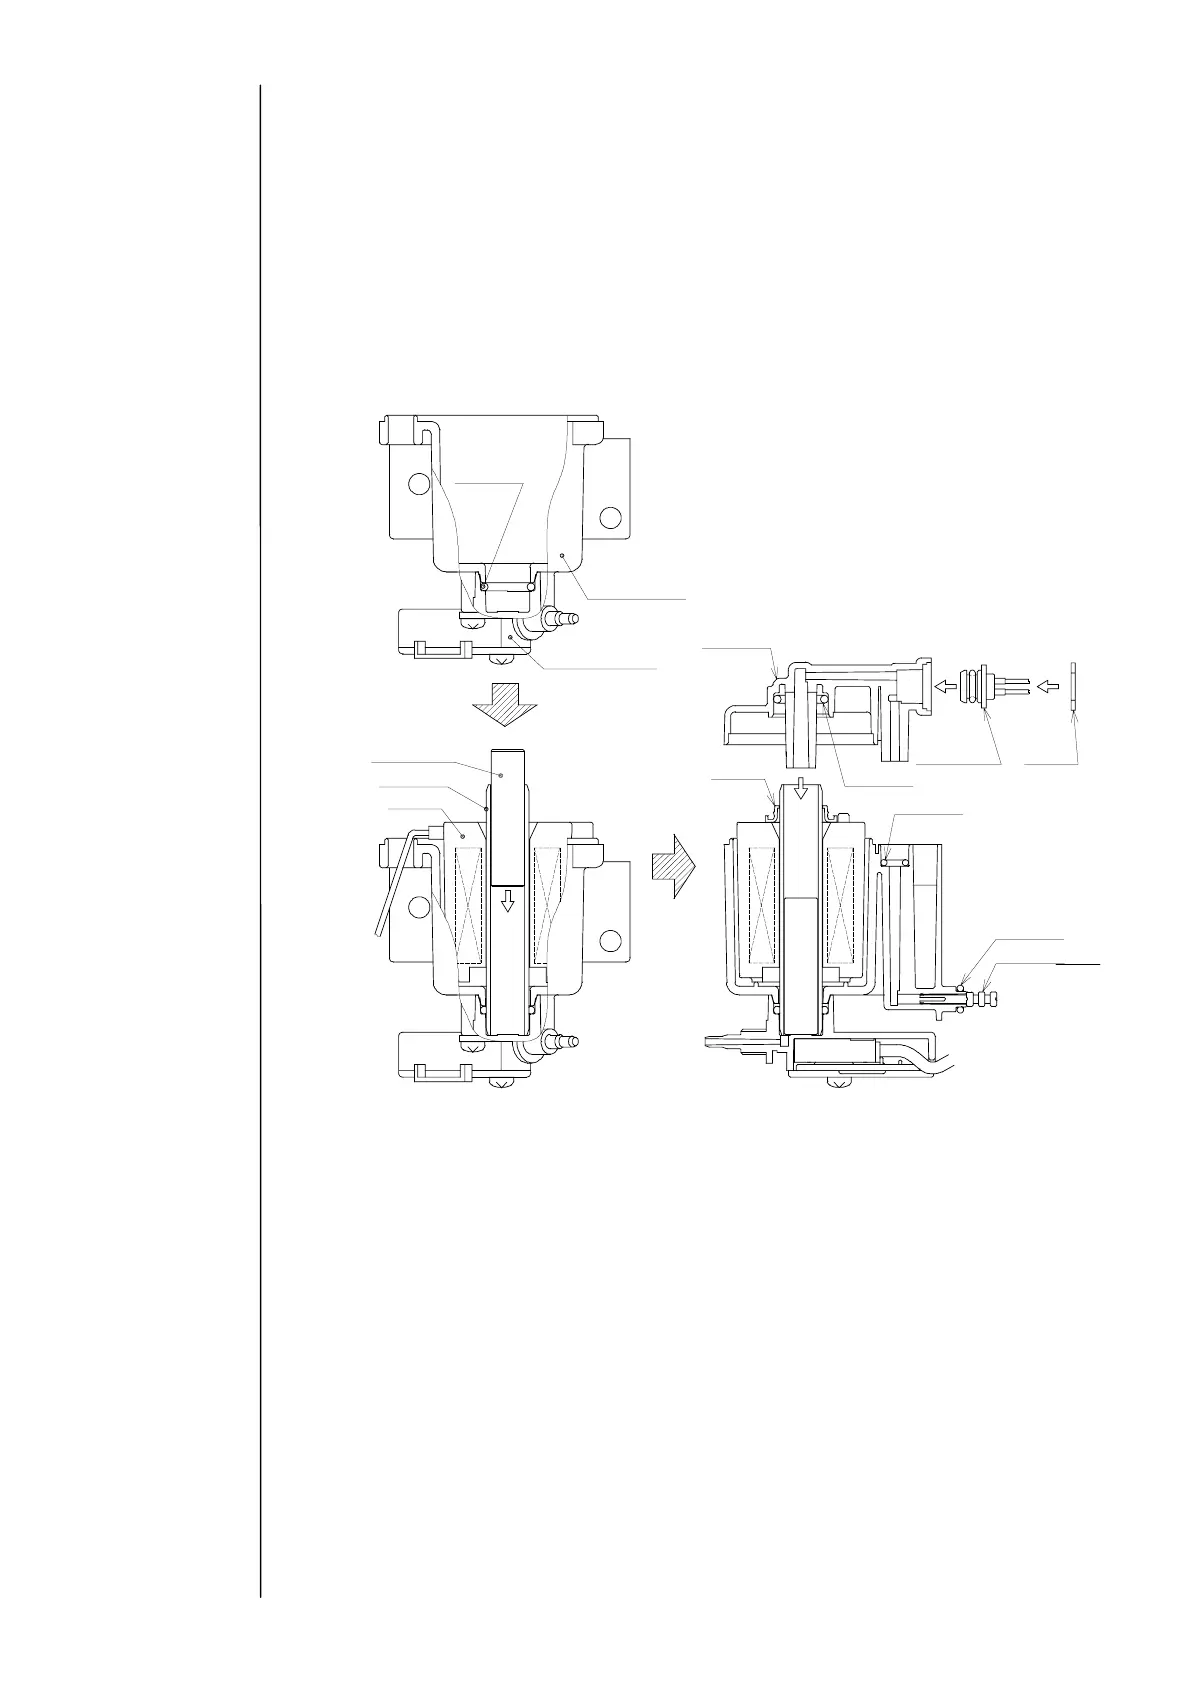
⑥Place the cylinder, the plunger, the viscometer cover, the viscometer IN joint, the
viscometer case and each O-ring into a beaker or the like filled with the makeup ink
and wash them using an ultrasonic washing machine.
“Caution” Do not dip the coil, the thermistor and the proximity sensor in the
makeup ink. It causes trouble.
⑦After the washing, assemble the viscometer in inverse order.
"Caution" To prevent the crack of o-ring, assemble o-ring of the thermistor after
moistening with the makeup ink.
⑧Replace it with new ink and perform the viscometer calibration.
(Ref. 2.6 "Calibration of viscometer)
"Caution" To prevent the crack of o-ring, assemble o-ring of the thermistor after
moistening with thermistor.
⑨Replace it with new ink and perform the viscometer calibration.
(as shown below)
4.9.5 Replacement of the thermistor
①Replace the thermistor as described above.
"Caution" To prevent the crack of o-ring, assemble o-ring of the thermistor after
moistening with thermistor.
O-rin
O-ring
O-ring
O-ring
O-ring
Thermistor
Coil
Cylinder
Plun
er
Viscometer
cover
Viscometer
case
Viscometer IN
oint
Squeezing pin
Fixing
board