Chapter 4
Removing and Replacing Components
Removing and Replacing a Processor
59
Step 1. If rack mounted, slide the HP server out from the rack until it stops. See “Accessing a Rack
Mounted Server” on page 38.
Step 2. Remove the front bezel. See “Removing the Front Bezel” on page 41.
Step 3. Remove the front cover. See “Removing the Front Cover” on page 42.
Step 4. Remove the processor extender board. See “Removing the Processor Extender Board” on page 52.
Step 5. Using an antistatic wrist strap place the extender board on a grounding mat (Electrically
Conductive Field Service Grounding Kit-HP 9300-1155).
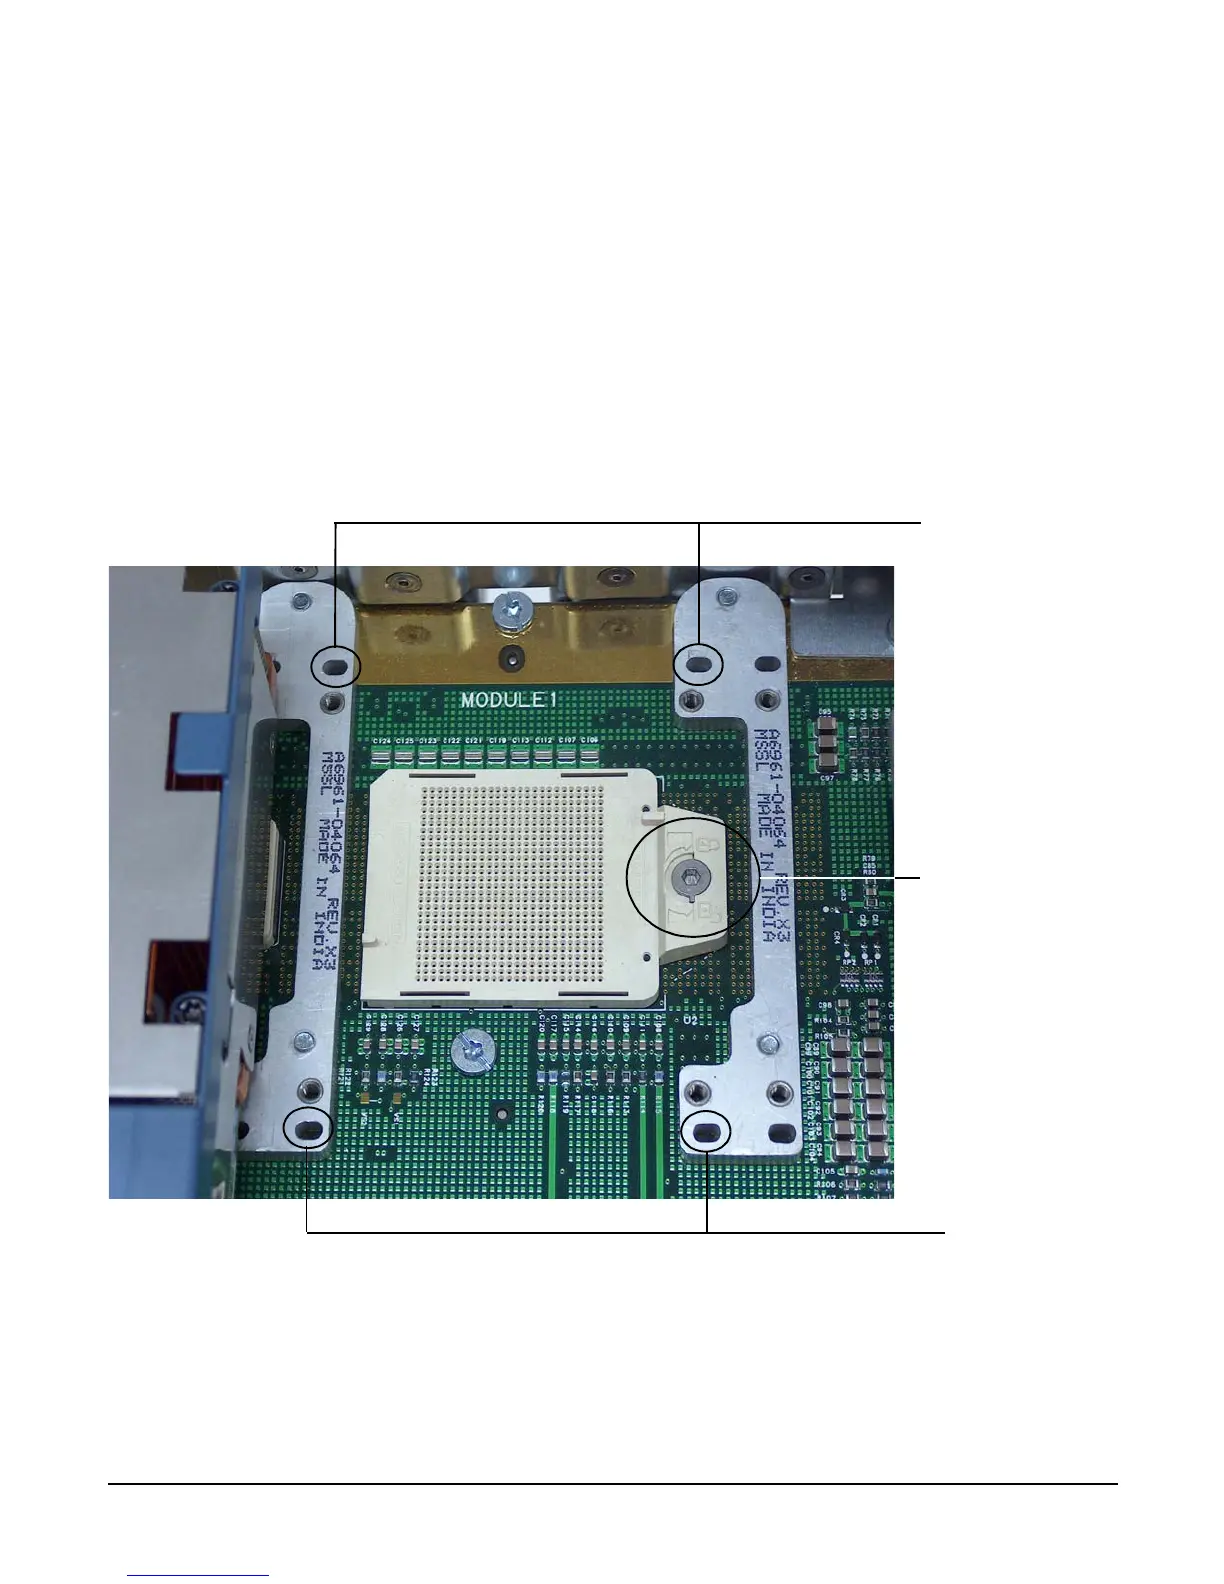
Step 6. Ensure the cam on the processor socket lock is in the unlocked, counterclockwise position.
Figure 4-16 shows the CPU 1 ZIF socket in the unlocked position.
Figure 4-16 CPU 1 Socket Unlocked
Step 7. Carefully lower the processor, without the sequencer clamp, onto the processor socket. Align the
pins on the bottom of the heatsink to the slots in the retention frame on the extender board.
Figure 4-16 shows the alignment holes on the processor extender board.
Processor ZIF socket
lock in unlocked
position
Alignment holes
Alignment holes
 Loading...


