Chapter 4
Removing and Replacing Components
Removing and Replacing the Midplane Riser Board
96
NOTE At this point, all cables and connectors should be unplugged from the midplane riser
board.
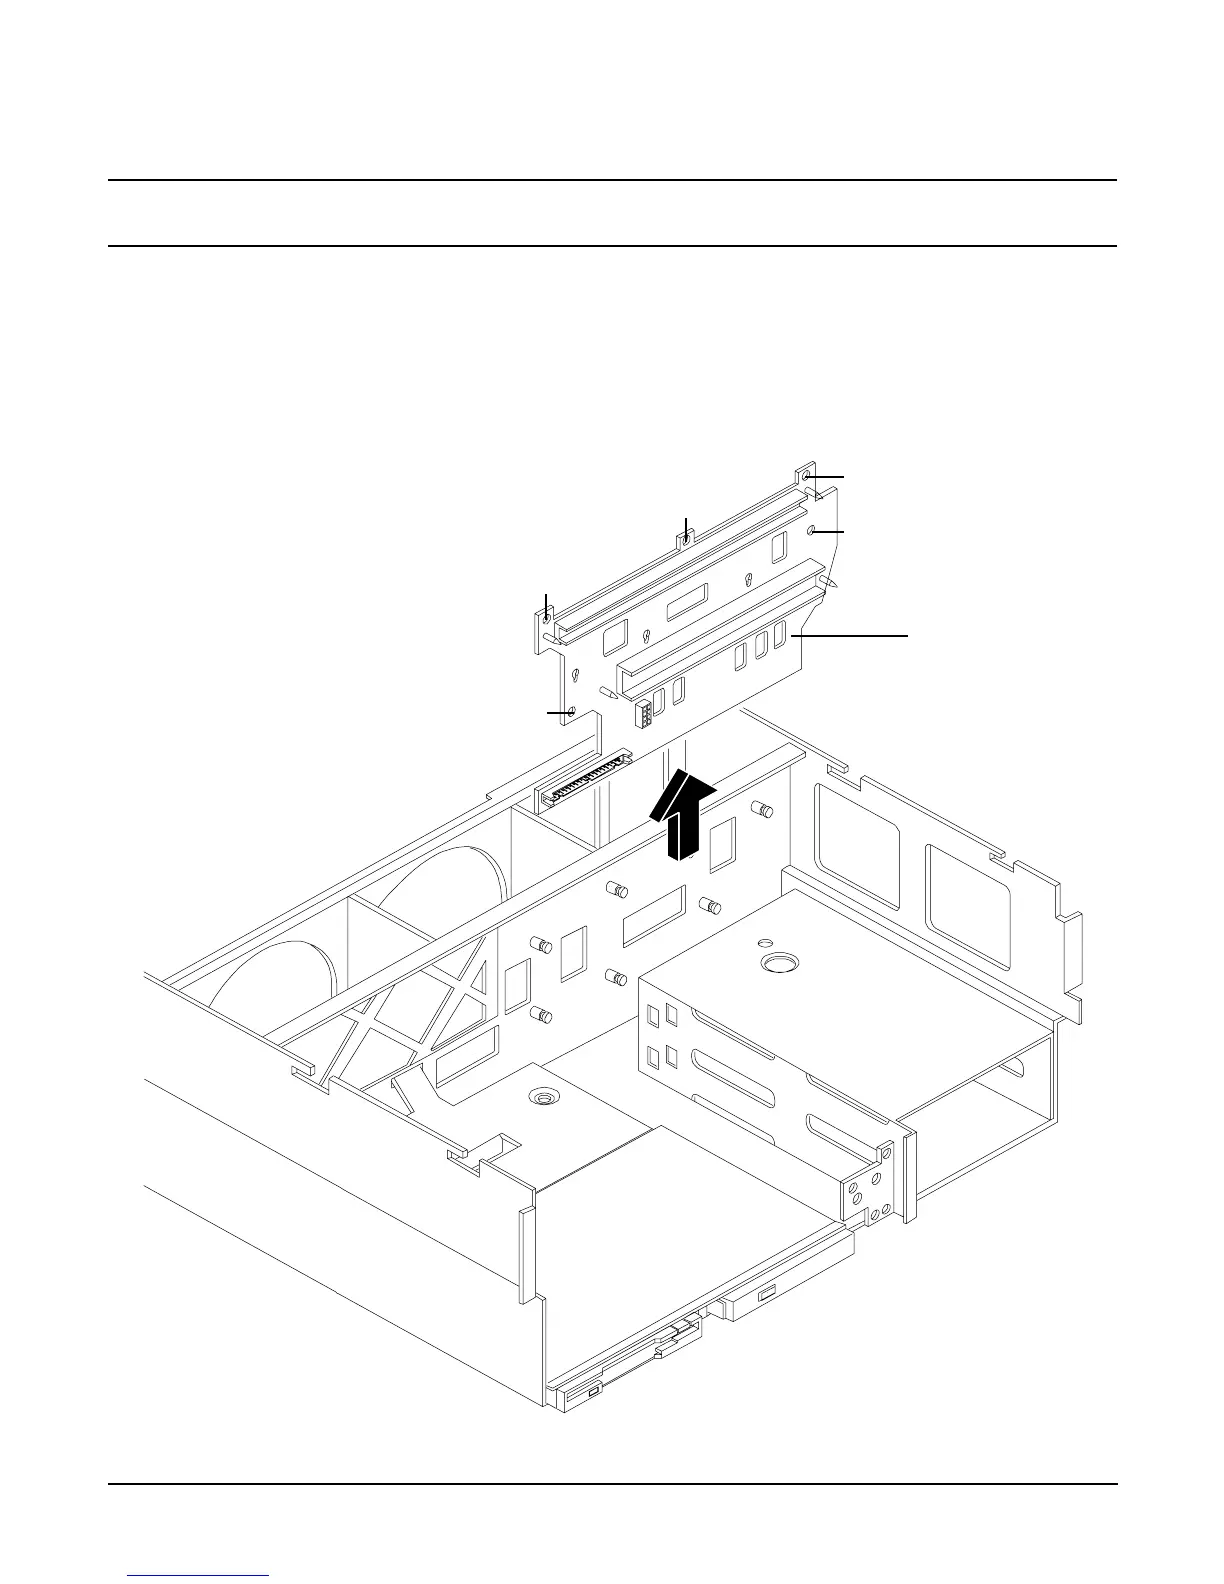
Step 13. Using a torx #15 driver, remove the five torx screws attaching the midplane riser board to the
chassis.
Step 14. Grasp the top edge of the midplane riser board and lift straight up to release it from the keyway
slots on the chassis. Then pull straight out and up to remove the midplane riser board from the
chassis. Figure 4-39 shows how to remove the midplane riser board.
Figure 4-39 Removing and Replacing the Midplane Riser Board
2
4
1
5
3
Midplane riser
board
1-5
Attaching screw
locations
 Loading...


