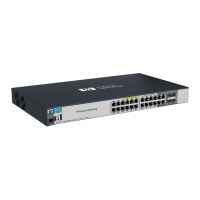
Access Control Lists (ACLs) for the Series 5300xl Switches
Overview
■ You can apply any one ACL to multiple VLANs.
■ A source or destination IP address and a mask, together, can define a
single host, a range of hosts, or all hosts.
■ The IP address(es) assigned to a VLAN must not be configured from
a DHCP server.
■ Every standard ACL includes an implied “deny IP any” as the last entry,
and every extended ACL includes an implied “deny IP any any” as the
last entry. The switch applies this action to any packets that do not
match other criteria in the ACL.
■ In any ACL, you can apply an ACL log function to ACEs that have a
“deny” action. The logging occurs when there is a match on a “deny”
ACE. (The switch sends ACL logging output to Syslog and, optionally,
to a console session.)
You can configure ACLs using either the CLI or a text editor. The text-editor
method is recommended when you plan to create or modify an ACL that has
more entries than you can easily enter or edit using the CLI alone. Refer to
“Editing ACLs and Creating an ACL Offline” on page 9-53.
General Steps for Planning and Configuring ACLs
1. Identify the traffic type to filter. Options include:
• Any routed IP traffic
• Routed TCP traffic only
• Routed UDP traffic only
2. The SA and/or the DA of routed traffic you want to permit or deny.
3. Determine the best points at which to apply specific ACL controls. For
example, you can improve network performance by filtering unwanted
traffic at the edge of the network instead of in the core. Also, on the switch
itself, you can improve performance by filtering unwanted traffic where
it is inbound to the switch instead of outbound.
4. Design the ACLs for the control points you have selected. Where you are
using explicit “deny” ACEs, you can optionally use the ACL logging feature
to help verify that the switch is denying unwanted packets where
intended. Remember that excessive ACL logging activity can degrade the
switch's performance. (Refer to
“Enable ACL “Deny” Logging” on page
9-59.)
5. Create the ACLs in the selected switches.
9-10
 Loading...

