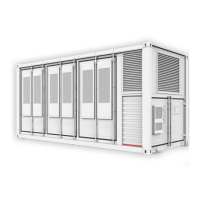
2. Remove two black screws on each side of the chassis and the silvery white
one on top of the hard disk tray, raise the hard disk tray by 45 degrees, and
take out the upper and then lower layers of hard disk tray.
Figure 6-57 Removing the hard disk tray
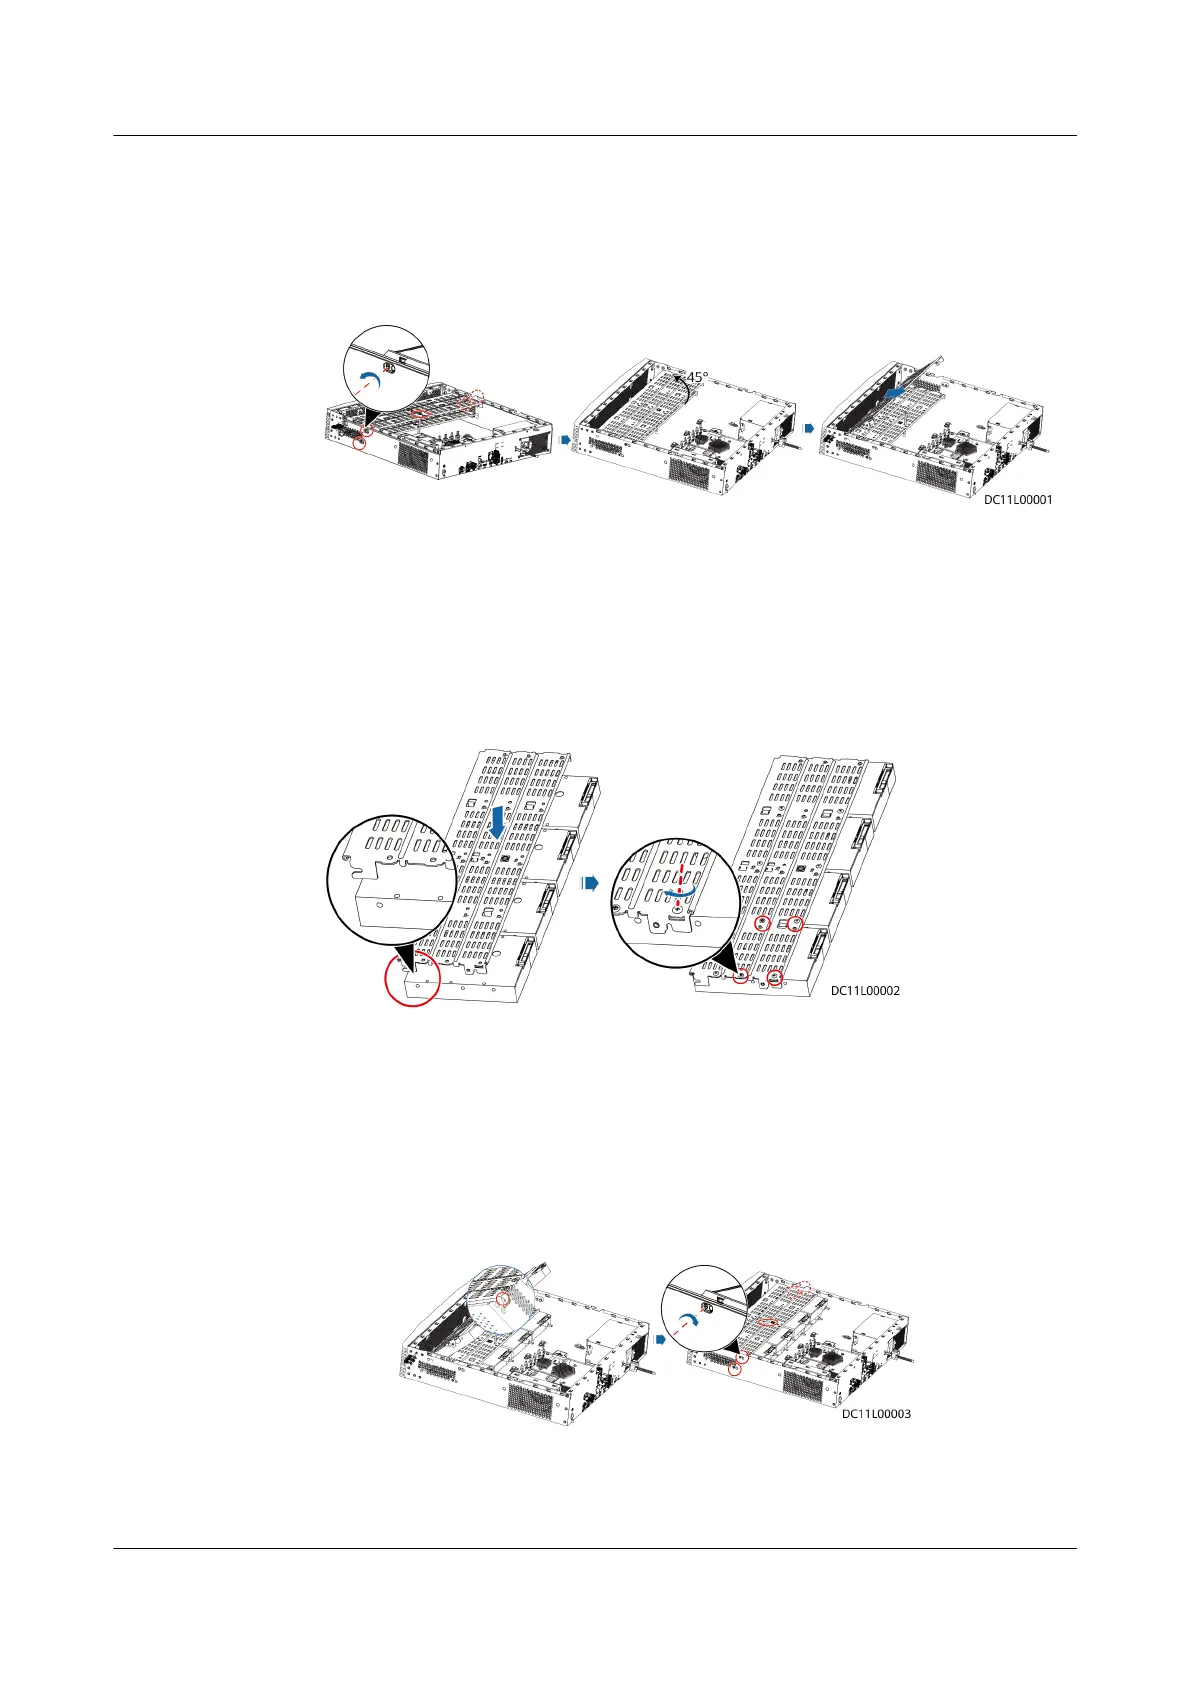
Step 3 Install a new hard disk.
1. Place the hard disk with ports facing upwards and align the screw holes on
the hard disk tray with the hard disk and fasten the screws. Before the
installation, ensure that the fastener of the hard disk tray is on a
dierent
side from the hard disk port, as shown in the lower left gure.
Figure 6-58 Installing hard disks
2. Insert the hard disk tray back at 45 degrees with the opening of its locking
buckle facing downwards, hold the screw in the red-framed part to lower the
hard disk tray until it is level, and fasten the black screws on the left and right
sides and the white screw on the top.
Figure 6-59 Fastening the screw on the panel and the screws on the hard disk
tray
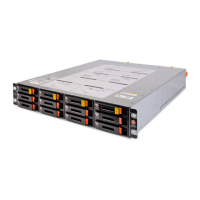
3. Connect data and power cables to hard disks. Connect hard disk cable ports
P0–P3 to hard disks on the lower-layer hard disk tray and ports P4–P7 to hard
disks on the upper-layer.
FusionModule800 Smart Small Data Center
User Manual 6 O&M
Issue 01 (2021-02-05) Copyright © Huawei Technologies Co., Ltd. 468