v The server supports up to four Intel Xeon dual-core or quad-core
microprocessors (two on the base system board and two on the optional
microprocessor and memory expansion tray). See http://www.ibm.com/
systems/info/x86servers/serverproven/compat/us/ for a list of supported
microprocessors.
1. Read the safety information that begins on page “Safety” on page vii and
“Installation guidelines” on page 35.
2. Install the microprocessor:
a. Remove the plastic clamshell packaging that contains the new
microprocessor kit.
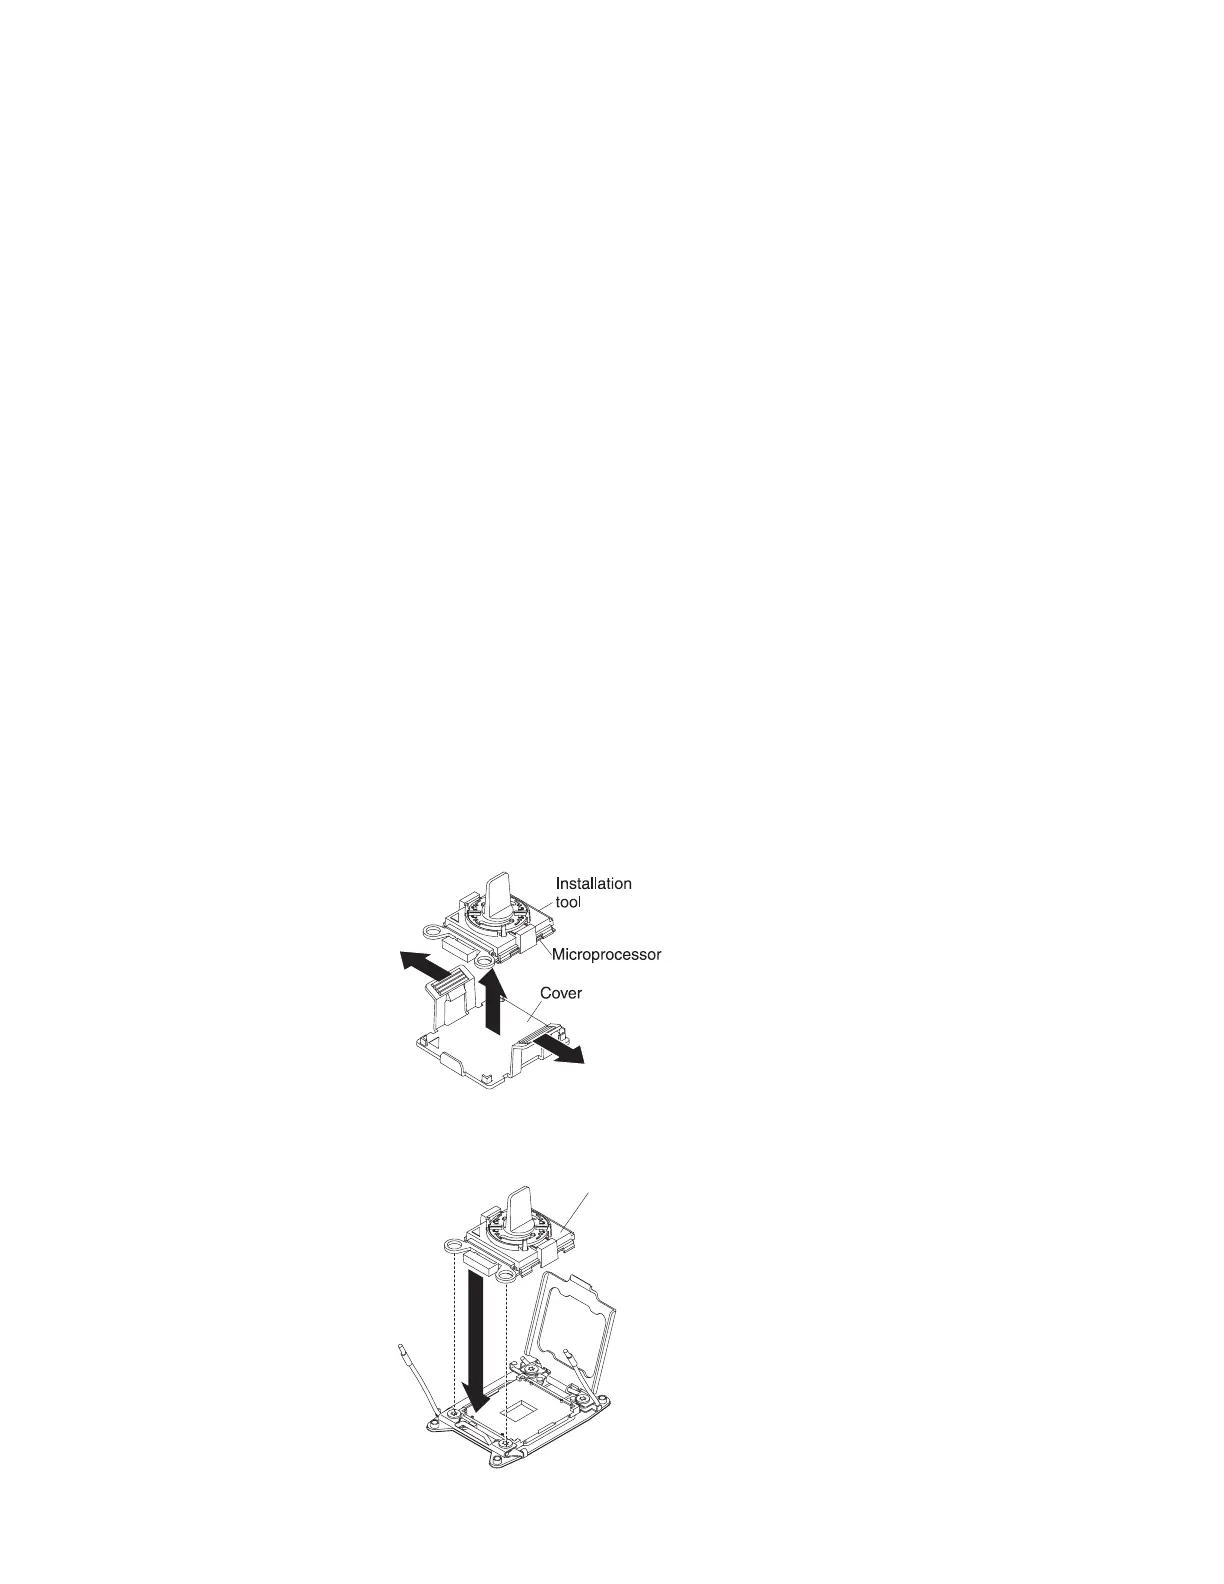
b. Locate and use the microprocessor installation tool that comes with a
microprocessor and a cover on the bottom of the tool.
Attention:
v The microprocessor FRU comes with two microprocessor tools: one tool
is empty and one tool comes with a microprocessor and a cover on the
bottom of the tool.
v Do not touch the microprocessor socket contacts. Contaminants on the
microprocessor contacts, such as oil from your skin, can cause
connection failures between the contacts and the socket.
v Handle the microprocessor carefully. Dropping the microprocessor
during installation or removal can damage the contacts.
v Do not use excessive force when you press the microprocessor into the
socket.
v Make sure that the microprocessor is oriented and aligned and
positioned in the socket before you try to close the lever.
c. Release the sides of the microprocessor protective cover on the bottom of
the microprocessor and carefully remove the cover from the installation
tool. The microprocessor is preinstalled on the installation tool.
d. Carefully align the microprocessor installation tool over the microprocessor
socket. The microprocessor is keyed to ensure that the microprocessor is
installed correctly.
Installation
tool
302 System x3750 M4 Types 8722 and 8733: Installation and Service Guide

 Loading...


