Note:
a. Remove the socket covers from the microprocessor frame brackets on the
new system board and place them on the microprocessor sockets of the old
system board that you are removing.
b. Use an alcohol wipe to remove any thermal grease from the tabs on the
microprocessor bracket frame on the old system board.
c. Use the microprocessor tool that comes in the system board FRU to
remove and replace microprocessors.
d. Remove the microprocessors from the old system board and place them
directly onto the new system board sockets. Keep the heat sink and
microprocessor from each microprocessor socket of the old system board
together so that you can install them on the new system board on the
same socket together. For example, when you remove the heat sink and
microprocessor from microprocessor socket 1 of the old system board ,
install them both on the same socket (socket 1) on the new system board.
20. Remove the backplanes and cables, if necessary to access and remove the
system board.
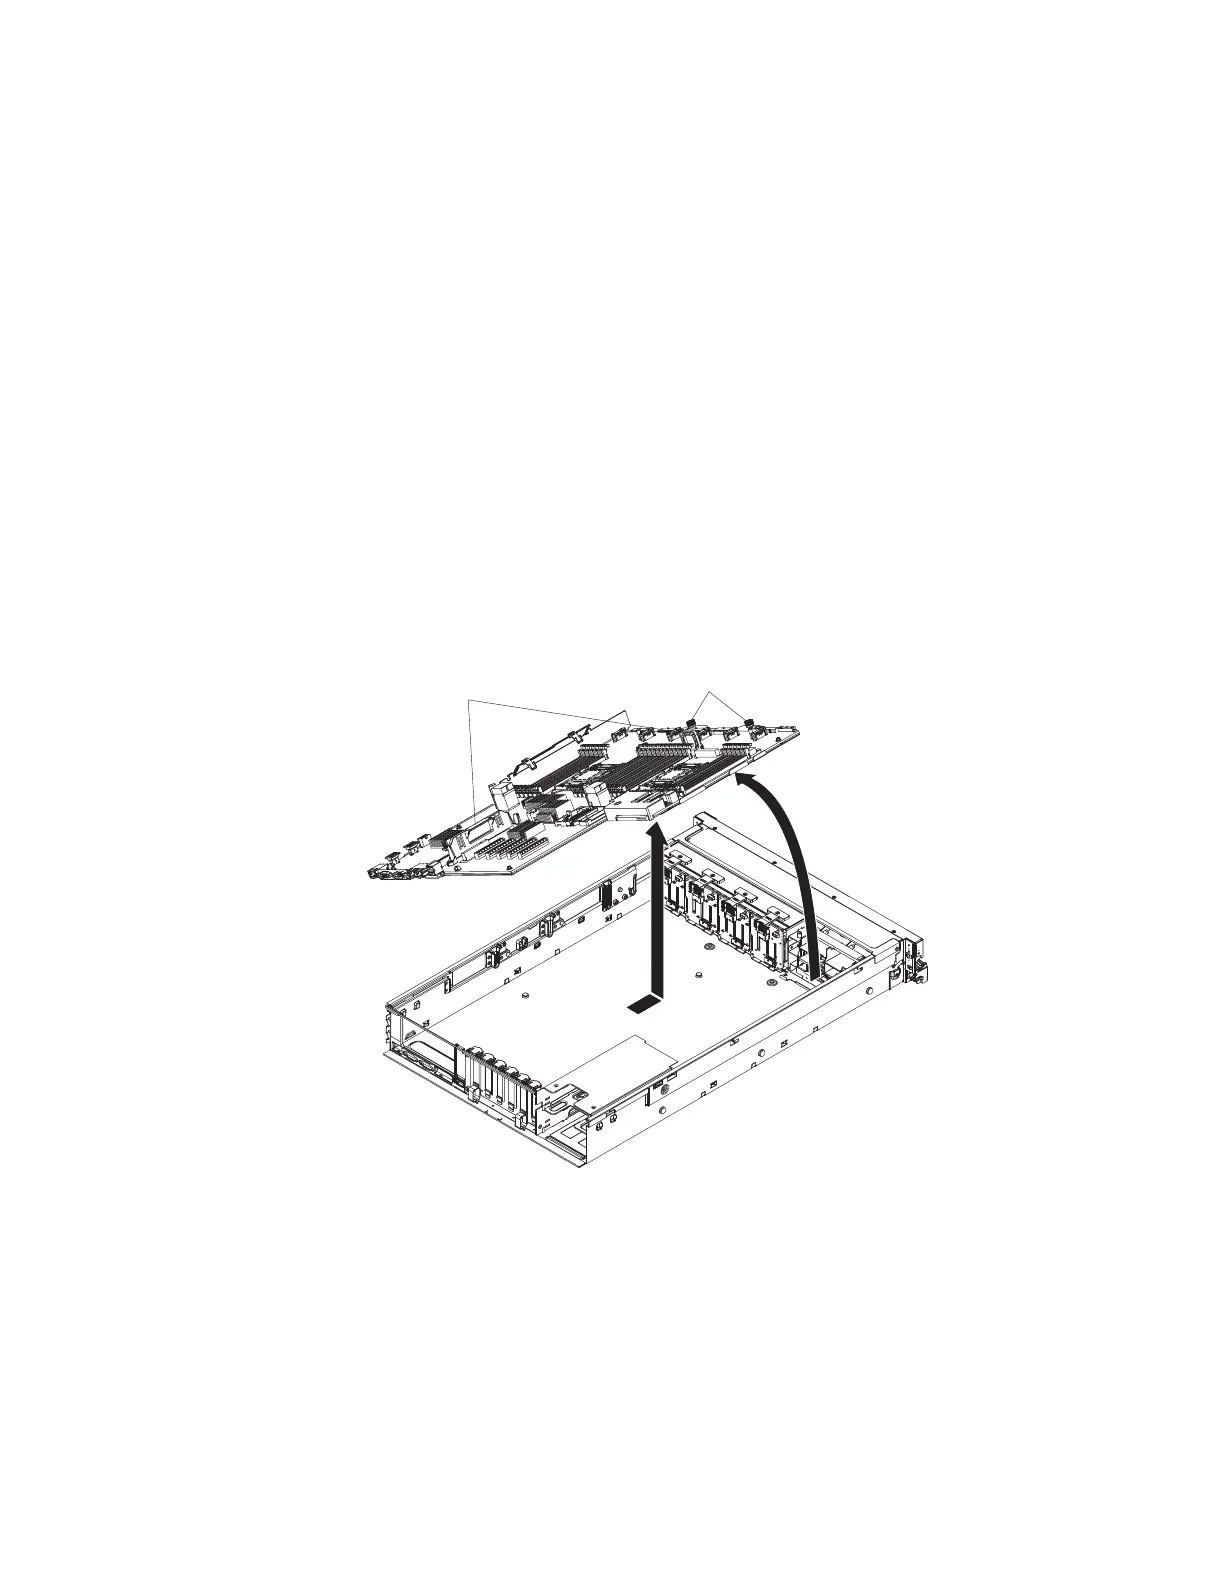
21. Loosen the thumbscrews (near the front of the server) that secure the system
board to the server and slide the system board toward the front of the server.
Note: Remove the drive backplanes, if necessary.
System board
handles
Thumb screws
22. Grasp both system-board handles and lift up the left side of the system board
slightly and carefully remove it from the chassis, being careful not to damage
any surrounding components.
Note: Use the system-board handles to lift the system board only. Do not
attempt to lift the server using the system board handles.
23. If you are instructed to return the system board, follow all packaging
instructions, and use any packaging materials for shipping that are supplied
to you.
316 System x3750 M4 Types 8722 and 8733: Installation and Service Guide

 Loading...


