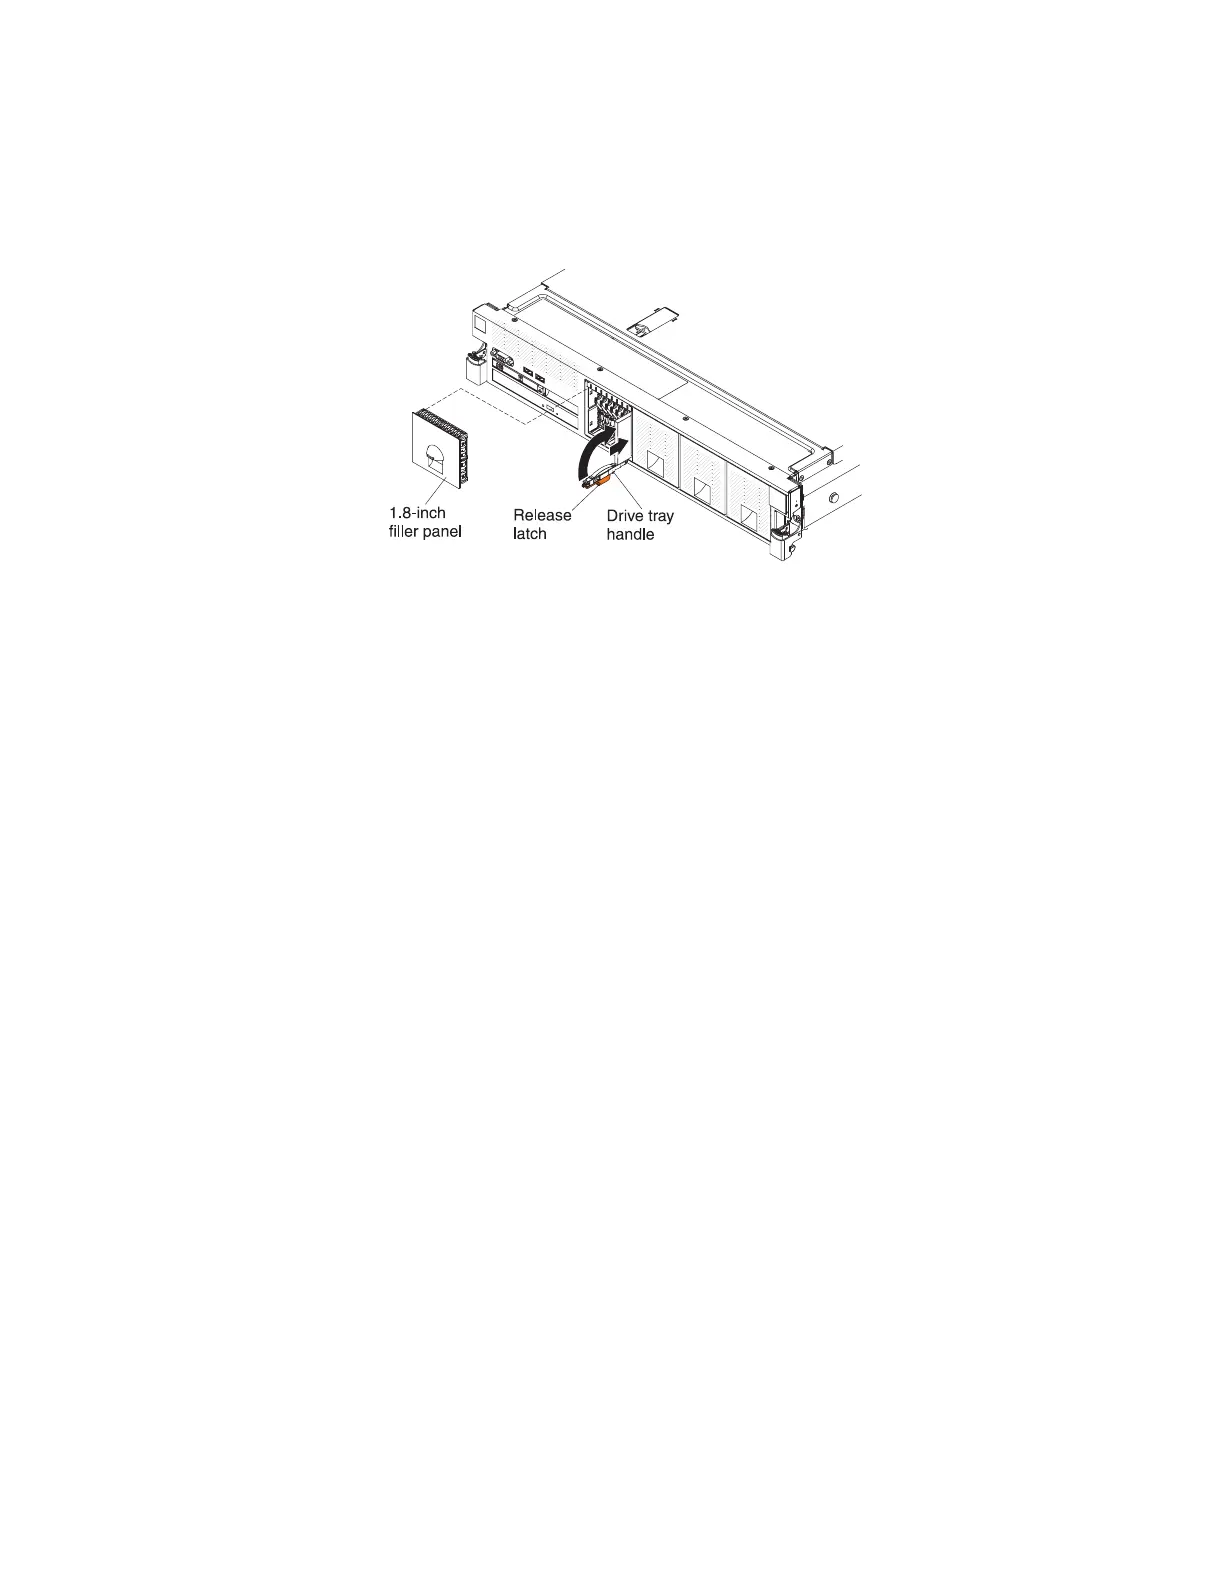
4. To install a 1.8-inch drive, complete the following steps:
a. Remove the filler panel (EMC filler panel).
b. Grasp the orange release latch on the drive tray handle of the drive tray in
which you want to install the drive and slide the release latch down to
unlock the drive tray handle; then, rotate the drive tray handle down.
c. Insert the drive into the drive tray with the label side of the drive facing the
right side of the server and push the drive tray toward the server to slide
the drive into the drive bay until it clicks into place and is seated firmly.
d. Rotate the drive tray handle to the closed position and slide the release
latch up to secure the drive tray handle in place.
e. Replace the filler panel (EMC filler panel).
5. Check the drive status LED to verify that the drive is operating correctly. If the
amber drive status LED for a drive is lit continuously, that drive is faulty and
must be replaced. If the green drive activity LED is flashing, the drive is being
accessed.
Note: If the server is configured for RAID operation through a ServeRAID
adapter, you might have to reconfigure your disk arrays after you install drives.
See the ServeRAID adapter documentation for additional information about
RAID operation and complete instructions for using the ServeRAID adapter.
6. If you are installing additional hot-swap drives, do so now.
7. Complete the additional steps in “Instructions for IBM Business Partners” on
page 26.
Results
66 System x3750 M4 Types 8722 and 8733: Installation and Service Guide

 Loading...


