Working with Master/Slave 8-16
ICE Vulcan Service Manual
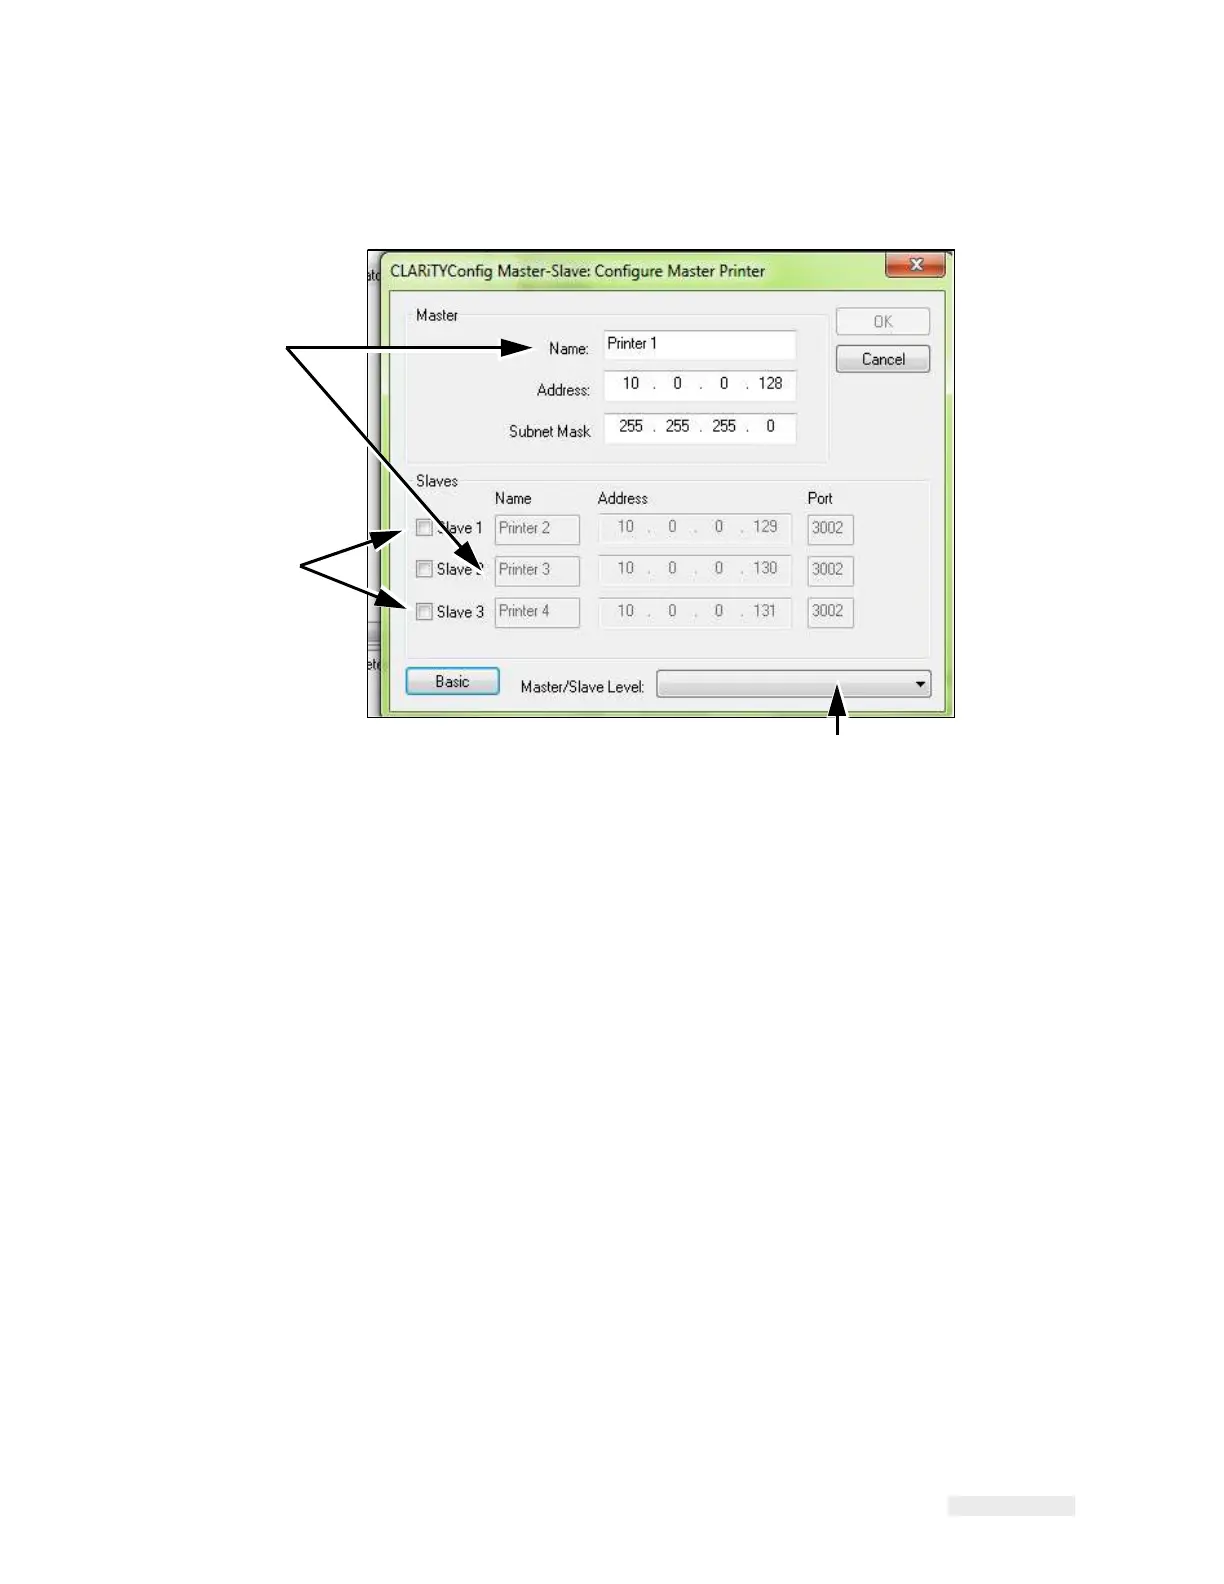
The advance configure master printer dialog box appears (Figure 8-
11).
3
2
1.
Master/Slave Level Drop - Down List
2.
Check Boxes
1
3.
Names Fields
Figure 8-14: Advanced Configure Master LPA Dialog Box
4
Enter a identification name for the LPA in the name field.
These names can be viewed on the screen of the Master LPA
CLARiTY and are useful for
identification purposes. Names can be
edited from the default values of 'LPA 1… LPA 4', if
required e.g.
'Master…. Slave 1'
Note: The 'Check boxes' on the left hand side of the dialog box indicate how
many Slaves are to
be connected.
5
Click on the check boxes to select the slave LPAs. The dialog box
allows only the selection
of consecutively-numbered Slaves starting
with Slave 1.
6
Enter the IP address, network subnet mask, and the port number of
the slave LPA and
the master in their Address field, Subnet Mask
field, and Port field respectively.
7
Select either Group Job Select or Group Control from the Master/
Slave level drop -
down box (refer “Master/Slave Terminology” on
page 8-2).
When at least one Slave is enabled and a Master/Slave level has been
selected, the 'OK' button is become available.
8
Click OK button, to program the LPA with the selected configuration.