Working with Master/Slave 8-13
ICE Vulcan Service Manual
3
Click on the Advanced button, to change to advanced configuration.
The advance configure slave printer dialog box appears (Figure 8-11).
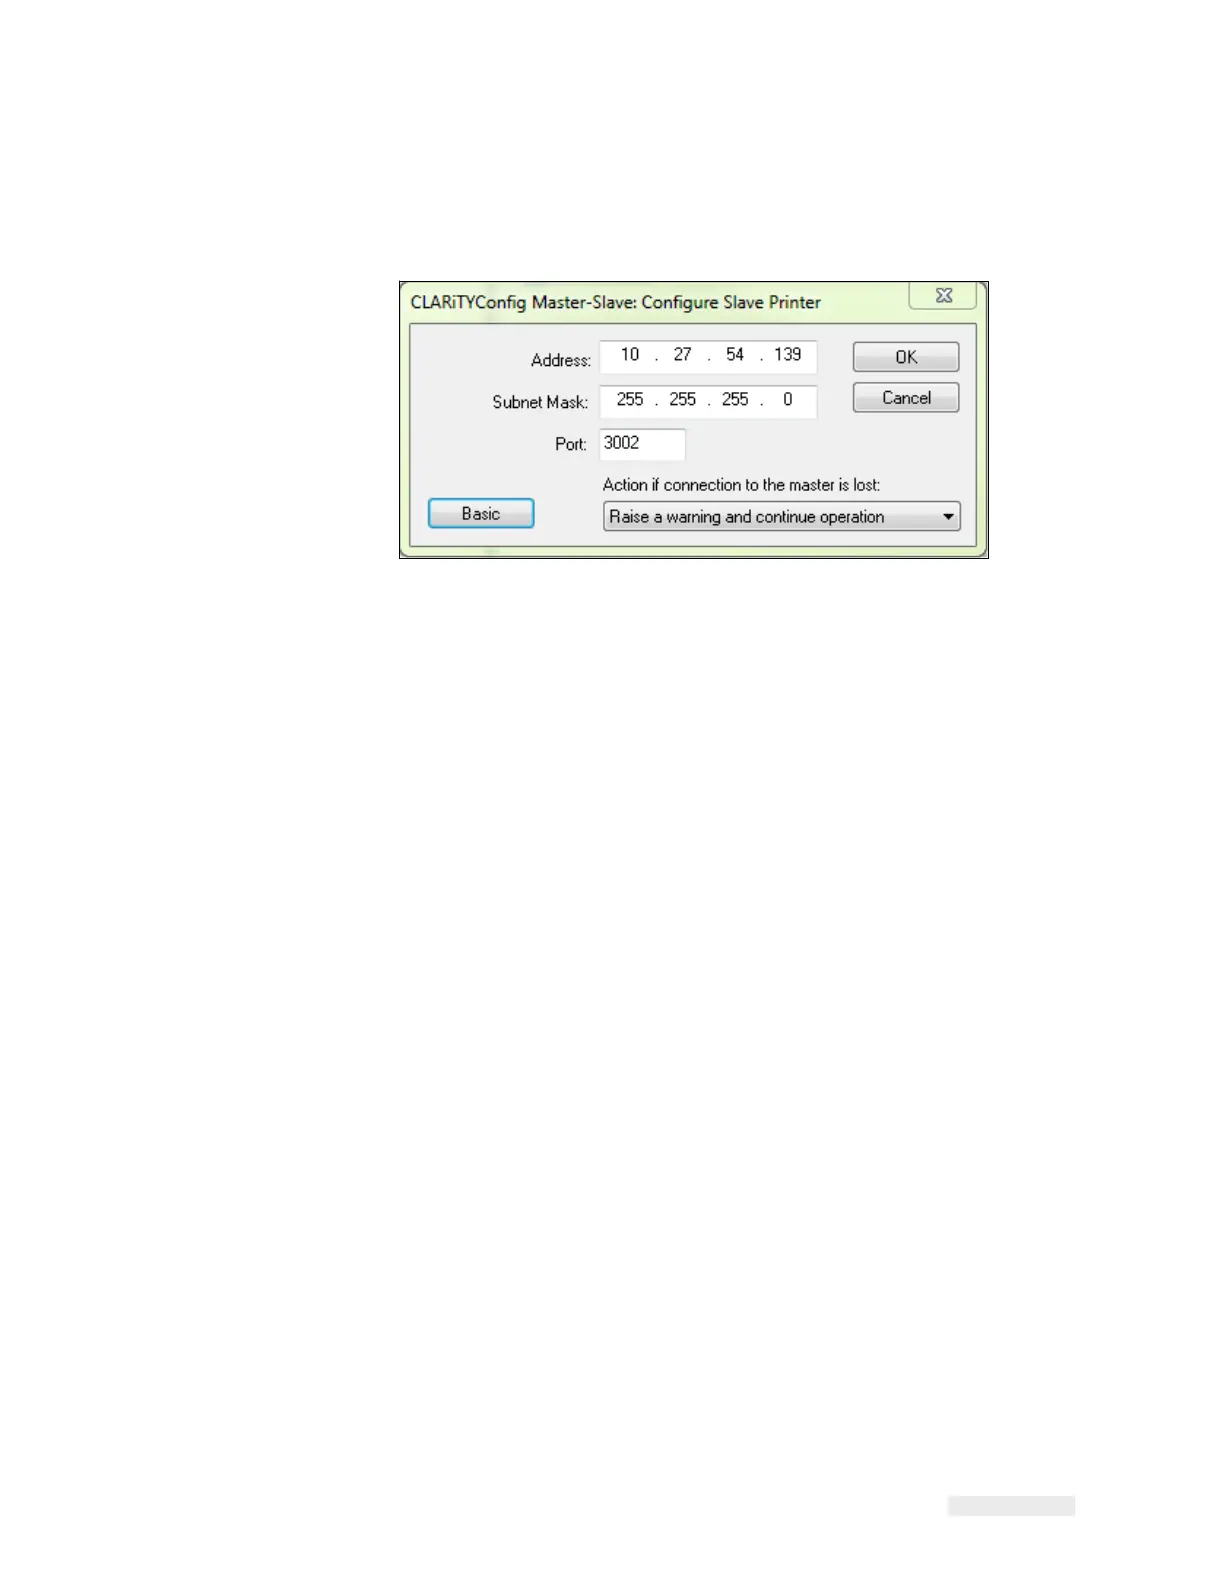
Figure 8-11: Advanced Configure Slave LPA Dialog Box
4
Enter the IP address, network subnet mask, and the port number of
the slave LPA in the
in Address field, Subnet Mask field, and Port
field respectively.
5
Select the option to be taken in the event of communication failure
between the
Master LPA and Slave LPA from the drop-down list.
The three options available are:
-
No Action (ignore the condition)
-
Raise a Warning message and continue operation
-
Raise a Fault message and suspend operation (stop printing)
6
Touch OK to configure the Slave LPA.
Once the slave LPA is configured, on a Standard LPA, the 'JOB' button on
the screen of
CLARiTY is disabled (greyed out) as shown in Figure 8-4 on
page 8-7.
After a short period of time the Slave LPA may raise a Warning or Fault
message (depending
on the setting you chosen in 'Action if connection to
the Master is lost') to indicate that the
Master LPA is absent, as shown in
Figure 8-5 on page 8-7 and Figure 8-6 on page 8-8.
Once the Master has been configured and communication established
between LPAs, the
warning message can be cleared from the Slave LPA
screen.
Repeat the above steps to install the remaining Slave LPAs in the group.