8-30 Working with Master/Slave
ICE Vulcan Service Manual
•
Disable Master/Slave mode for all Slaves and use as standalone LPAs
only.
Disabling Auto-Changeover Mode
Do the following to disable auto-changeover mode:
Disabling LPA 2/3
1
Establish communications between CLARiTY Configuration Manager
and LPA 2/3 (“How to
Connect the CLARiTY Configuration Manager
to the LPA using an RS232 connection” on page
5-8).
2
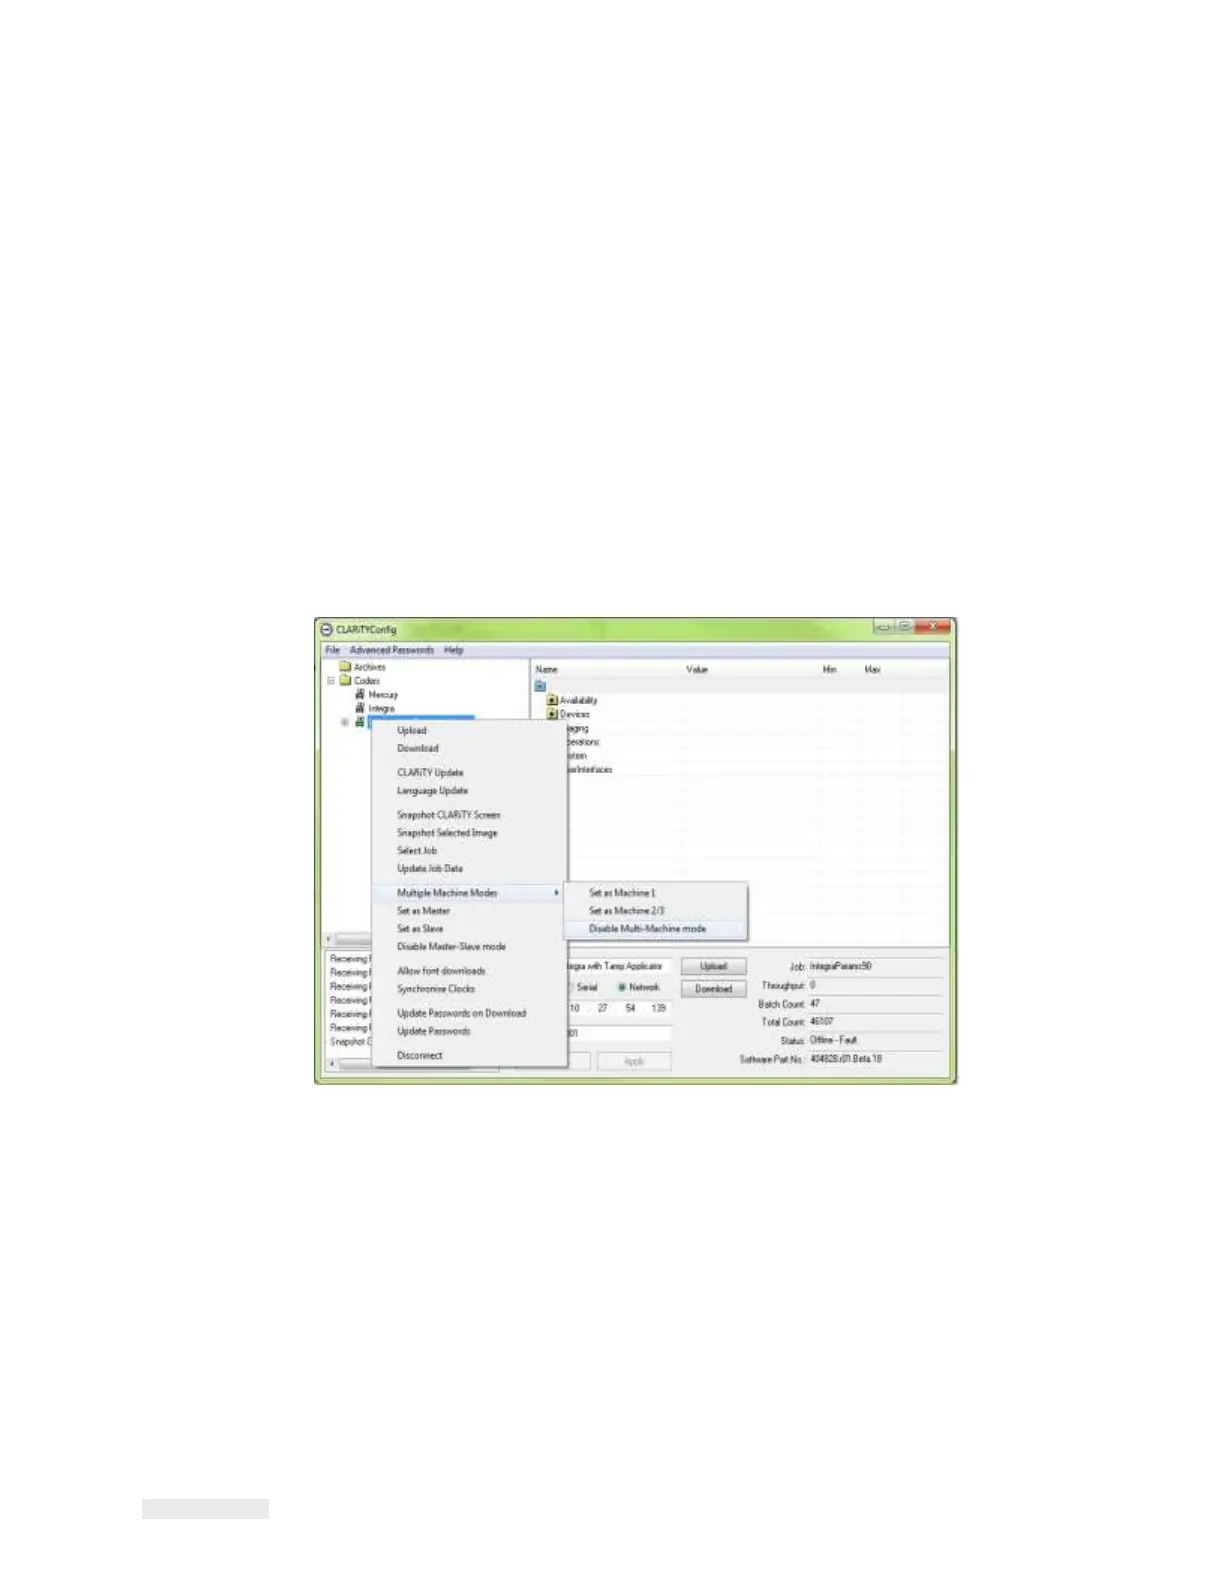
Right click on the 'New Printer' icon when the icon turns 'green' and
Select 'Multiple
Machine Modes > Disable Multiple Machine Mode',
from the list as shown in Figure 8-29.
Figure 8-29: CLARiTY Config - LPA 2/3 Disabling
A confirmation box appears asking you to confirm this action.
3
Click Yes and LPA 2/3 is deleted from the Auto-Changeover group
and begins to function
as a standalone LPA.
Note: If LPA 2/3 is Standard LPA, the 'JOB' button is enabled and
LPA 2/3's 'Job' database
is empty or contains only the last Job selected.
The Auto-Changeover group database is held by LPA 1. Therefore, if a
LPA is disabled from the
Auto-Changeover network and becomes a
standalone unit, any additional Jobs required have
to be downloaded
from CLARiSOFT.