8-20 Working with Master/Slave
ICE Vulcan Service Manual
3
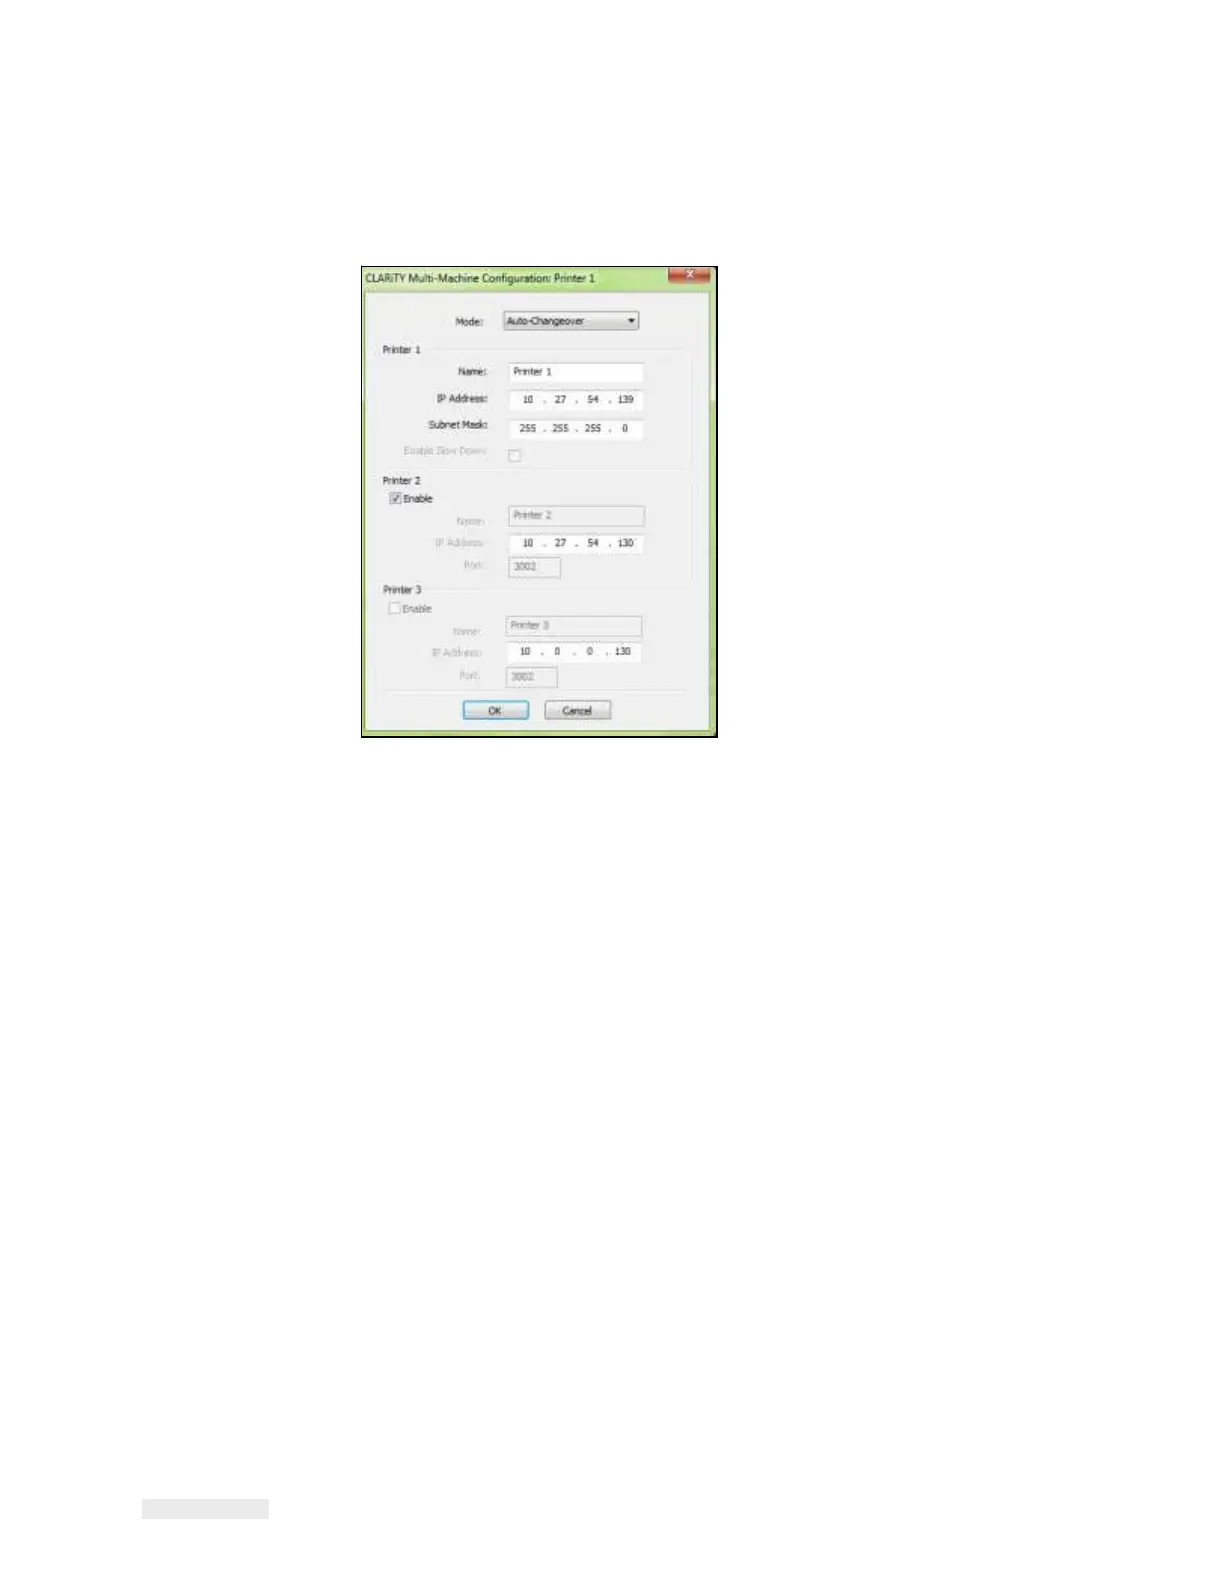
Select auto-changeover mode from the drop down list
(see Figure 8-18)
Figure 8-18: Auto-Changeover Mode
4
Enter a identification name for the LPA in the name field (Printer 1).
These names can be viewed on the screen of the LPA 1 CLARiTY and
are useful for
identification purposes. Names can be edited from the
default values of 'Printer 1, Printer 2
and Printer 3', if required.
Note: The 'Check boxes' on the left hand side of the dialog box indicate how
many Slaves are to
be connected.
5
Click on the check boxes to select LPA 2/3. The dialog box allows only
the selection of
consecutively-numbered Slaves starting with Slave 1.
6
Enter the IP address, network subnet mask, and the port number of the LPA 2/3 and LPA
1 in their IP Address field, Subnet Mask field, and Port field respectively.
Note: Only one LPA can be set as slave in auto-changeover mode.
7
Click OK button, to program the LPA with the selected configuration.