Suction Pump and Controller Card
11-34 CUSA EXcel Ultrasonic Surgical Aspirator System Service Manual
Install the Suction Pump
Prepare the New Pump for Installation
1. Open the packaging for the new suction pump. You will find the pump pre-
connected to a pump controller card. A printed label covers the white 3-pin
connector.
a. Cut, but do not remove, the label on the white 3-pin connector.
b. Unplug the connectors.
c. Remove the new suction pump.
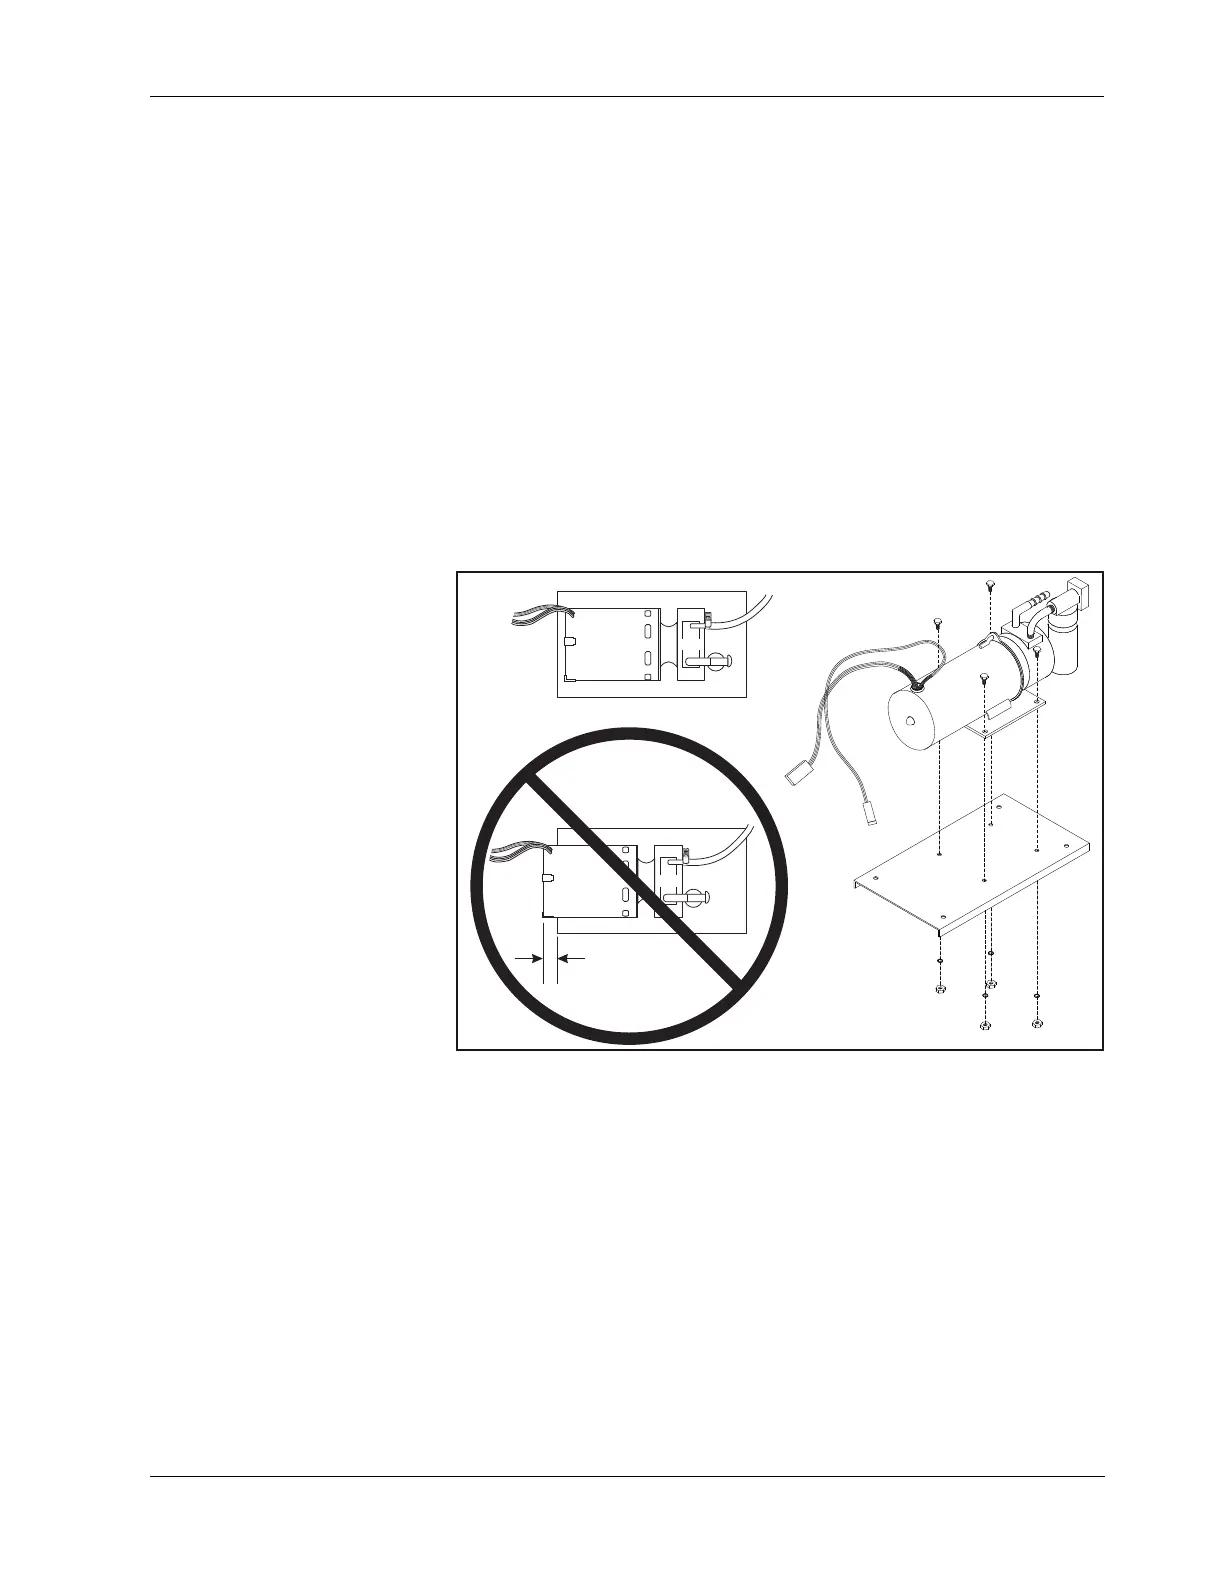
2. Attach the suction pump to the suction pump bracket mount:
a. Position the pump so that it centers on the bracket mount; no part of the
pump body should extend over any edge of the bracket.
b. Replace four bolts (M6), four lock washers (M6), and four nuts (M6).
Figure 11-25.
Attaching the suction pump motor to
its mounting bracket, making sure to
center the pump on the bracket
3.
Install attachments:
a. Remove the red plastic cap from the 90° elbow at the pump inlet.
b. Connect the 3/8 in. ID suction tube and clamp to the 90° elbow on the
suction pump inlet.
Note: The split bushing restraint should still be on the tube.
4. Position the strain relief bushing on the suction pump wires 20 cm (8 in.) from
where the wires exit the pump. Crimp the strain relief bushing in place with
pliers.