Intel® Server Board S1200BT Service Guide 65
Recovering the BIOS
The following steps boot the recovery BIOS and flashes the normal BIOS:
1. Power down and unplug the system from the AC power source.
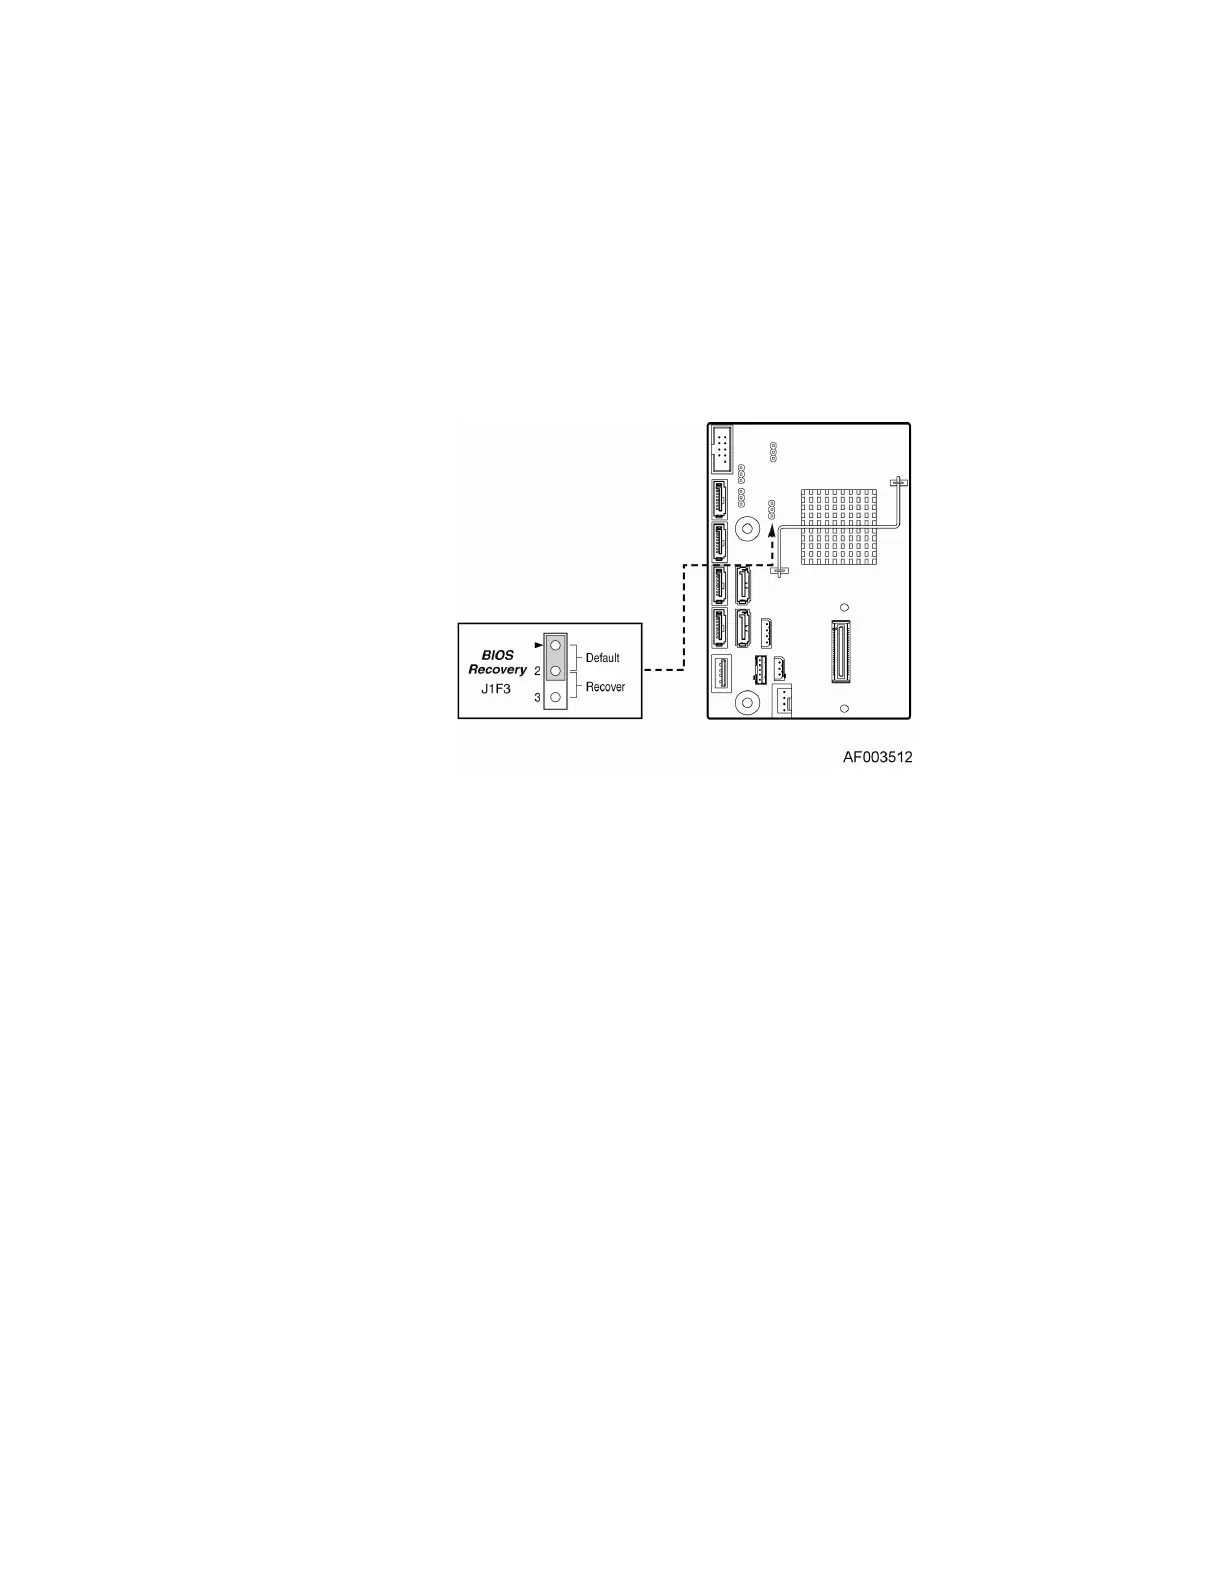
2. Move the recovery jumper at JIF3 from the spare location at pins 2 and 3 to cover
pins 1 and 2. Refer to the following figure.
Figure 40. BIOS Recovery Jumper
3. Insert the bootable BIOS Recovery media containing the new BIOS image files. A
BIOS recovery can be accomplished from SATA CD and USB Mass Storage
device. Please note this platform does not support recovery from a USB floppy. The
recovery media must contain the following files under the root directory:
• FVMAIN.FV
• UEFI iFlash32
• *Rec.CAP
• Startup.nsh (update accordingly to use proper *Rec.CAP file)
4. Plug the system into the AC power source and power it on.
5. The BIOS POST screen will appear displaying the progress, and the system will
automatically boot to the EFI SHELL.
6. Remove the recovery media.
7. Power down and unplug the system from the AC power source.
8. Move the BIOS recovery jumper at J1A1 back to the original position, covering
storage pins 1 and 2.
9. Plug the system into the AC power source and power it up to confirm the recovery
was successful.
10. Do NOT interrupt the BIOS POST during the first boot.