72
3. With the Window Assembly unlocked and rotated clockwise, the Window Assembly will drop off
the lens assembly (see Figure 9-4).
Figure 9-4 Removing the Window Assembly
WARNING: It is recommended that users have a spare Window Assembly on-hand
in order to decrease the amount of time required to change out protective windows.
The longer the lens is left exposed to the open environment, the greater the chance
that the lens can become contaminated. Having a spare Window Assembly will help
to reduce this exposure and also decrease cell downtime due to protective window
change-out.
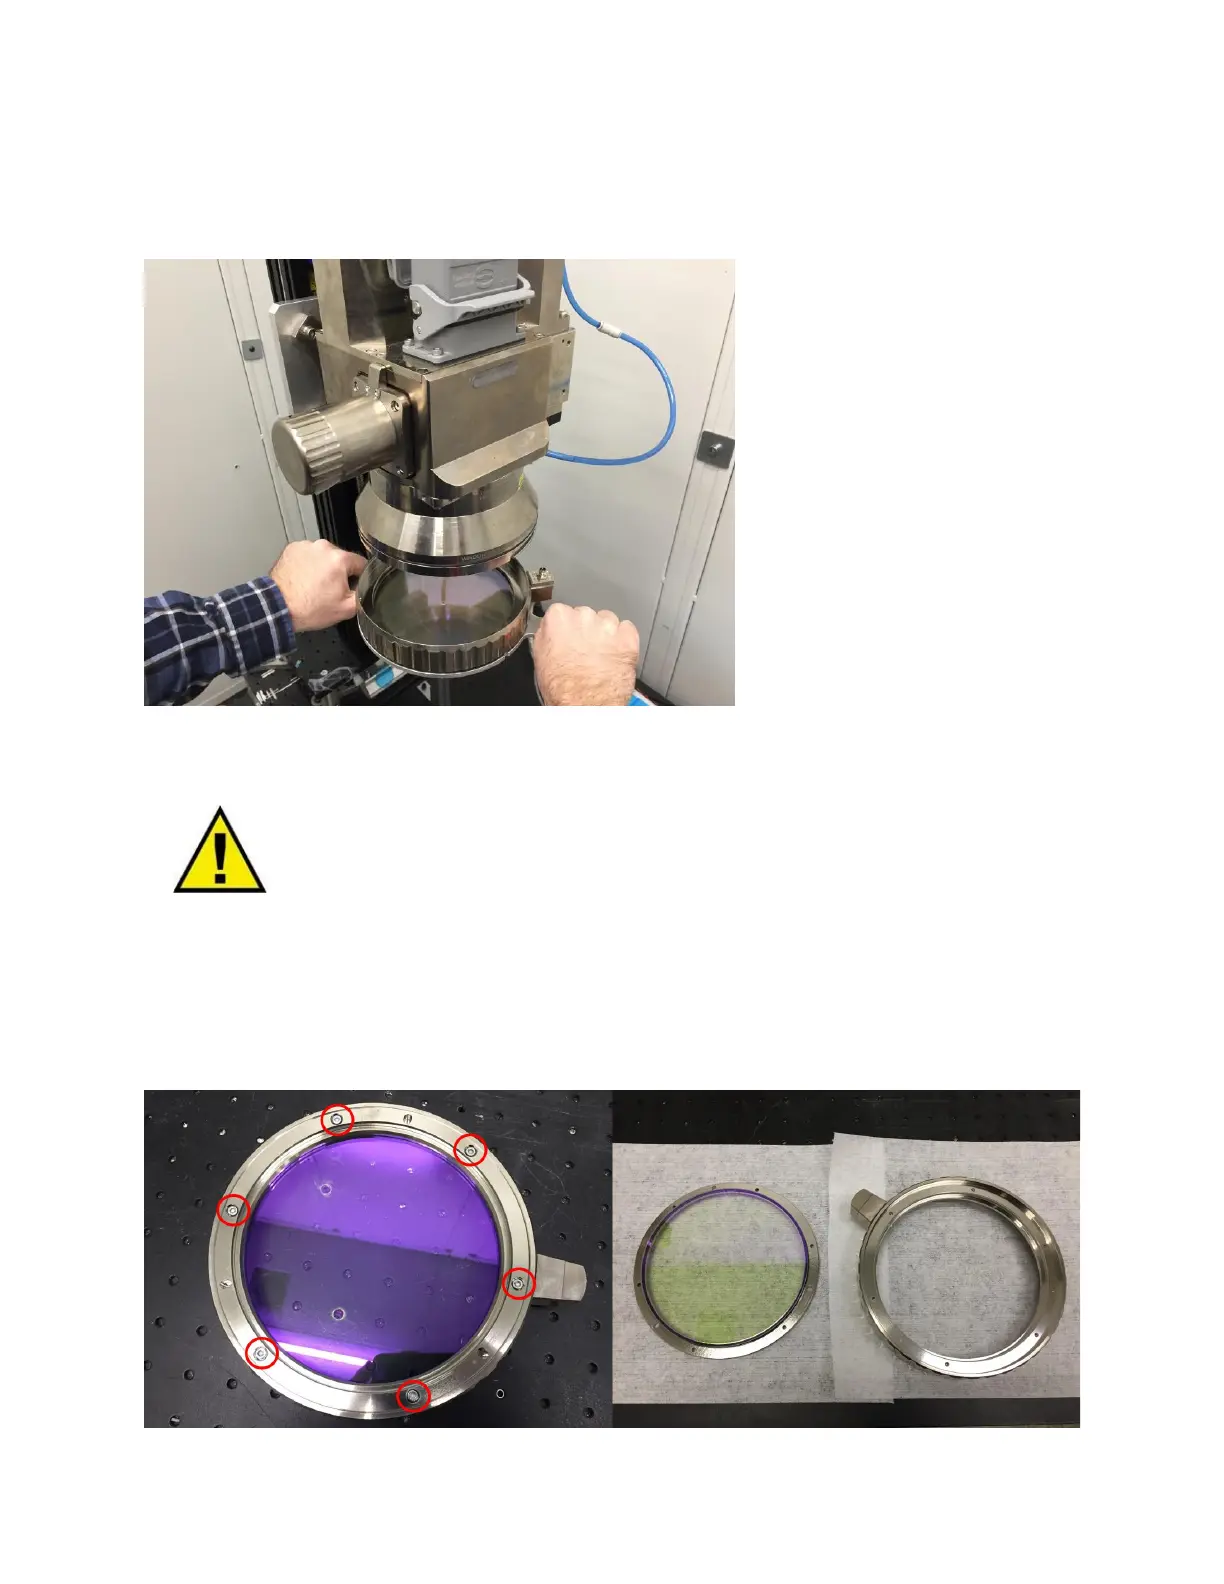
4. With the Window Assembly in a clean environment, use a 2.5mm hex driver to remove the
screws to release the protective window retaining ring and protective window. See Figure 9-5.
Figure 9-5 Removing the Window Retaining Ring and Protective Window