1. Wrap and fasten one end of the ESD grounding strap around your bare wrist, and connect the other
end of the strap to one of the ESD points on the chassis.
2. Remove the fan module from its bag.
3. Hold the handle of the fan module with one hand and support the weight of the module with the
other hand. Place the fan module in the fan module slot on the rear panel of the switch and slide the
module in unl it is fully seated.
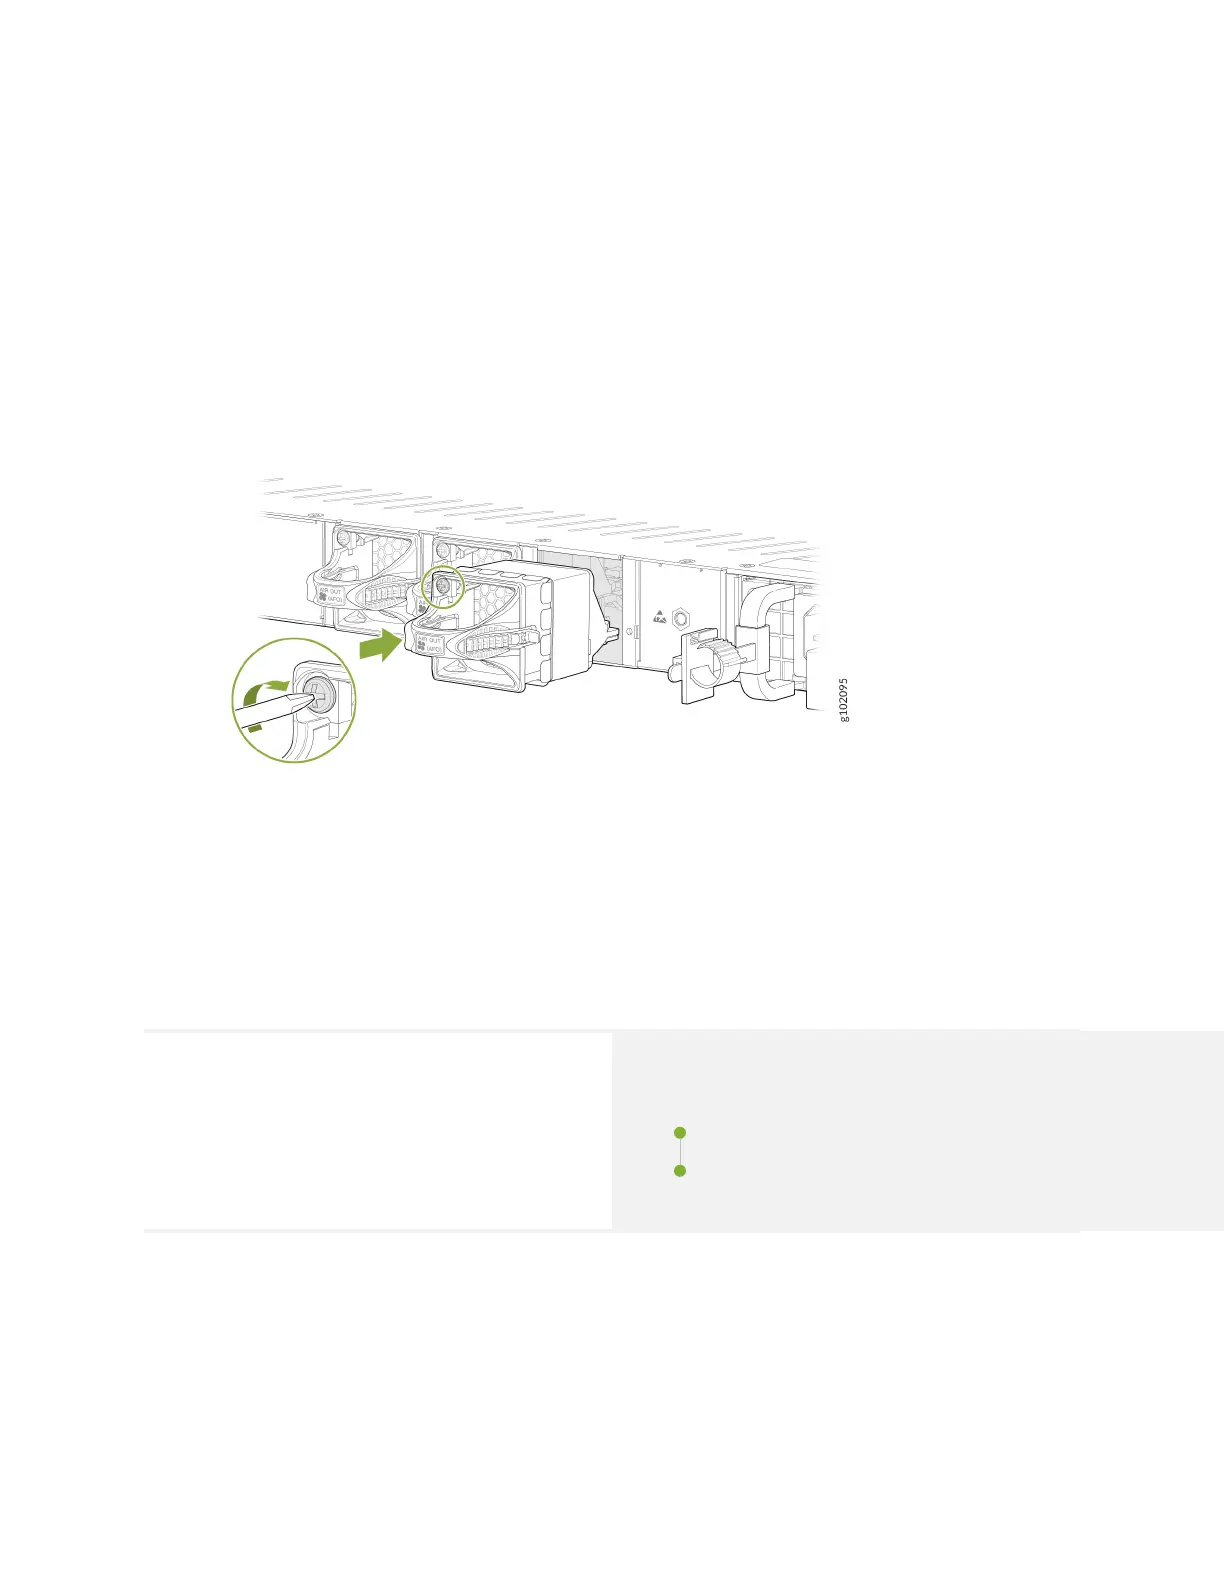
Figure 41: Install the Fan Module on the SRX1600
4. Tighten the capve screws on the faceplate of the fan module by using your ngers. If you can't
ghten the capve screws by using your ngers, use the screwdriver.
SRX1600 Power Supply Maintenance
SUMMARY
Maintaining an SRX1600 includes removing a failed
power supply unit (PSU) and installing a funconal
PSU.
IN THIS SECTION
Replace an AC PSU on the SRX1600 | 74
Replace a DC PSU on the SRX1600 | 76
73