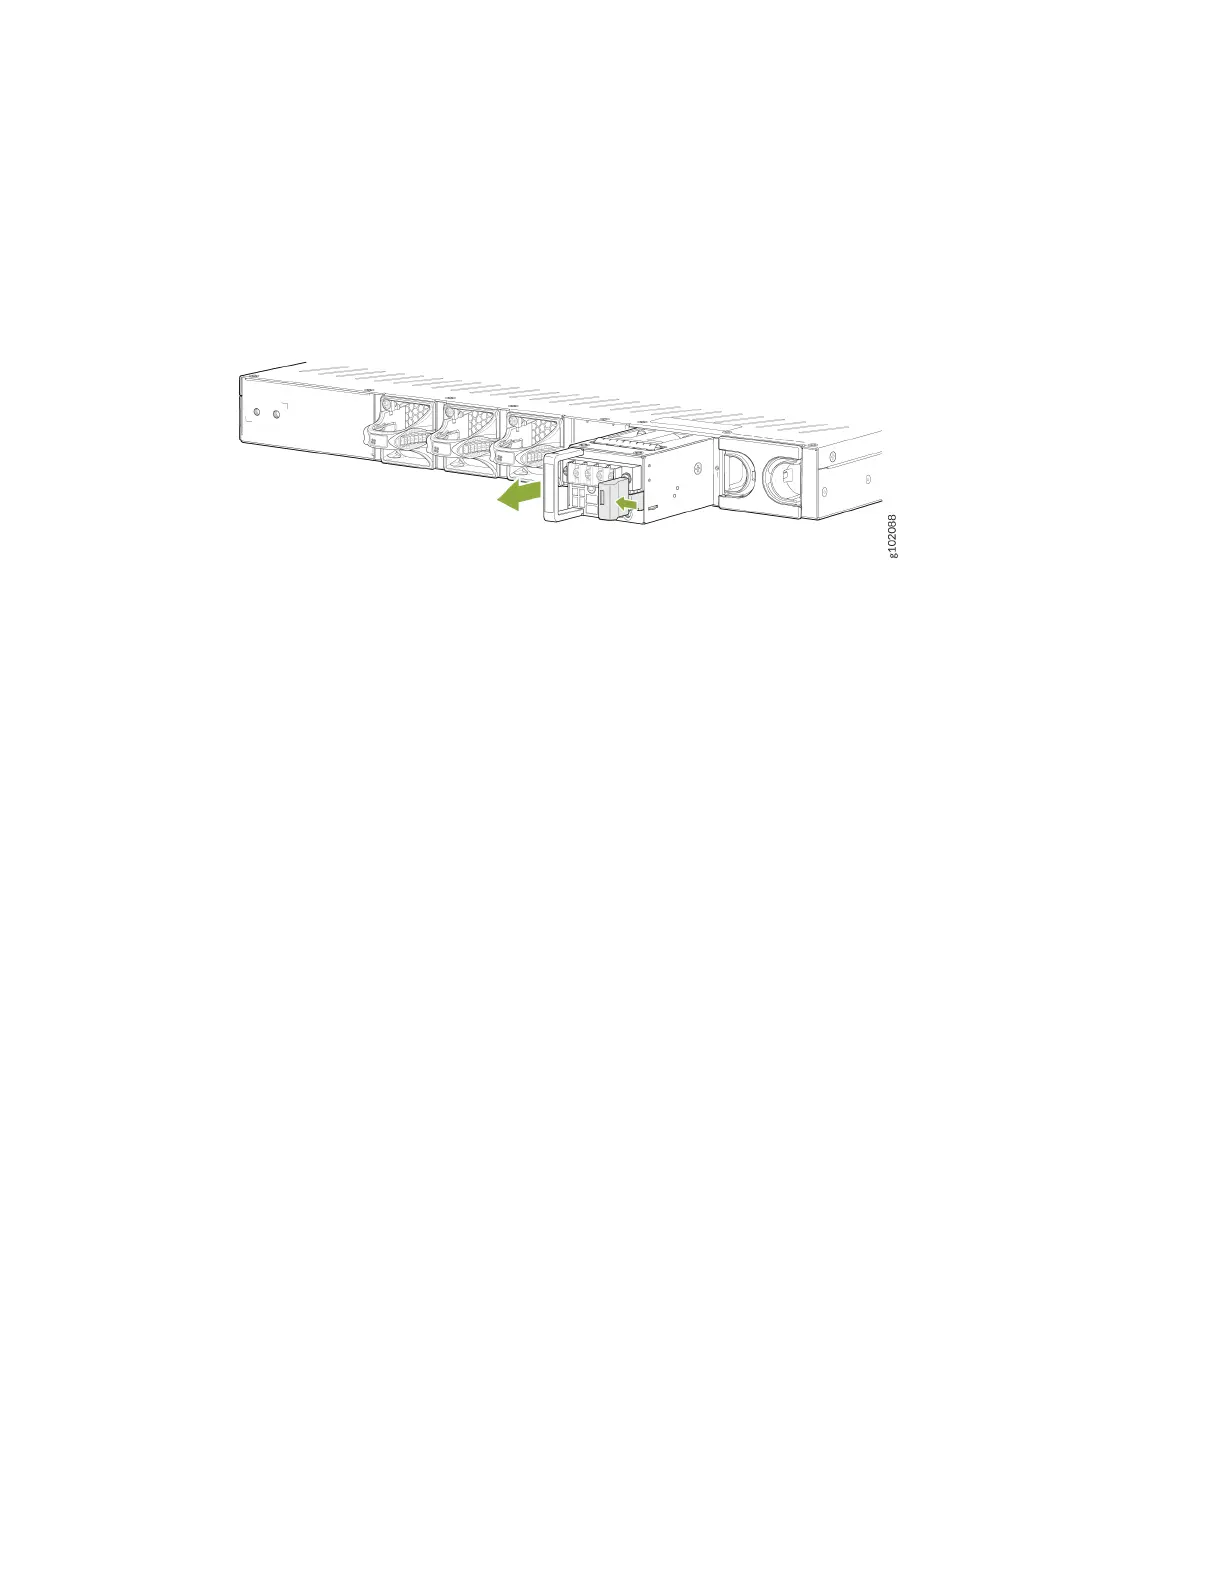
7. Press the latch, which is on the right side of the power outlet, to the le.
8. Pull the PSU straight out of the chassis.
Figure 44: Remove an SRX1600 DC PSU
9. Place the PSU in the anstac bag or on the anstac mat that you've placed on a at, stable
surface.
10. If you're not replacing the power supply, install the cover panel over the slot.
Install the DC PSU in the SRX1600
To install a DC PSU (see Figure 45 on page 78 ):
1. Aach the ESD grounding strap to your bare wrist, and connect the strap to the ESD point on the
chassis.
2. Switch o the circuit breaker on the panel board that services the DC circuit. Tape the handle of the
circuit breaker in the OFF posion. Make sure that the voltage across the power source cable leads is
0 V. You must remove any possibility for the cables to become acve during the removal process.
3. If the PSU slot has a cover panel on it, remove the cover panel. Save the cover panel for subsequent
use.
4. Taking care not to touch the power supply terminals, leads, or solder connecons on the PSU,
remove the PSU from the bag.
5. Using both hands, place the PSU in the PSU slot on the rear panel of the SRX1600. Slide the PSU
straight into the chassis unl the PSU is fully seated in the chassis slot. Ensure that the PSU faceplate
is ush with the adjacent PSU faceplate.
77