Unite
®
Panel System - Panel Frame Assembly
Assembly Instructions
Assemble units as described herein only. To do otherwise
may result in instability. All screws, nuts and bolts must be
tightened securely and must be checked periodically after
assembly. Failure to assemble properly, or to secure parts
may result in assembly failure and personal injury.
13
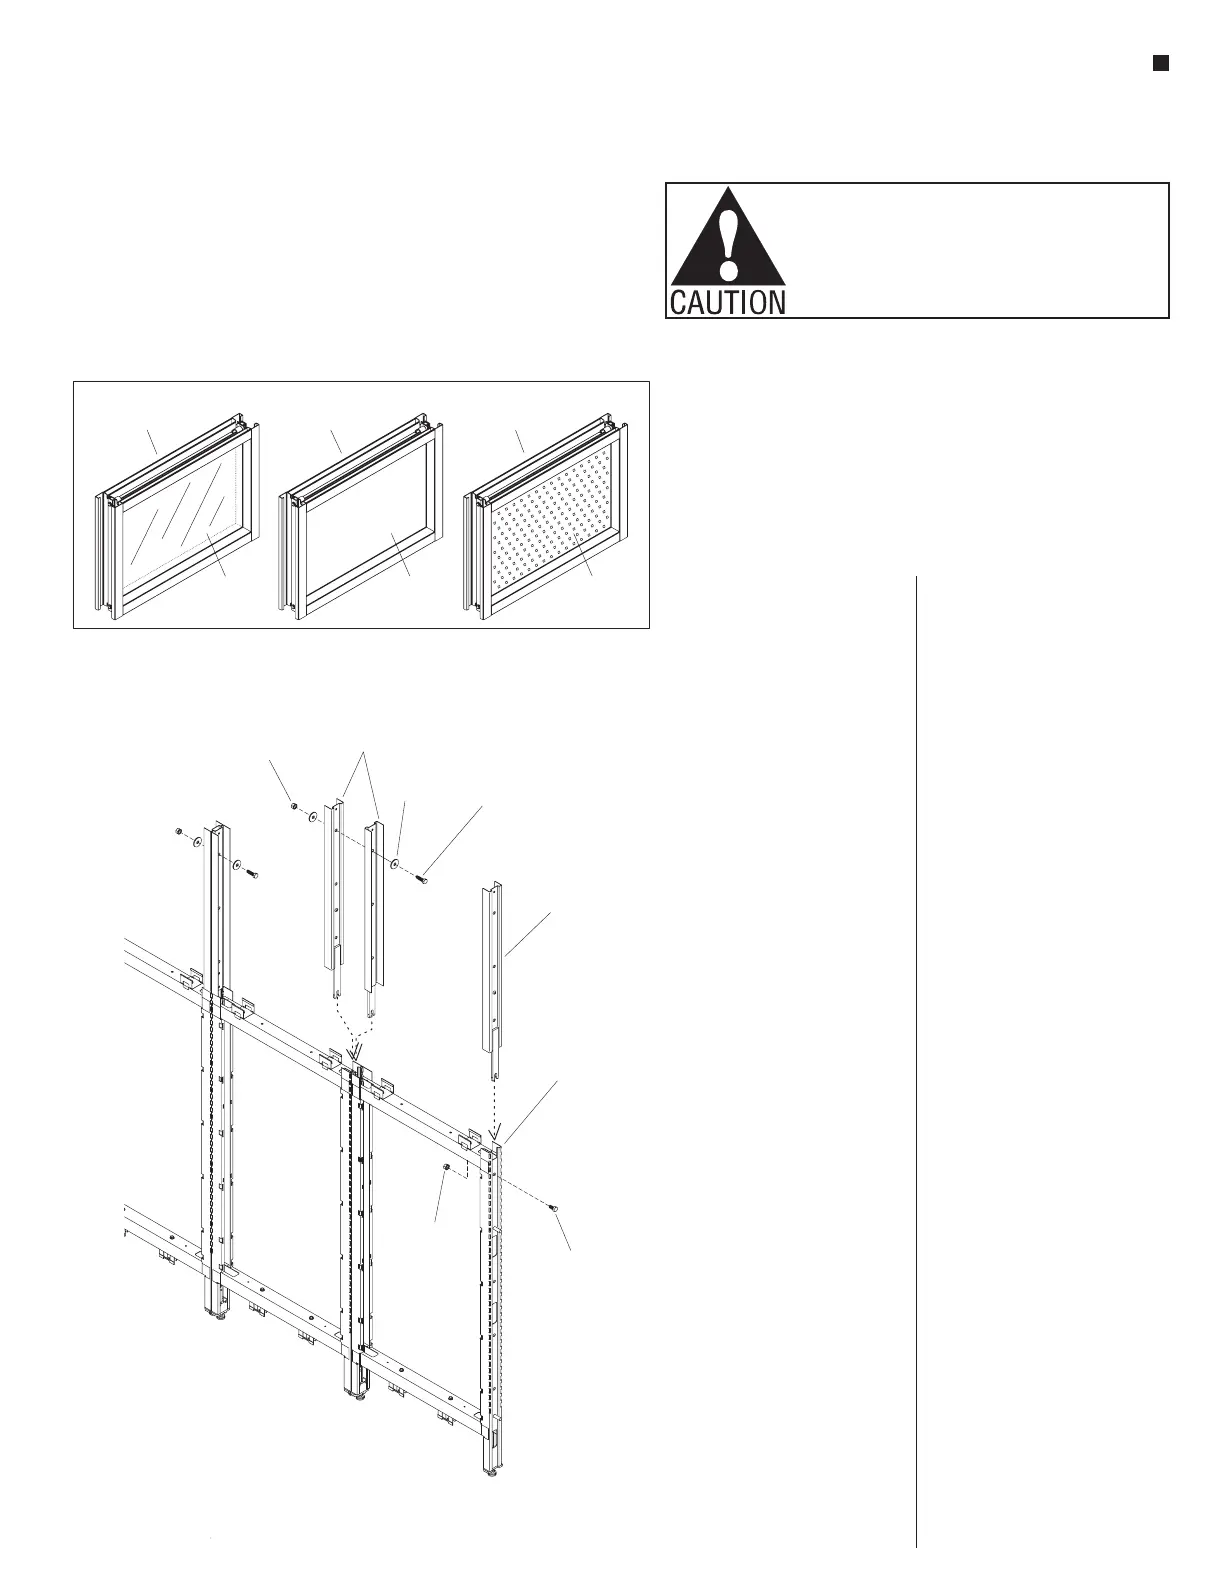
14 - Stacking Sections (aluminum frame) -
End-of-Run & In-Line
31
/ -16 x 1 /
bolt
84
”
/ -16 x /
bolt
washer
3
/ -16
k-lock nut
8
3
/ -16
k-lock nut
8
vertical
stacking posts
(in-line)
vertical
stacking post
(end-of-run)
panel frame
(end-of-run)
Stacking Sections (aluminum
frame) - End-of-Run & In-Line
Assembly
Note: Installation of “Stacking
Sections (aluminum frame) -
Full-Height Intersection
Assembly” is covered on page 9,
Figure 9. The steps below and
Figure 14 illustrate in-line
assembly.
Note: Stacking sections with
"top frame" (aluminum frame)
are constructed of a four-sided
aluminum frame and contain
either glass, steel or perforated
steel inserts pre-installed at the
factory. they use separate vertical
stacking posts to hold the "top
frame" in place (Detail E,
page 13).
1. At a joined pair of panel frames,
position two vertical stacking
posts side-to-side as illustrated,
and press them into the cavity at
the top where two panel frames
meet. Posts may be tapped in
place one at a time using a rubber
mallet. If necessary, loosen the
bolt securing the upper vertical
member of the panel frames, tap
the vertical stacking posts in, then
re-tighten the bolt (Figure 14).
2. Secure the side-to-side vertical
stacking posts together using a
3
/
8
-16 x 1
1
/
4
” hex head bolt, two
washers and a
3
/
8
-16 k-lock nut
(Figure 14).
3. At end-of-run conditions, loosely
insert a shorter
3
/
8
-16 x
3
/
4
” hex
head bolt to the top mounting
hole of the end panel frame, then
twist on a
3
/
8
-16 k-lock nut.
Note: The nut must be positioned
inside the panel frame and flat
washers are not required. Next,
place a vertical stacking post
at end of the panel frame as
illustrated, with the notch of the
stacking post fork resting on the
3
/
8
-16 x
3
/
4
” bolt thread. Tighten
the hex bolt and k-lock nut to
secure (Figure 14).
4. Before installing glass, perforated
steel or steel top frames into the
vertical stacking posts on panels,
all internal components, as well
as exterior tiles must be installed
to lower panel frames.
E-Stacking Sections (aluminum frame) -Top Frames
top
frame
top
frame
top
frame
insert
(glass)
insert
(steel)
insert
(perforated steel)