66
Unite
®
Panel System - Glass Dividers
Assembly Instructions
Assemble units as described herein only. To do otherwise
may result in instability. All screws, nuts and bolts must be
tightened securely and must be checked periodically after
assembly. Failure to assemble properly, or to secure parts
may result in assembly failure and personal injury.
Glass Divider Installation
(cont.)
6. Per “Fabric Tile-” or “Steel
Tile & Steel Markerboard Tile
Installation” instructions outlined
on page 45 or 46, depending on
the type of tile being installed,
install panel tiles to divider panel
frame on both sides of the frame.
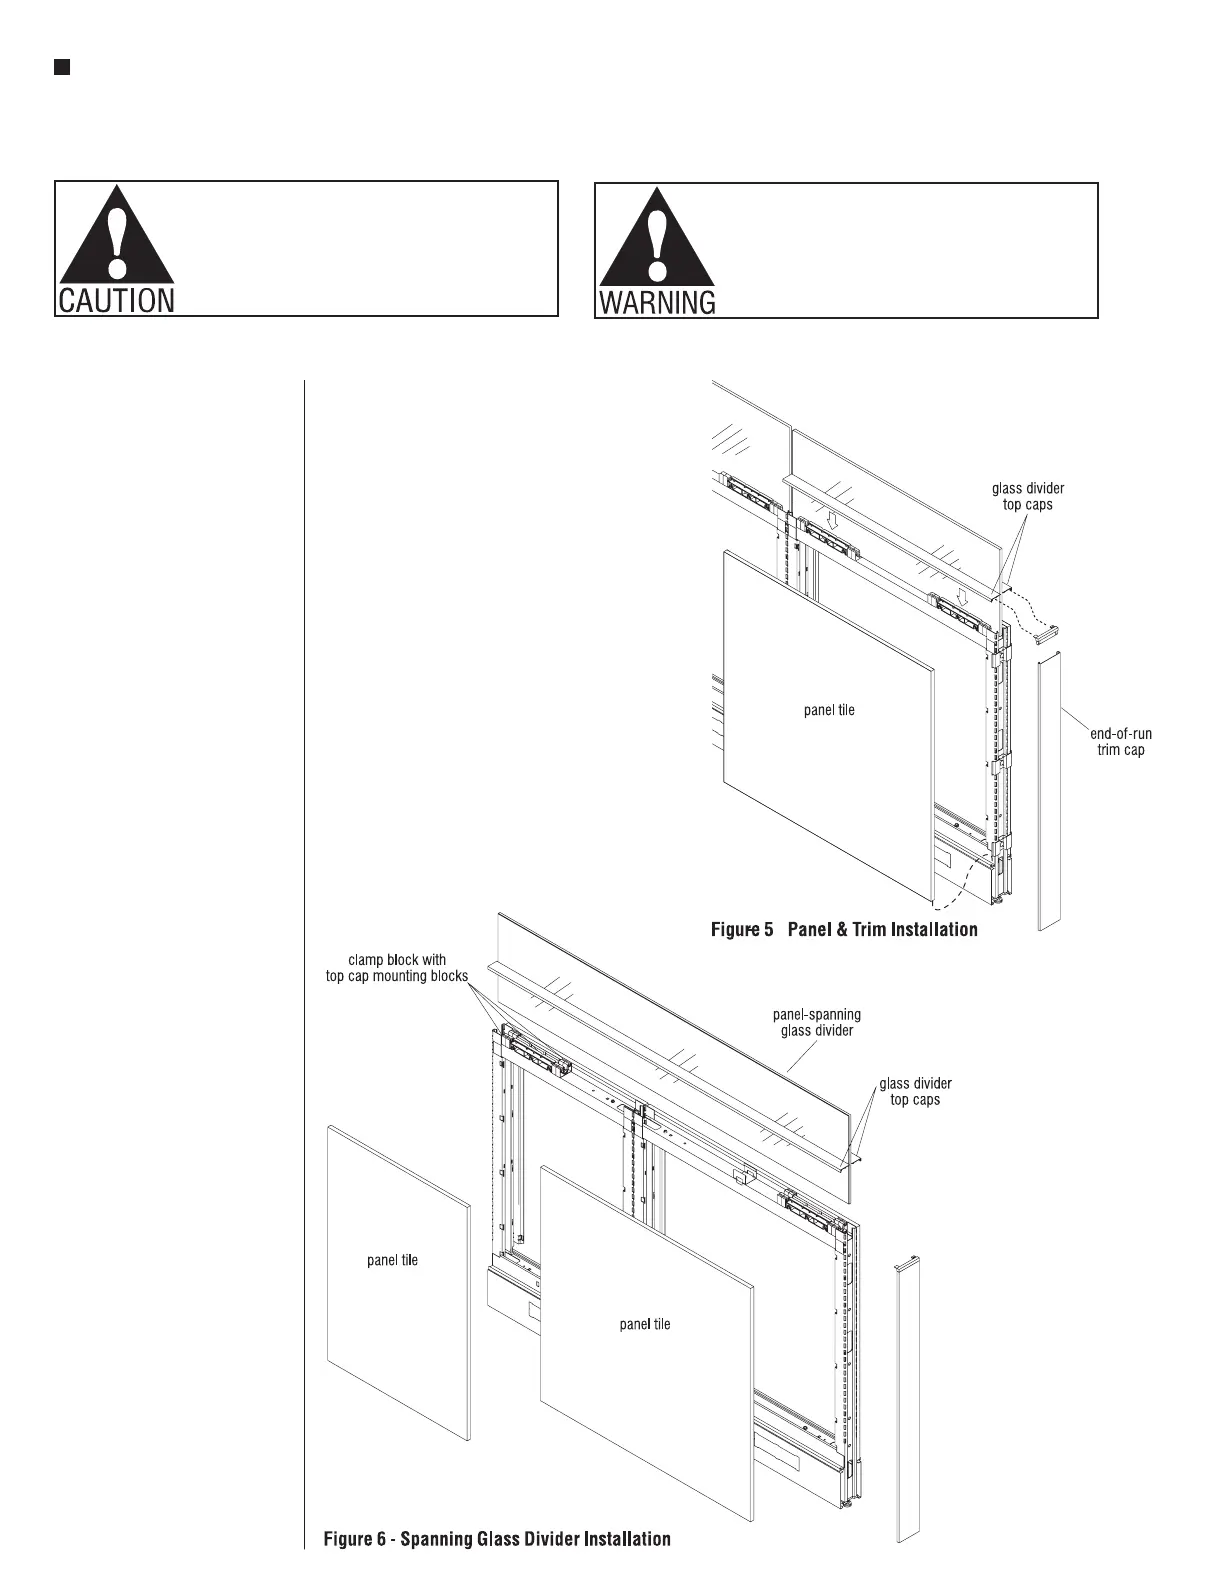
7. Center the glass divider top caps
over the top of the panel frame, on
both sides of the glass divider as
illustrated. Gently press the caps
down to engage the top caps to
the mounting blocks (Figure 5).
8. If necessary, shims (not supplied)
may be used under the clamp
block to align top of adjacent
glass dividers.
9. Intersection and end-of-run trim
and caps are installed as outlined
in “Vertical End-of-Run &
Change-of-Height Vertical Trim
Installation” section, page 63.
Panel-Spanning Glass Divider
Note: Panel-spanning glass
dividers are to be installed over
adjoining panel frames as if they
are installed over a single panel
frame. A clamp block assembly
with top cap mounting blocks is
required at each end of the glass
divider, but not in the center of the
glass (Figure 6).
Rare Earth Magnets used with this product. The magnets can
be harmful to pacemaker wearers and others with medical
devices. Pacemaker wearers should stay at least one
foot away from the steel tiles.