Unite
®
Panel System - Trim Installation
Assembly Instructions
Assemble units as described herein only. To do otherwise
may result in instability. All screws, nuts and bolts must be
tightened securely and must be checked periodically after
assembly. Failure to assemble properly, or to secure parts
may result in assembly failure and personal injury.
57
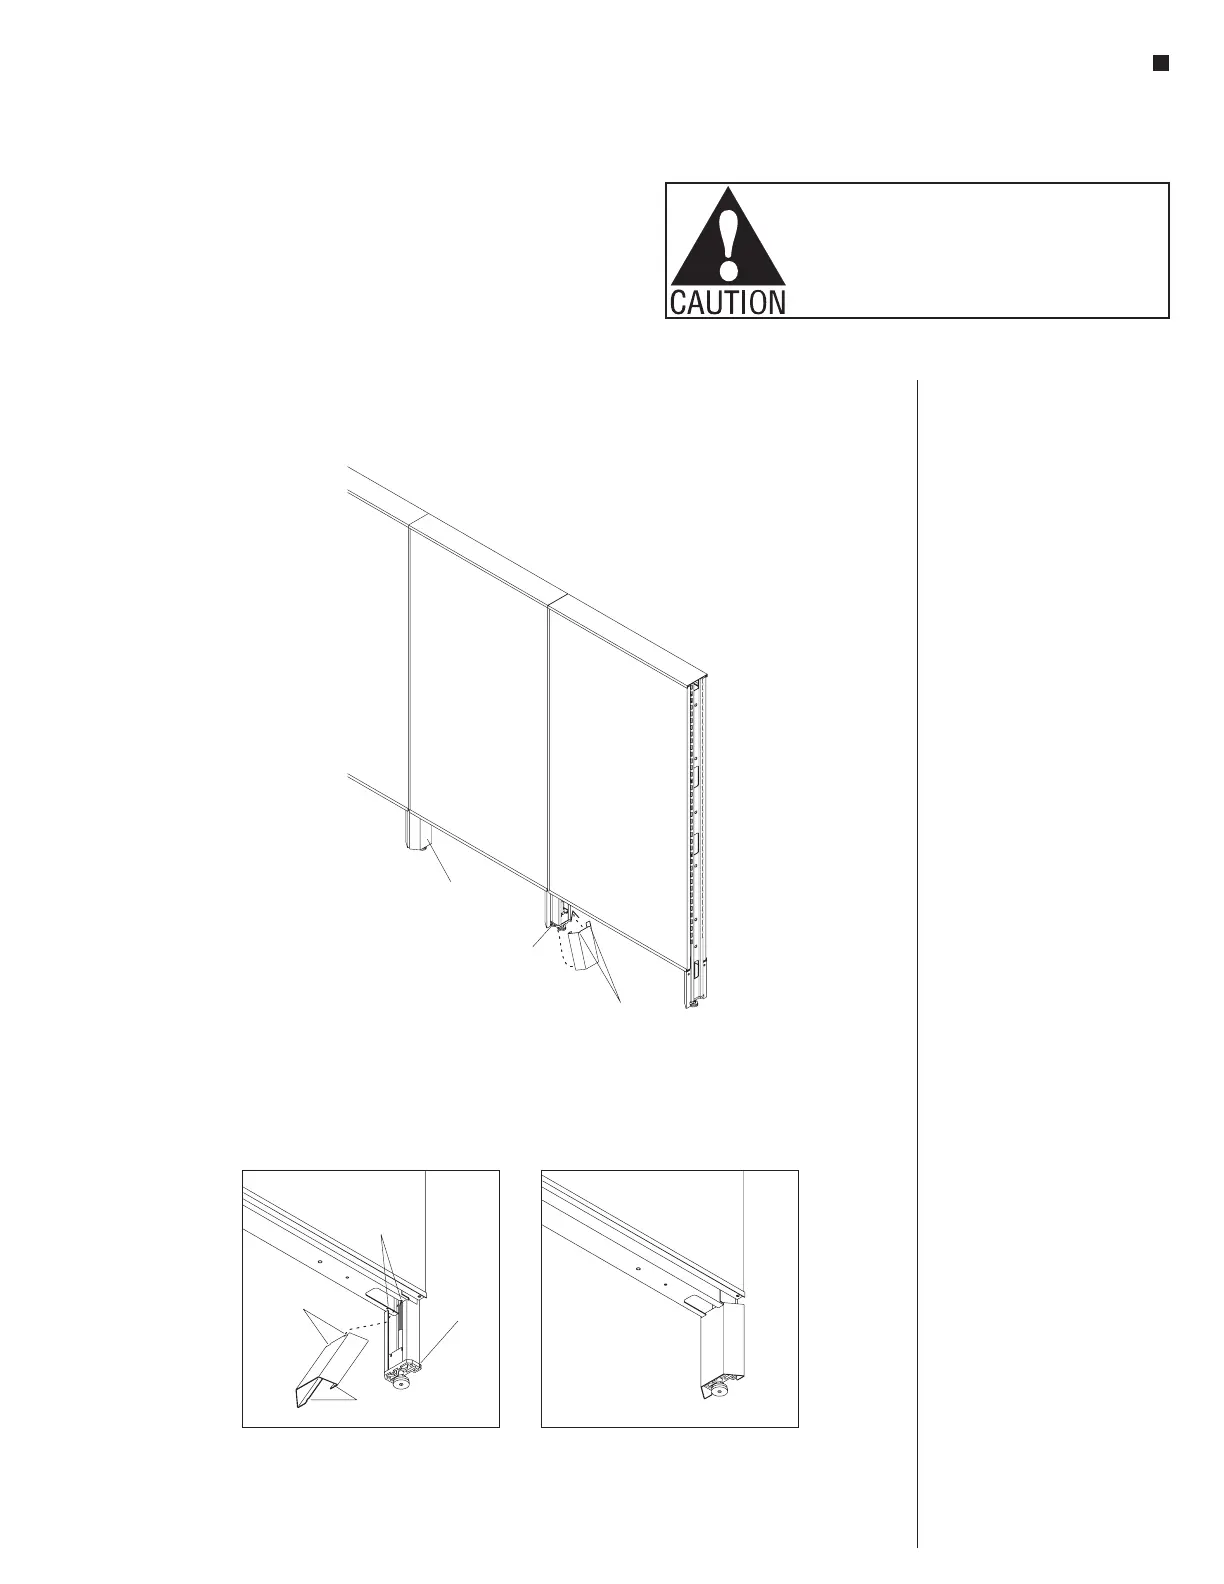
Lifted Base Shroud Installation
Note: The lifted base shroud
has a top and bottom, and the
shroud must be oriented correctly
at time of installation. The top of
the shroud has two notches cut
out of the longer, inside-face of
the shroud, and the bottom of
the shroud has notches in the
smaller vertical flanges (Figure 2
& Detail A).
1. Position the lifted base shroud
with the upper notches facing
up, and from under the lower
horizontal rail of the panel frame,
turn the shroud at an angle and
insert the notches of the shroud
into the horizontal rail notches
(Detail A). Next, rotate the bottom
of the shroud down to the glide
housing of the panel frame, then
strike the bottom of the shroud
with the palm of your hand or a
rubber mallet to snap the shroud
into place (Figure 2, Details A
& B).
Note: Shroud notches in the
bottom vertical flanges snap into
the glide housing lower notches
to hold it in place. The shroud can
be moved up and down slightly
when it is installed correctly into
place.
Figure 2-Lifted Base Shroud Installation
glide housing
lower notch
lifted base shroud
upper notches
lifted base
shroud
lifted base
shroud
upper
notches
shroud lower notches
in vertical flanges
glide
housing
lower
notch
horizontal
rail
notches
A
 Loading...


