Unite
®
Panel System - Tile Installation
Assembly Instructions
Assemble units as described herein only. To do otherwise
may result in instability. All screws, nuts and bolts must be
tightened securely and must be checked periodically after
assembly. Failure to assemble properly, or to secure parts
may result in assembly failure and personal injury.
47
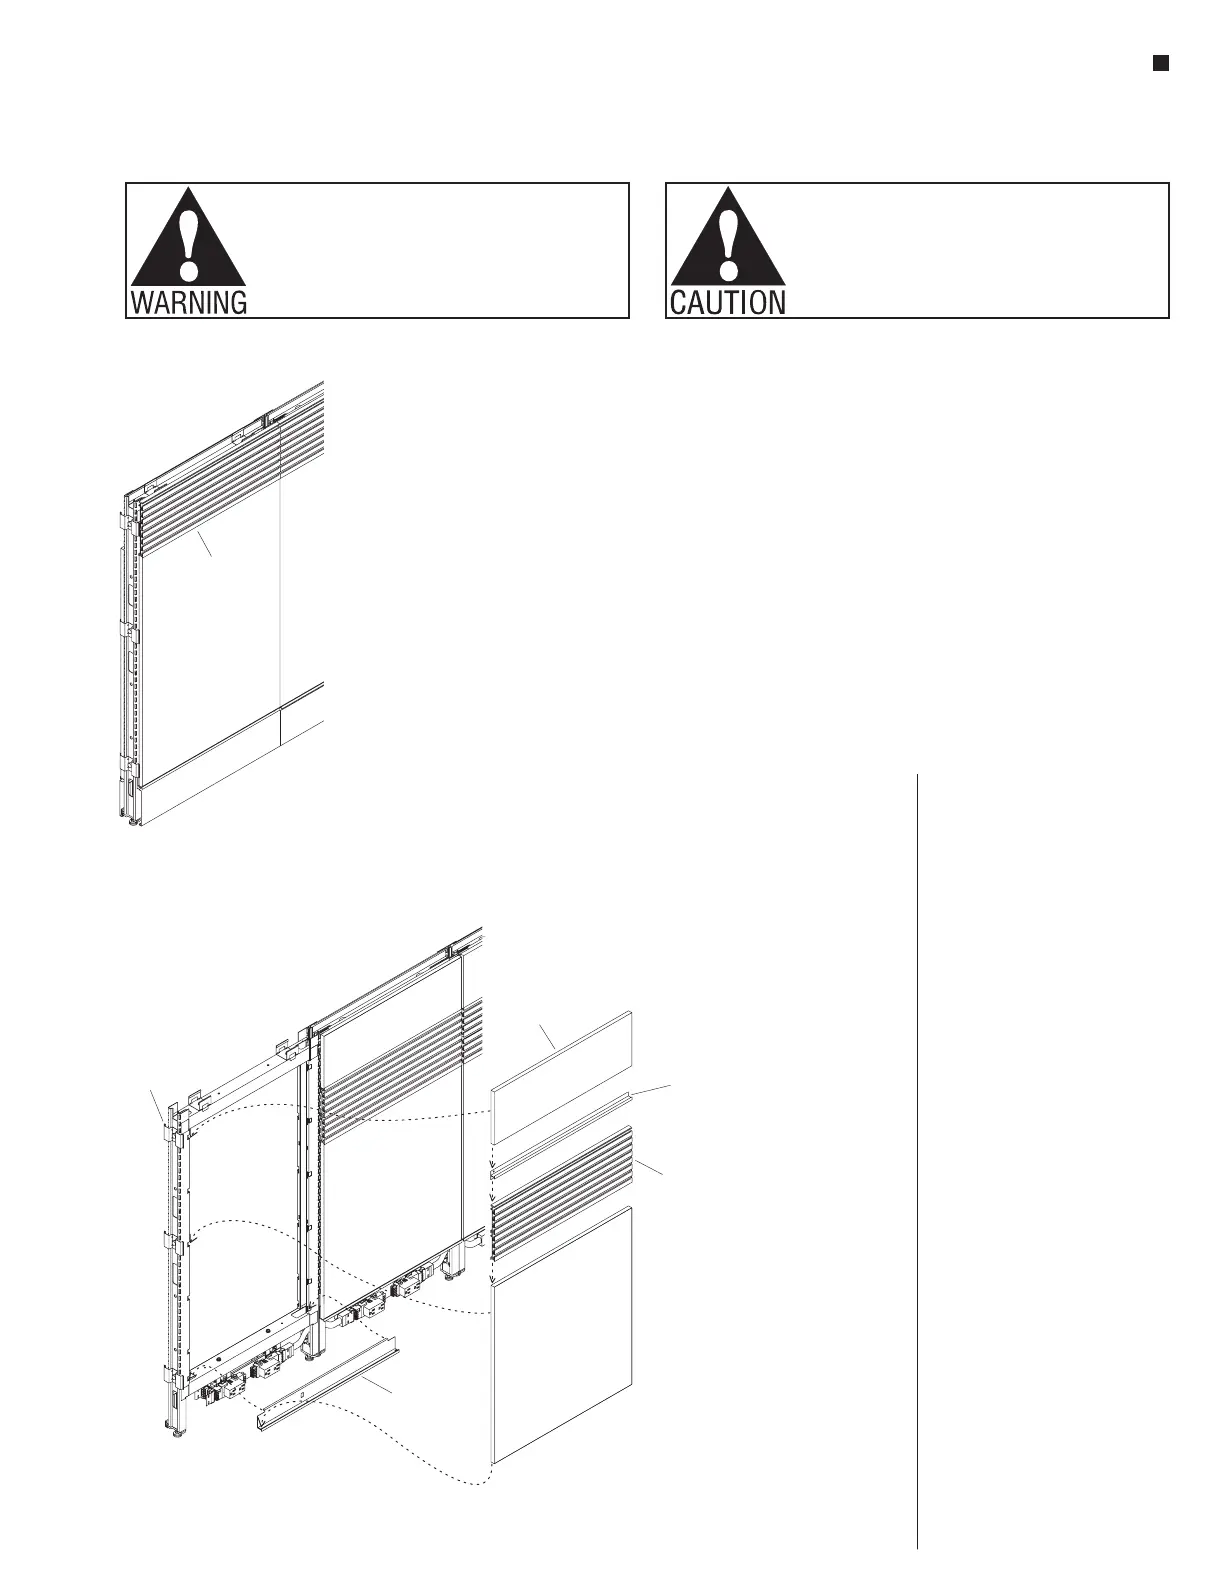
Slat Wall Tile Installation
Note: End-of-run trim clips must
be installed on end-of-run panel
frames prior to installing tiles. If
end-of-run trim clips are not
installed on the end-of-run
frames, reference "End-of-Run
Trim Clip Installation"
instructions on page 15 or
"End-of-Run Trim Clip
Installation on Panel Frame
Change-of-Height Assembly"
instructions on page 16.
Note: Slat wall tiles install to
Unite frames above standard
segmented tiles utilizing an
integral H-channel at the bottom
of the tile. The H-channel at
the bottom captures the top of
the segmented tile it rests on.
Above each slat wall tile another
segmented tile must be installed
using a segmented H-trim
channel which is placed between
them to hold the slat wall tile in
place from above. 40" high panels
do not utilize the H-trim channel
and segmented tile. The top cap
is used to hold the slat wall tile in
place as shown in Detail E.
1. In a typical slat wall tile
installation, first install a “bottom
trim channel” into the panel frame
“vertical posts”. Position the
bottom trim channel as illustrated,
and hook the top lip into the
bottom P-slot notches in the
4-Slat Wall Tile Installation
bottom
trim channel
H-trim
channel
standard
segmented tile
standard
segmented tile
slat
wall tile
end-of-run
trim clip
Rare Earth Magnets used with this product. The magnets can
be harmful to pacemaker wearers and others with medical
devices. Pacemaker wearers should stay at least one
foot away from the steel tiles.
vertical posts. Push trim channel
down into the slots to secure
(Figure 4).
Note: Standard tiles have vertical
tile stiffeners installed to the back
side. At one end of each stiffener
the tabs are extended out, and at
the other end they are not. The
end with the tabs extended is the
top of the tile.
2. Position the standard tile such that
the “open tabs” at the top of the
vertical tile stiffeners are at the top
of the panel frame (Figure 4).
3. Hold the tile up, then center and
nest the bottom of the tile into the
bottom trim channel. Push the
top of the tile against the panel
frame and lift such that the tabs
of the stiffeners enter the P-slots.
Push in and down gently to allow
tile bottom to nest down into the
bottom trim channel (Figure 4).
Note: Unite tiles do not hang
from the stiffener tabs. Support of
the tiles is provided by the bottom
trim channel. The tabs simply
keep the tile from tipping away
from the panel frame.
4. Next, position the slat wall tile
as illustrated, with the integral
H-channel facing down, and
set onto the top of the lower
segmented panel. Hold the slat
wall tile from tipping away and
set a segmented H-shape trim
channel onto the top of the slat
wall tile, such that the wide flange
of the channel is behind the tile as
illustrated. Ensure the tabs on the
back side of the slat wall tile nest
into the “P” slots on the vertical
post. Finally, install a segmented
tile above the H-shape trim as
illustrated (Figure 4).
Note: Eight inch high segmented
panels will have hook and loop
pads instead of stiffener tabs for
securing to vertical posts.
slat
wall tile
32” standard
segmented tile