40
Unite
®
Panel System - Gallery Panel Installation
Assembly Instructions
Assemble units as described herein only. To do otherwise
may result in instability. All screws, nuts and bolts must be
tightened securely and must be checked periodically after
assembly. Failure to assemble properly, or to secure parts
may result in assembly failure and personal injury.
Gallery Panel Divider
Intersection Post Installation
Note: The divider post is required
for the installation of divider gallery
panels. The divider post should be
planned with the initial installation,
but can be added anytime. If the
divider panel is a retrofit or add-on,
it is important to know that the
divider post is 1.4” wide and will
increase the Unite panel run by 1.4”.
If installed at the initial installation,
the Unite panel frames should
have been adjusted and leveled per
standard Unite instructions. The
divider post should be installed at
the same time as the Unite panel
run.
Divider gallery panels can be
installed to a Unite panel run, at an
intersection with same height Unite
panels, or with change-of-height
Unite panels. The height of the
divider post is always the same
height as the lowest Unite panel.
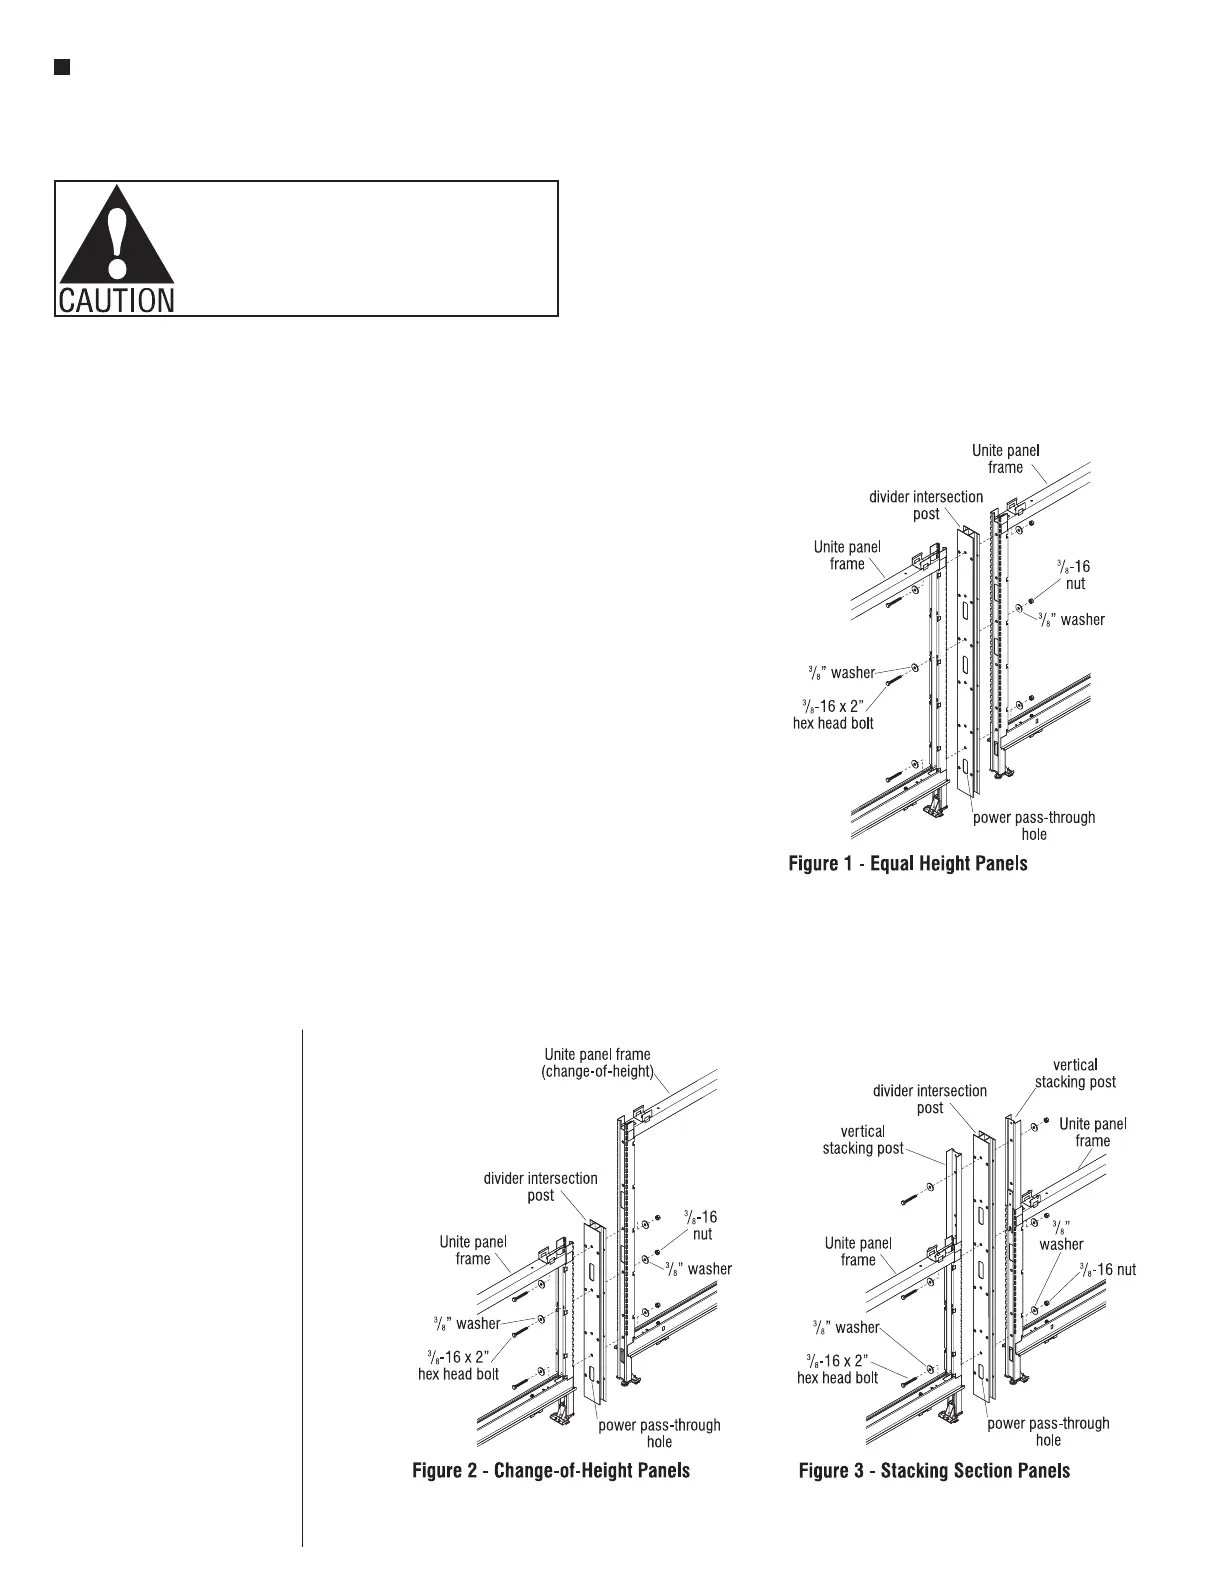
1. Determine the bottom of the
divider post, which contains the
power pass-through hole and
position it as illustrated to the
end of the lowest Unite panel
along the panel run. Place
3
/
8
" flat
washers onto three
3
/
8
-16 x 2"
hex head bolts. Insert a
3
/
8
-16 x 2” hex head bolt with
washer through the highest hole
in the unite frame and divider
post. Install a second bolt with
washer at the lowest hole and
install a third bolt with washer
through any hole between the top
and bottom bolts (Figures 1 & 2).
2. Next, mate the second Unite panel
to the exposed face of the divider
post while aligning all three
exposed bolts through the Unite
panel frame. Install
3
/
8
” washers
and hex nuts to all three bolts
and secure the intersection firmly
(Figures 1 & 2).
3. For panels with stacking sections,
the divider post can extend to
the top of stacking sections. As
with standard Unite, assure all
stacking sections are installed
prior. Determine the bottom of
the divider post, which contains
the power pass-through hole.
Position the divider post to
the end of the Unite panel with
stacking panel. Place
3
/
8
" flat
washers onto three
3
/
8
-16 x 2"
hex head bolts. Insert a
3
/
8
-16 x 2” hex head bolt through
the highest hole in the Unite
frame stacking section and
divider post. Install a second bolt
at the lowest hole of the Unite
frame, and install a third bolt
through any hole between the top
and bottom bolts (Figure 3).
4. Next, mate the second Unite
panel with stacking panel to the
exposed face of the divider post
while aligning all three exposed
bolts through the Unite panel
frame with stacking panel section.
Install
3
/
8
” washers and hex nuts
to all three bolts and secure the
intersection firmly (Figure 3).