Unite
®
Panel System - Panel Frame-to-Genius Wall
Assembly Instructions
Assemble units as described herein only. To do otherwise
may result in instability. All screws, nuts and bolts must be
tightened securely and must be checked periodically after
assembly. Failure to assemble properly, or to secure parts
may result in assembly failure and personal injury.
19
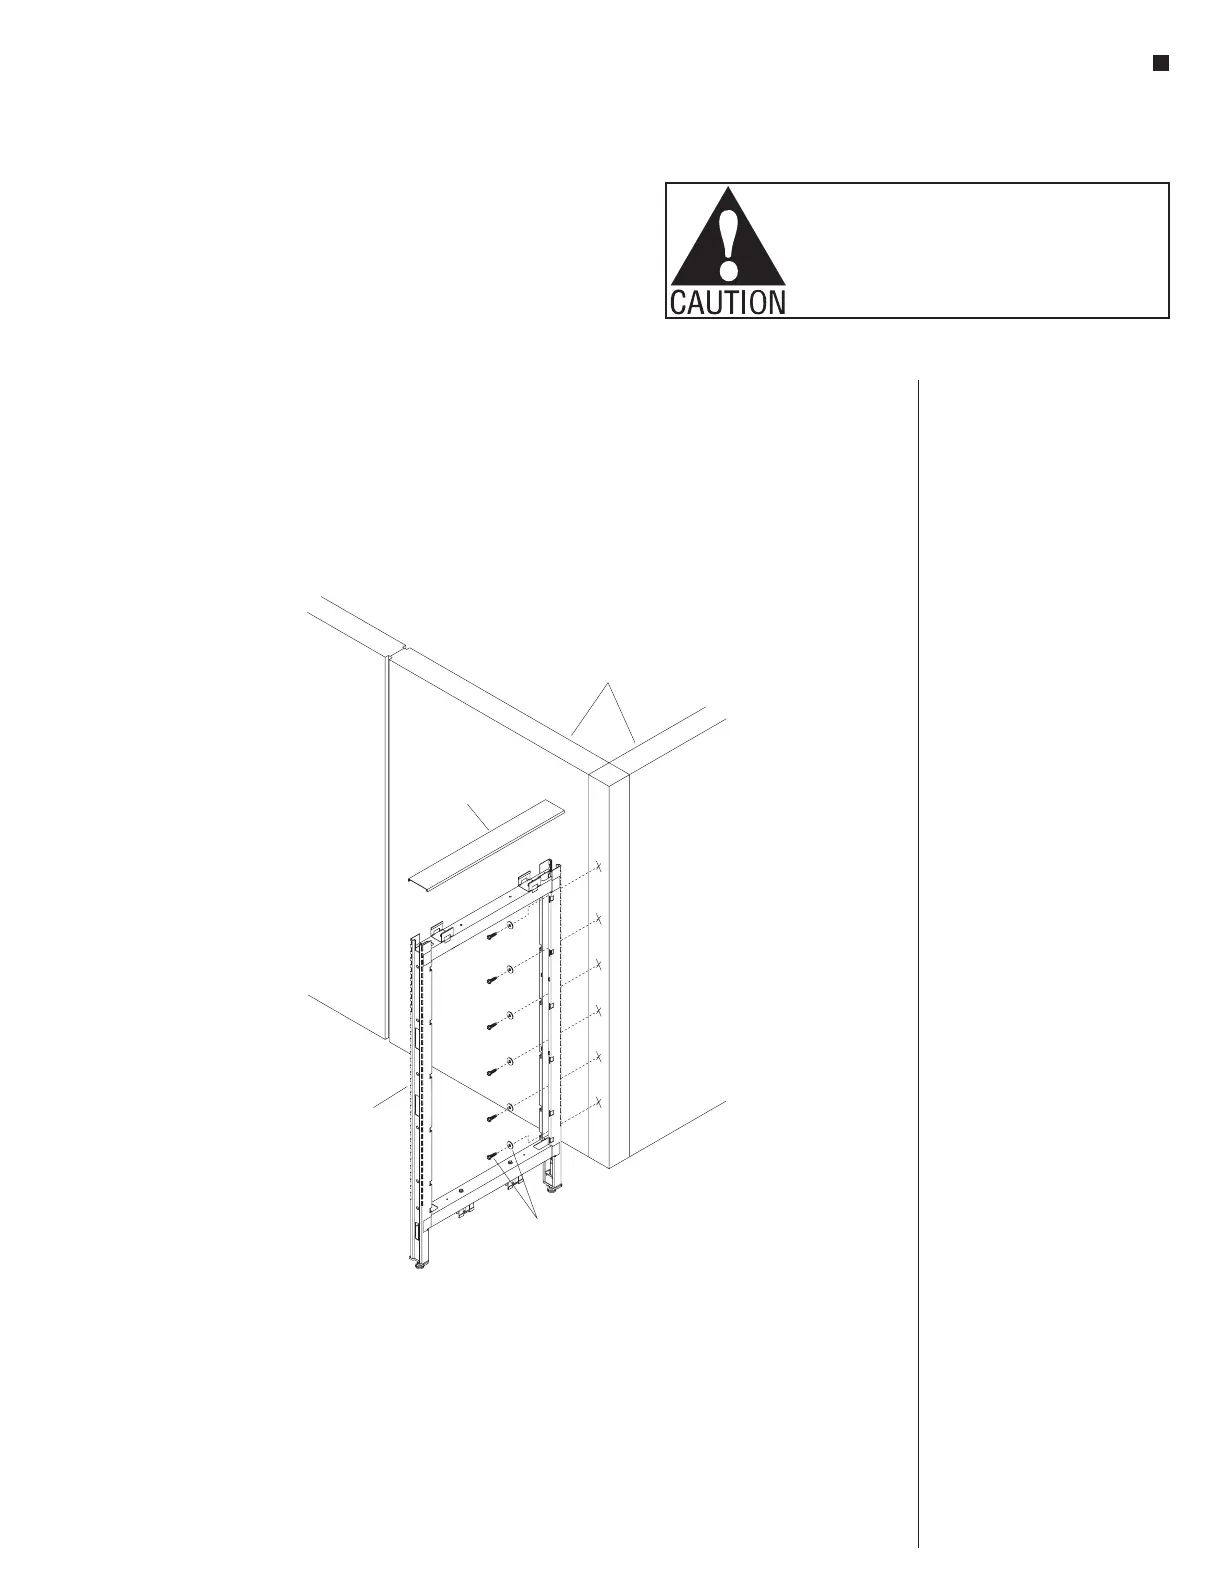
23 - Unite-to-Genius Wall Universal
Unite
panel
frame
top cap
(for alignment)
11
/ -14 x 1 /
hex head self-drilling screw
& shoulder washer
44
”
Genius Wall
panels
Universal Panel Frame
Start - Unite-to-Genius Wall
Installation
Note: Universal connections
of the Unite Panel System to
Genus Wall utilize self-drilling
screws and shoulder washers.
Corner installation is shown,
although installation of Unite can
be to corner, in-line or 3-way
conditions of a Genius Wall
section.
1. Position Unite Panel frame up
to Genius Wall at the desired
installation location. If installing
to a corner (Figure 23),
temporarily install a top cap to
the top of the Unite panel frame.
Use the width of the installed top
cap to align the frame location
for flush mounting to corner
locations (Figure 23).
2. Properly plumb and align the
Unite panel frame to the mounting
location, then using six
1
/
4
-14 x 1
1
/
4
” hex head
self-drilling screws & shoulder
washers, run the self-drilling
screws through the Unite panel
frame mounting locations, and
into the aluminum trim of the
Genius Wall (Figure 23).
Important: Using a
power-driver, twist self-drilling
screws in to a snug-fit only.
Take care to not over-tighten the
mounting screws.