64
Unite
®
Panel System - Glass Dividers
Assembly Instructions
Assemble units as described herein only. To do otherwise
may result in instability. All screws, nuts and bolts must be
tightened securely and must be checked periodically after
assembly. Failure to assemble properly, or to secure parts
may result in assembly failure and personal injury.
Glass Divider Installation
Tools Required
• Level
• Power Drill Driver
•
5
/
16
” Drill Bit
•
7
/
16
” Box Wrench
• #2 Phillips Screw Driver
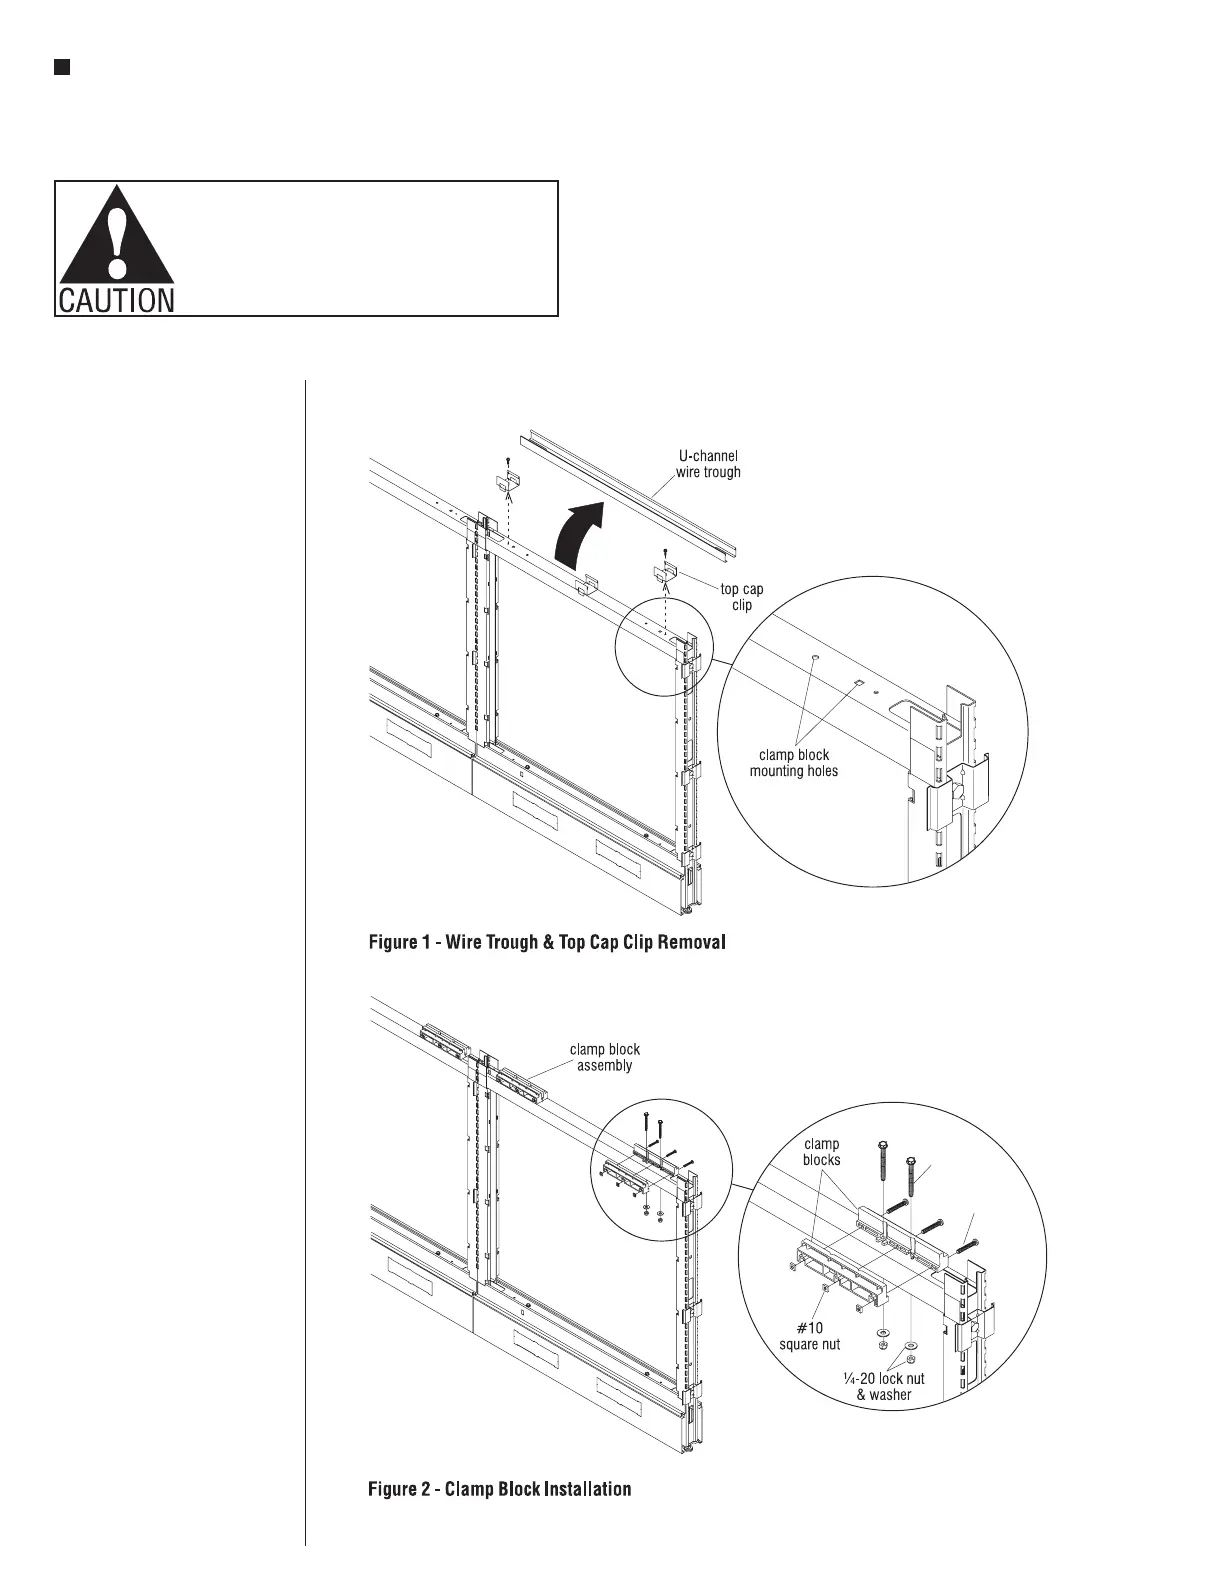
Note: The top of your frame
may contain a U-channel wire
trough and two or three top
cap clips, depending on date of
manufacture.
1. If so equipped, unscrew and
remove each U-channel wire
trough and any outer top cap
clips from the top of the Unite
panel frame which will receive
glass divider(s). Any
center-installed top cap clip
can remain on the frame. The
removed items may be discarded
as they will not be used again
(Figure 1).
Note: If the frame is an older
model, the two holes for
mounting the clamp blocks to
each side of the frame may need
to be drilled out, using a
5
/
16
”
drill bit.
2. Loosely assemble the pair of
clamp blocks as illustrated using
#10-24 x 1.5” Phillips screws
and square nuts. Do not tighten
completely. Position the
clamp-block over the indicated
holes (the outer hole should be a
square hole, see detail at Figure 1
and insert two
1
/
4
-20 x 2.5” hex
head bolts down through the top
of the panel frame. Install a flat
washer and
1
/
4
-20 lock nut onto
each hex bolt and tighten snug to
frame. Do not tighten completely
(Figure 2).
3. Repeat step two and install clamp
blocks to other end of panel
frame top (Figure 2).
#10-24 x 1.5”
Phillips screw
1
/ -20 x
4
2.5”
hex bolt