18
Unite
®
Panel System - Panel Frame-to-Genius Wall
Assembly Instructions
Assemble units as described herein only. To do otherwise
may result in instability. All screws, nuts and bolts must be
tightened securely and must be checked periodically after
assembly. Failure to assemble properly, or to secure parts
may result in assembly failure and personal injury.
k-lock nut
& flat washer
Genius Wall
panels
Genius Wall
connecting trim
(removed, then cut to fit)
Unite Panel
frame
perpendicular
start track
self-drilling
screw
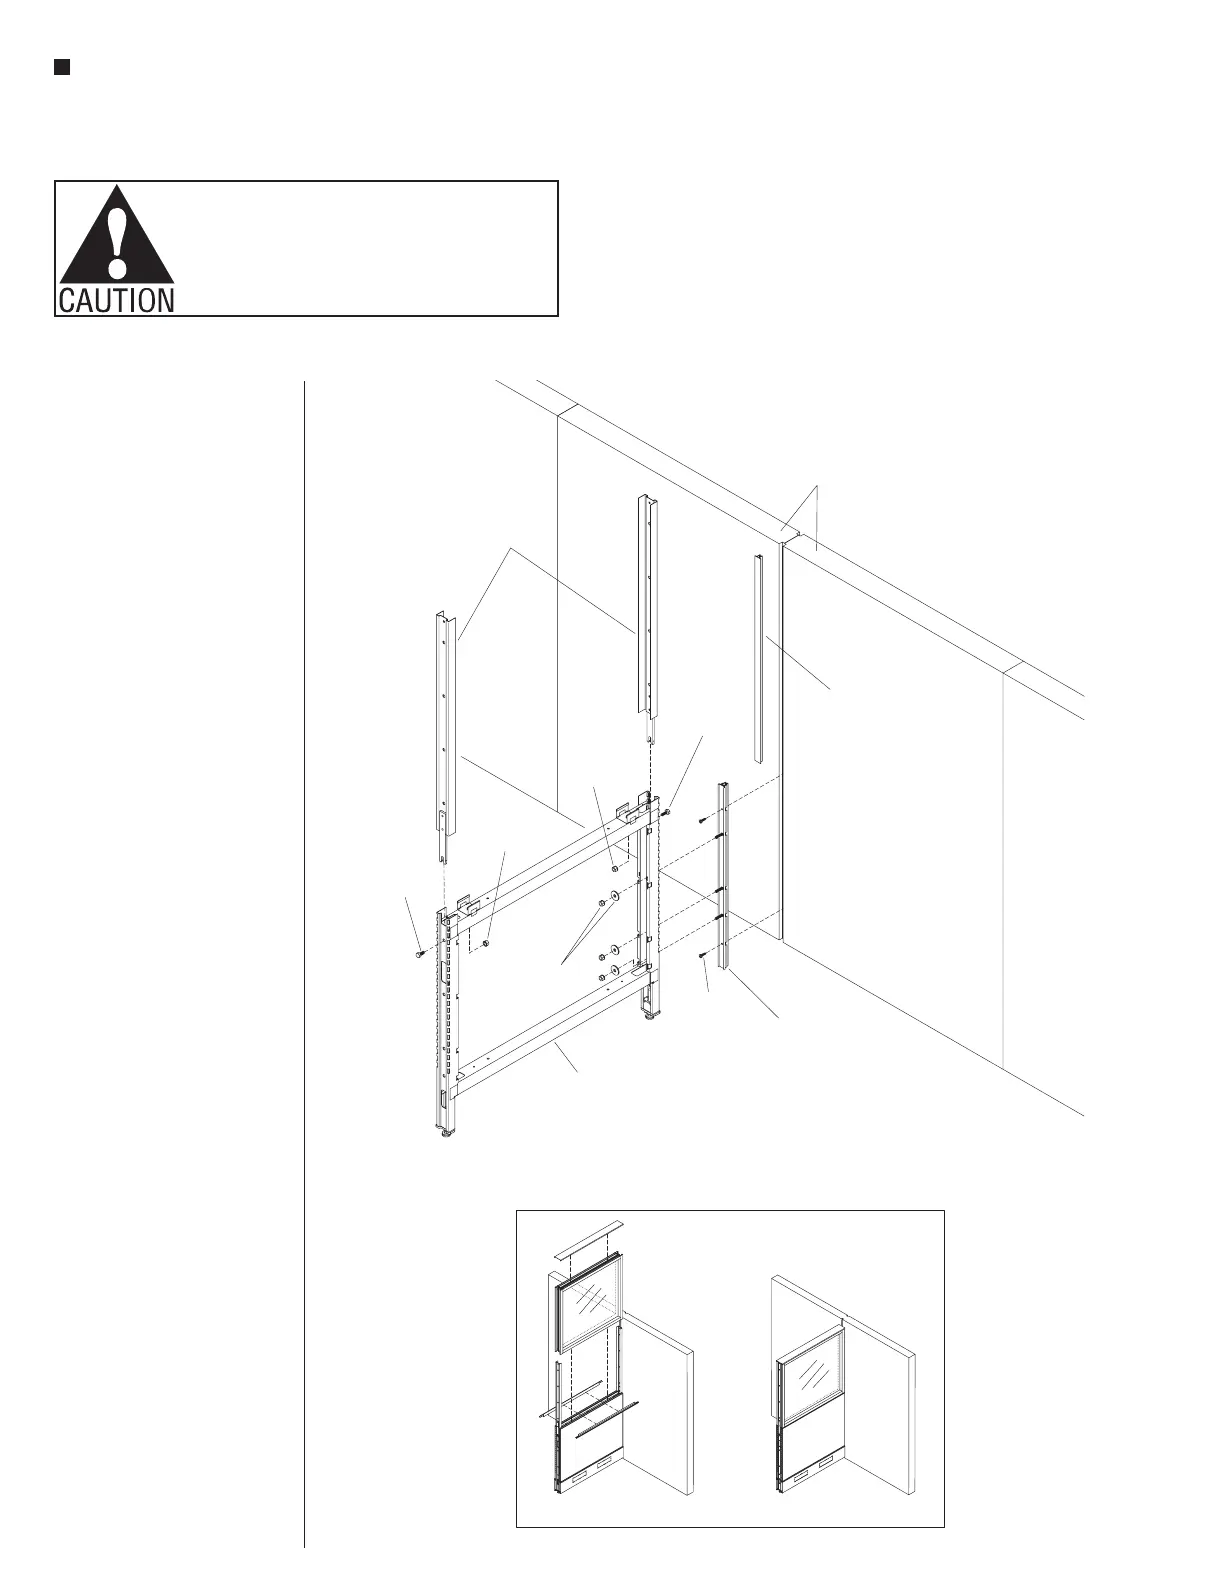
22 - Unite Stacking Sections (aluminum frame) -Panel Frame-to- Genius Wall
3
3
/ -16 x /
bolt
8
4
”
33
/ -16 x /
bolt
8
4
”
3
/ -16
k-lock nut
8
vertical
stacking posts
3
/ -16
k-lock nut
8
Perpendicular Panel
Start - Unite Stacking Sections
(aluminum frame) -
Panel-to-Genius Wall
Installation
Note: Perpendicular connections
of the Unite Panel System
to Genius Wall utilize a
“Perpendicular Start Track”,
which replaces a section of
Genius Wall connecting trim and
is installed at the union of two
Genius Wall panels.
Important: The vertical stacking
post at the location where the
Unite panel frame meets the
Genius Wall panel, must be
installed to the Unite panel frame
before Unite frame attaches to
Genius Wall.
1. Using a
3
/
8
-16 x
3
/
4
” bolt and
k-lock nut install a vertical
stacking post to the Unite frame,
at the side of the frame which will
install to the Genius Wall joint
(Figure 22).
2. Follow instructions,
“Perpendicular Panel Frame
Start - Unite-to-Genius Wall
Installation”, steps 1 through 4
(Figure 21) on previous page to
install Unite panel with vertical
stacking post onto Genius Wall
(Figure 21).
3. Install all remaining vertical
stacking posts to Unite frames by
referencing "Stacking Sections
(aluminum frame) - Full-Height
Intersection Assembly"
instructions on page 9 and
"Stacking Sections (aluminum
frame) End-of-Run & In-Line
Assembly" instructions on
page 13. See Detail A below.
Note: The perpendicular start
should fit flush to the Genius Wall
panels when properly installed.