28
Unite
®
Panel System - Electrical Installation
Assembly Instructions
Assemble units as described herein only. To do otherwise
may result in instability. All screws, nuts and bolts must be
tightened securely and must be checked periodically after
assembly. Failure to assemble properly, or to secure parts
may result in assembly failure and personal injury.
10-Wire Lifted Base Power
Infeed Installation
Note: All panel frames must
be mechanically connected
together, with all 10-wire rigid
wireways and panel-to-panel
power connections appropriately
installed before adding power
infeed, or connecting infeed to
power source.
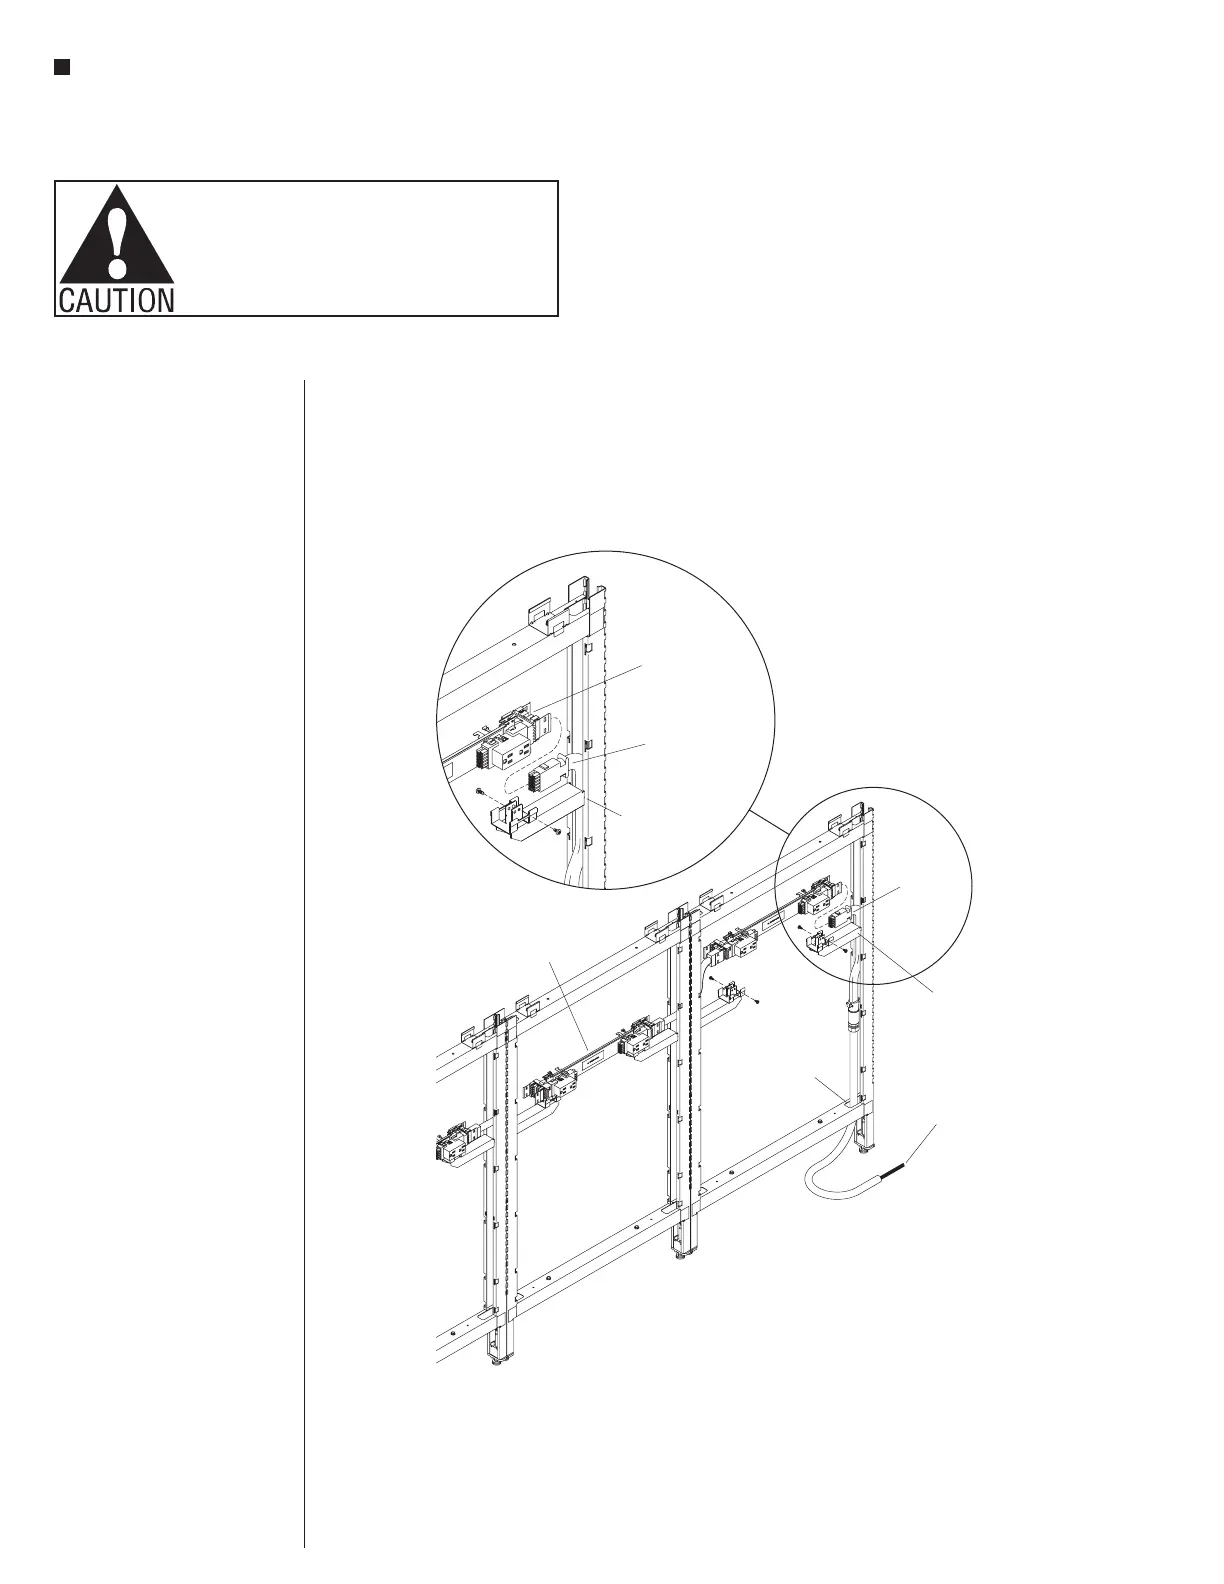
1. Position the 10-wire lifted base
power infeed inside the vertical
channel of the frame upright,
and route the plug end of the
infeed up and over the top of the
beltway-height support bracket as
illustrated (Figure 12).
Note: It is easier to plug the
10-wire lifted base power infeed
into the 10-wire rigid wireway
if the wireway is disconnected
from the beltway-height support
brackets first.
2. Remove the screws attaching the
10-wire rigid wireway to the
beltway-height support brackets,
move the wireway away slightly
and plug the power infeed into
the rigid wireway. Once secure,
re-attach rigid wireway to support
brackets (Figure 12).
3. Lastly, route the 10-wire end of
conduit down through the notch
in the lower horizontal rail next to
the vertical frame upright and let
rest on the floor (Figure 12)
Note: The power infeeds are to
be connected to the power source
by a qualified electrician who
must follow all state and local
codes at the building site and
check the electrical integrity of
the finished system.
10-wire
rigid wireway
support
10-wire lifted
base power
infeed
(plug end)
10-wire
lifted base
power infeed
(10-wire end)
notch of
lower horizontal
rail
12-10-Wire Lifted Base Power Infeed
10-wire lifted
base power infeed
(plug end)
beltway-height
support
10-wire
rigid wireway