Unite
®
Panel System - Gallery Panel Trim Installation
Assembly Instructions
Assemble units as described herein only. To do otherwise
may result in instability. All screws, nuts and bolts must be
tightened securely and must be checked periodically after
assembly. Failure to assemble properly, or to secure parts
may result in assembly failure and personal injury.
43
Gallery Panel Dead-End
Change-of-Height Trim
Installation
Note: This kit is used when a
change-of-height exists along
the Unite panel run at the same
intersection as a divider gallery
panel. The trim is 1.4” Thick to
match the thickness of the divider
post. The kit contains dead-end
change-of-height trim, top cap, and
trim clips.
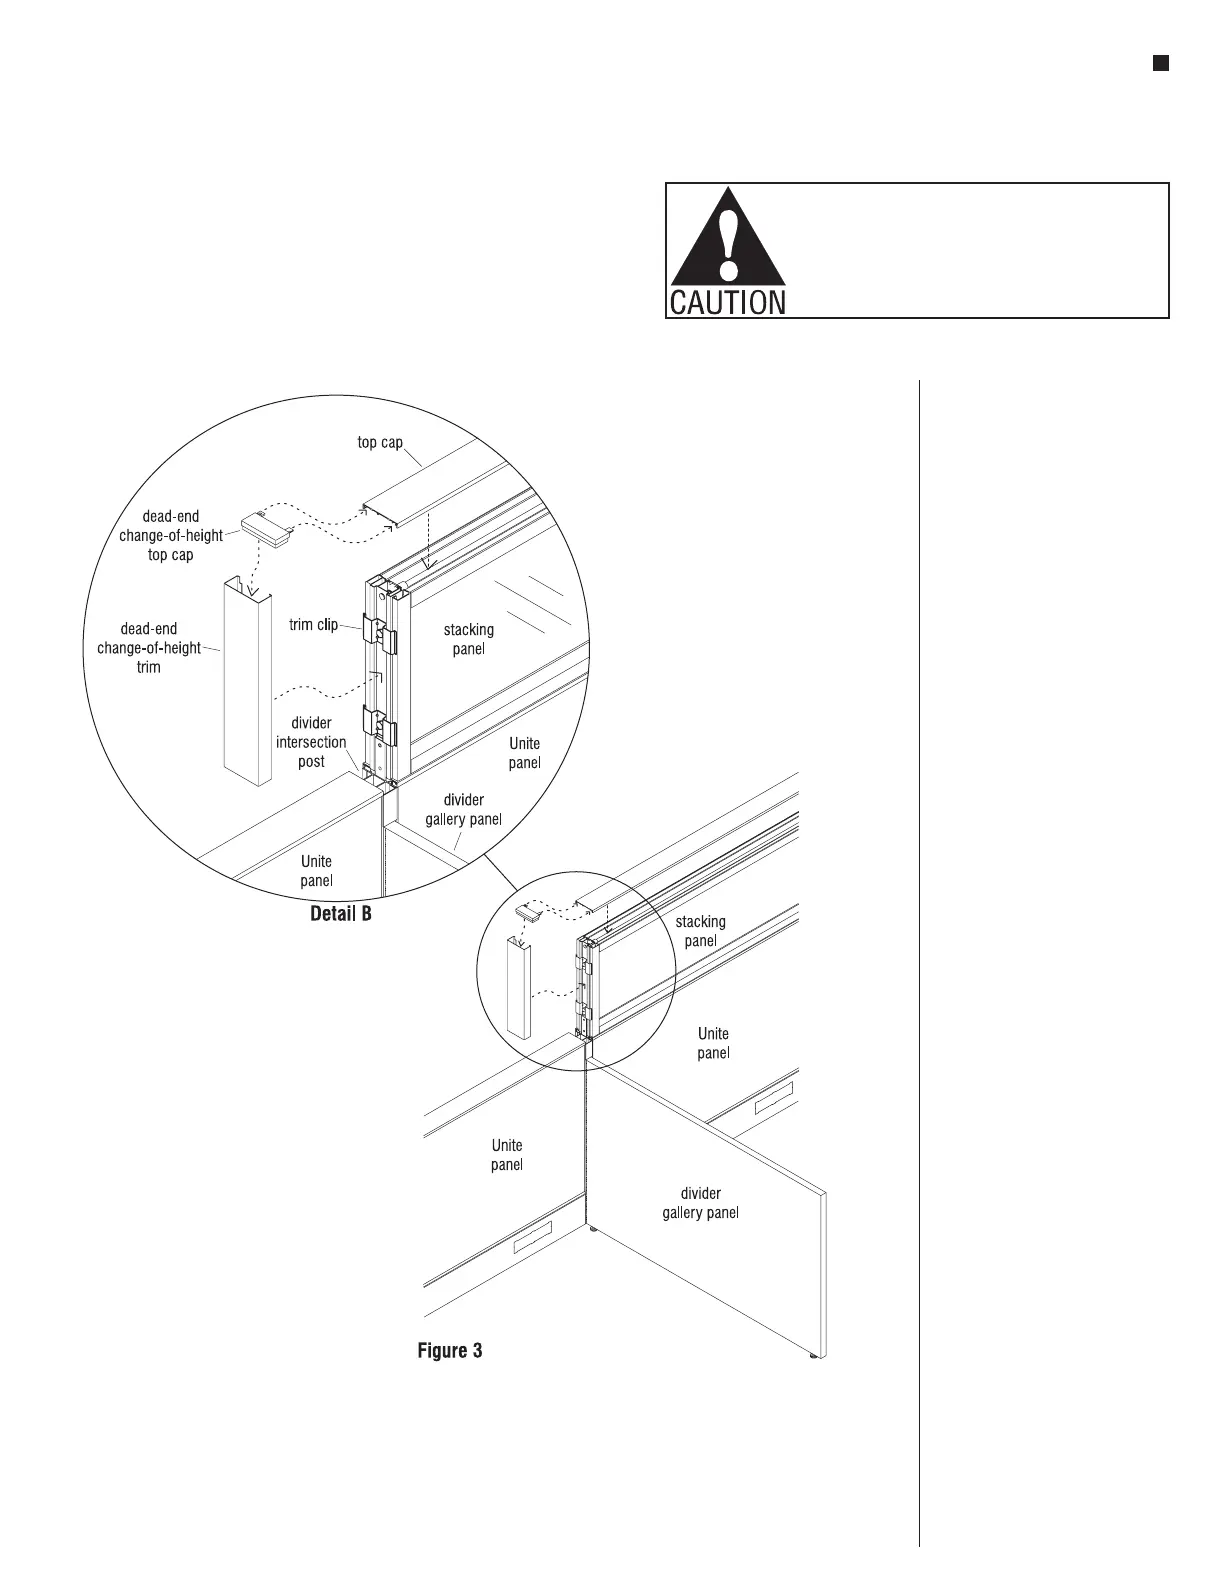
1. Before dead-end change-of-height
trim can be attached, trim clips
must be installed. Please see
page 15 "End-of-Run Trim Clip
Installation" for instructions.
2. Position the dead-end change-of
height trim on the trim clips by
hooking the trim on one side of
the clips and then snap to other
side of the clips (Figure 3 &
Detail B).
3. Next, install dead-end
change-of-height top cap
horizontal tabs into Unite
panel top cap. Seat the top cap
assembly into the top of dead-end
trim and onto the top of the Unite
panel at the same time (Figure 3
& Detail B).