76
Assemble units as described herein only. To do otherwise
may result in instability. All screws, nuts and bolts must be
tightened securely and must be checked periodically after
assembly. Failure to assemble properly, or to secure parts
may result in assembly failure and personal injury.
Unite
®
Panel System - Stacking Sections Stacking Panel Frame Assembly
Assembly Instructions
connector
block
light
shield
12 - Stacking Panel Sections with Fabric, Markerboard or Slat Wall
Tiles (steel frame) -Full-Height Intersection Assembly
33
/ -16 x /
bolt & washer
8
4
”
connector
block
stacking
section tile
stacking
trim rails
vertical
trim
stacking section
tile (fabric)
stacking section
tile (markerboard)
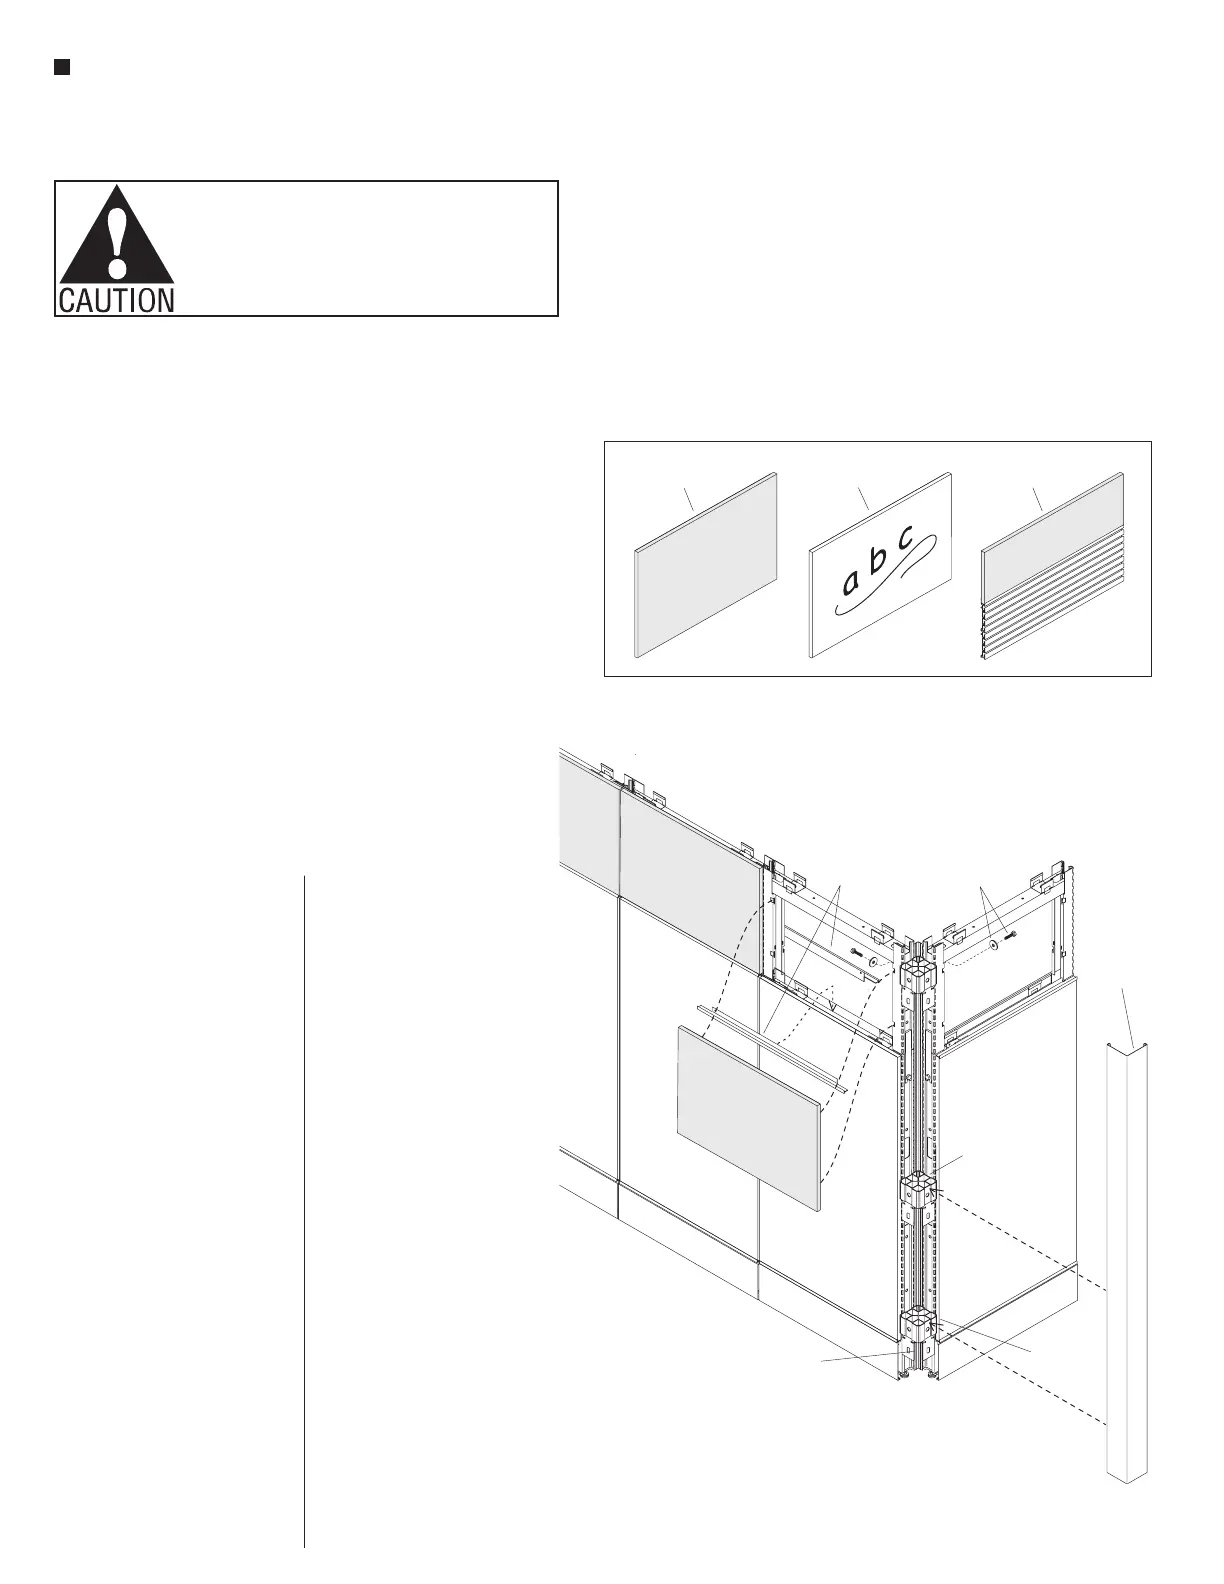
G-Stacking Section (steel frame) - Tiles
stacking section
tile (slat wall)
fabric
Stacking Sections (steel
frame) - Tile Assembly
Note: Tiles must be installed to
stacking section posts after all
panel components and exterior
tiles are installed to lower panel
frames. Re-install all lower panel
frame tiles that where removed
from previous steps before
proceeding.
Note: Three-sided
steel-construction stacking
sections (steel frame) utilize
exterior-mounted tiles of either
fabric, markerboard or slat wall
option (Detail G, page 76).
1. Stacking trim rails must fit
between the top of the lower
panel tile and the bottom of the
stacking section tile. Install two
trim rails; one on each side of the
panel. Ensure the large flange is
oriented toward the center of the
panel.
2. If the stacking section tile is
fabric or slat wall, hold the tile
up, then center and nest the
bottom of the tile into the bottom
of the stacking trim rail. Push
the top of the tile against the
frame and lift such that the tabs
of the stiffeners enter the P-slots.
Push in and gently allow tile to
nest down into the bottom trim
channel (Figure 12).
Note: Assembly of all standard
markerboard tiles are different
than standard fabric tiles. Instead
of brackets and tabs like Unite
fabric tiles, markerboard tiles
have two pre-assembled magnets
located on the back of the tile.
Steps to assemble markerboard
tiles require no tools.
3. If the stacking section tile is
markerboard, hold the tile up,
then center and nest the bottom
of the tile into the bottom of the
stacking trim rail. Push the top
of the tile against the frame.
Magnets will hold the tile against
the frame (Figure 12).
Note: Unite stacking section tiles
do not hang from the stiffener
tabs or frame. Support of the
tiles is provided by the stacking
trim rails. The tabs on fabric tiles
simply keep the tile from tipping
away from the frame. Magnets
simply keep the tile from tipping
away from the frame until the top
cap is installed providing final tile
retention.
5. Ensure each tile is installed
securely and even onto the lower
panels. Alignment along the top of
adjacent stacking panel tiles must
be even for trim to fit properly
(Figure 12).
Stacking Sections (steel
frame) - Full-Height Vertical
Intersection Trim Assembly
1. Hang the full-height vertical
intersection trim onto the
three connector blocks at the
intersection (Figure 12).