Matrix 2360 Programmable Shear User Manual - Section 6
12-092600 A 43
11. Remove the Automatic Roll Feed
mechanism from its box and
unwrap it, separating the screws
and washers.
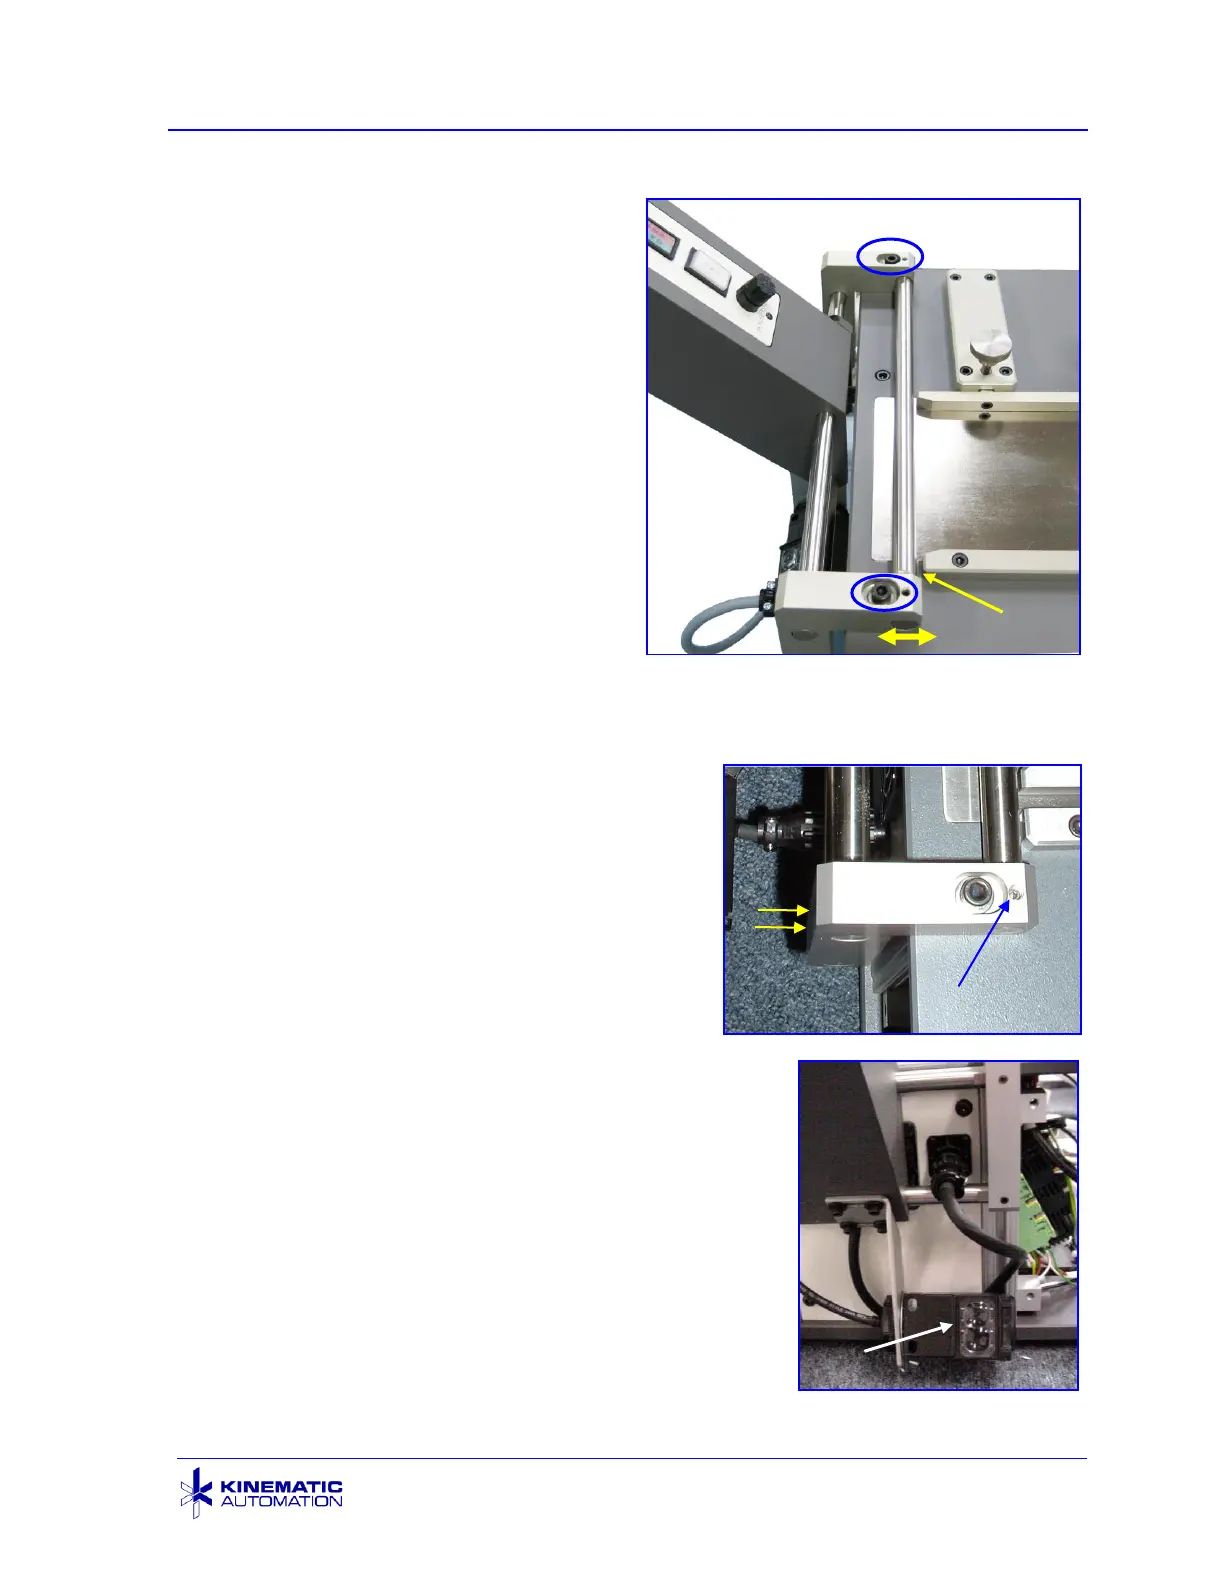
12. Place the new washers and bolts in
the slots provided on the roll feed
mounting bracket, then place the
entire assembly on the infeed end.
Loosely screw in the new bolts
shown in the red circles.
13. The assembly should not press on
the guide rails. Tighten new bolts
after adjusting.
14. If the bolts do not line up with the
holes in the M2360 base, the distance between the bracket ends can be
adjusted slightly. There are six setscrews (one on each end of each bar) on
the support frame. Loosen the three setscrews on one bracket slightly using a
3/32” hex head driver, and adjust the
length of the frame so the bolts will slide
into the holes on the M2360. Tighten
these setscrews after making any
adjustment.
15. Plug the quick disconnect screw-in plug
on the roll feed power cord into the new
socket on the fan panel. Stow the cord so
that it does not interfere with the lenses of
the sensor.
16. Tilt the front panel into place, and secure it with
the screws saved for this purpose.
17. Plug the power cord into the equipment, and turn
on the power. The roll feed motor should begin
operation when there is no material hanging in
front of the loop sensor. Hold a piece of web
material about 50 cm (2”) in front of the sensor,
and the motor should stop. Check the fan. The
air should be blowing into the enclosure. Turn off
the power.