page 100 Appendix
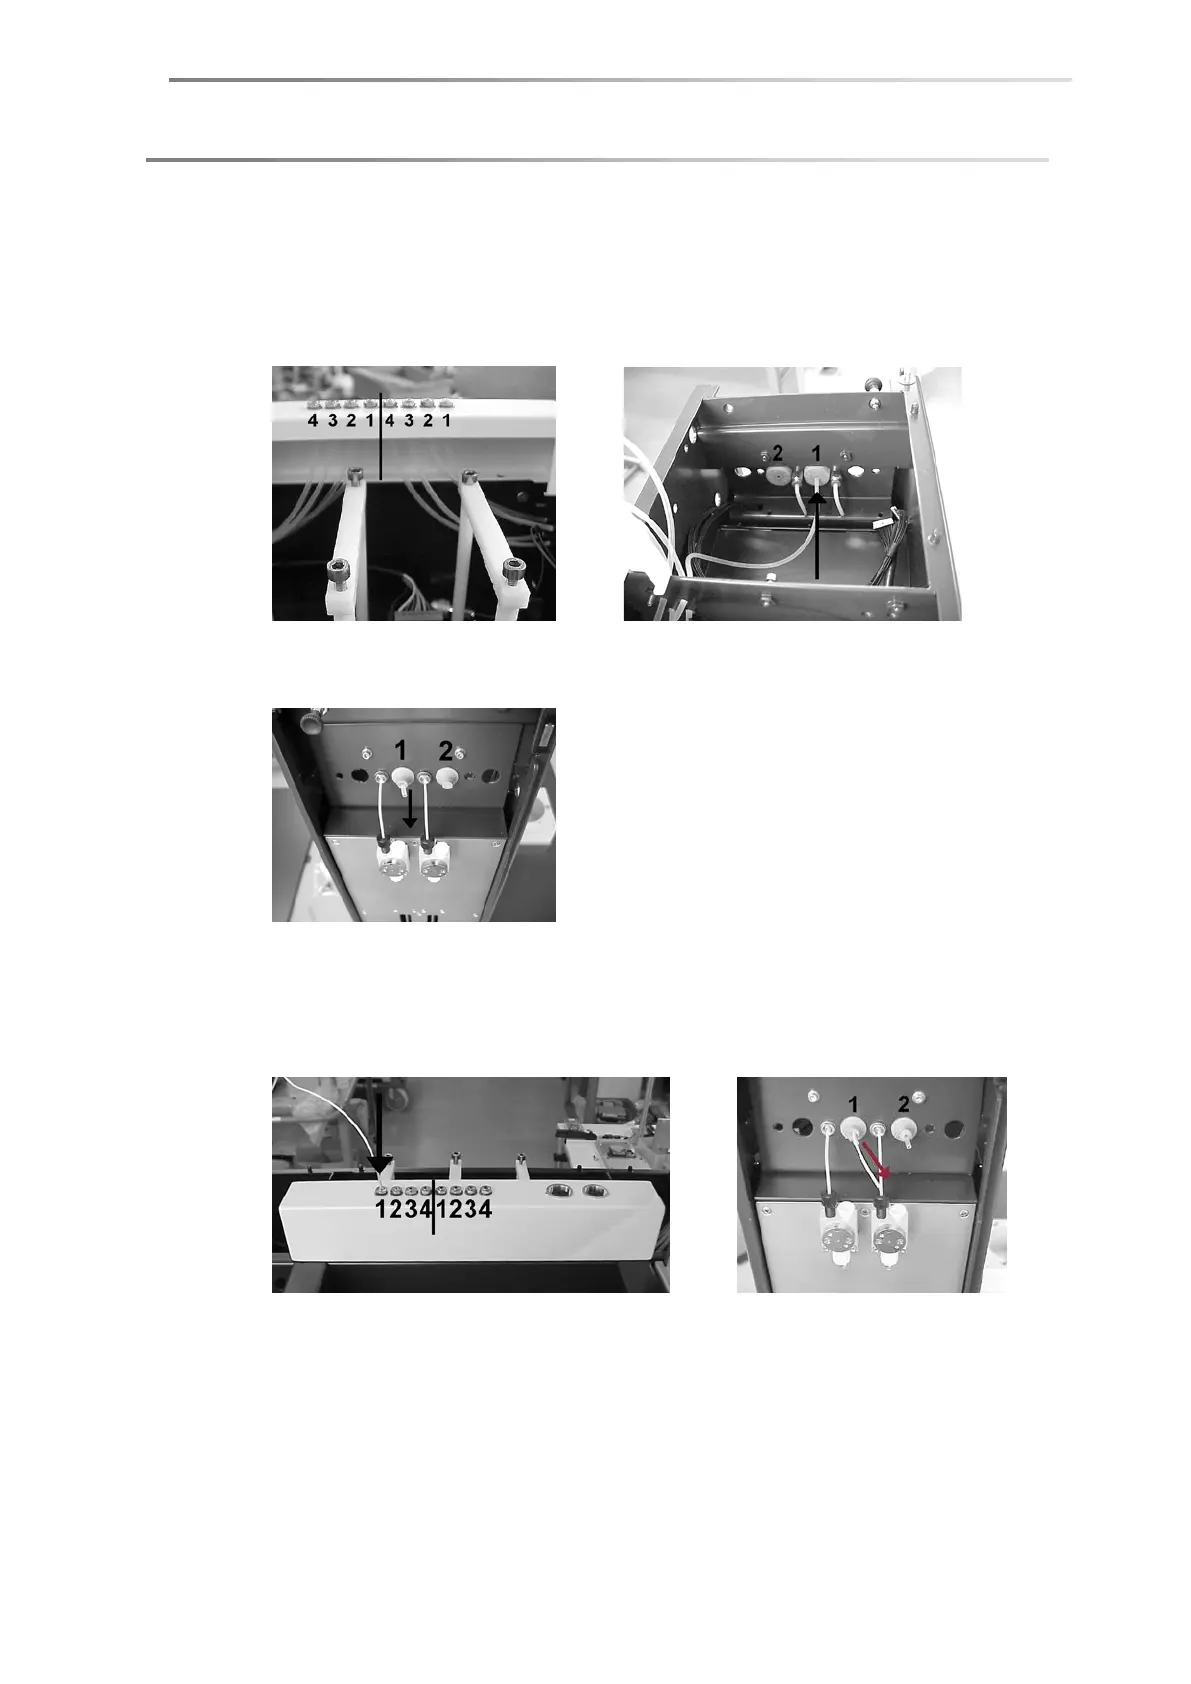
10. From the upper panel, eight tubes lead to the inside of the device. These tubes
serve as leads between syringes and dosing needle for the actual dosing tubes
that are assembled in a later step.
The following figure (rear view) shows the order of these tubes. Lead the tube
no. 1 to syringe position 1 (to the compartment for the first syringes).
11. Thread the tube through the pierced rubber stopper so that about 0.5 cm jut
out.
Proceed in the same way with the other tubes.
12. In the accessories case you find thin coloured tubes. Thread these tubes from
the upper side of the housing through the leading tubes until they reach the
compartments with the syringe driver units (the picture shows the front view).
For all further installation steps the colours of the accessories (fittings)
should suit the dosing tubes. It lends itself to use the colours as codes for
the test liquids used.
right left chamber
)
left right chamber