Appendix page 99
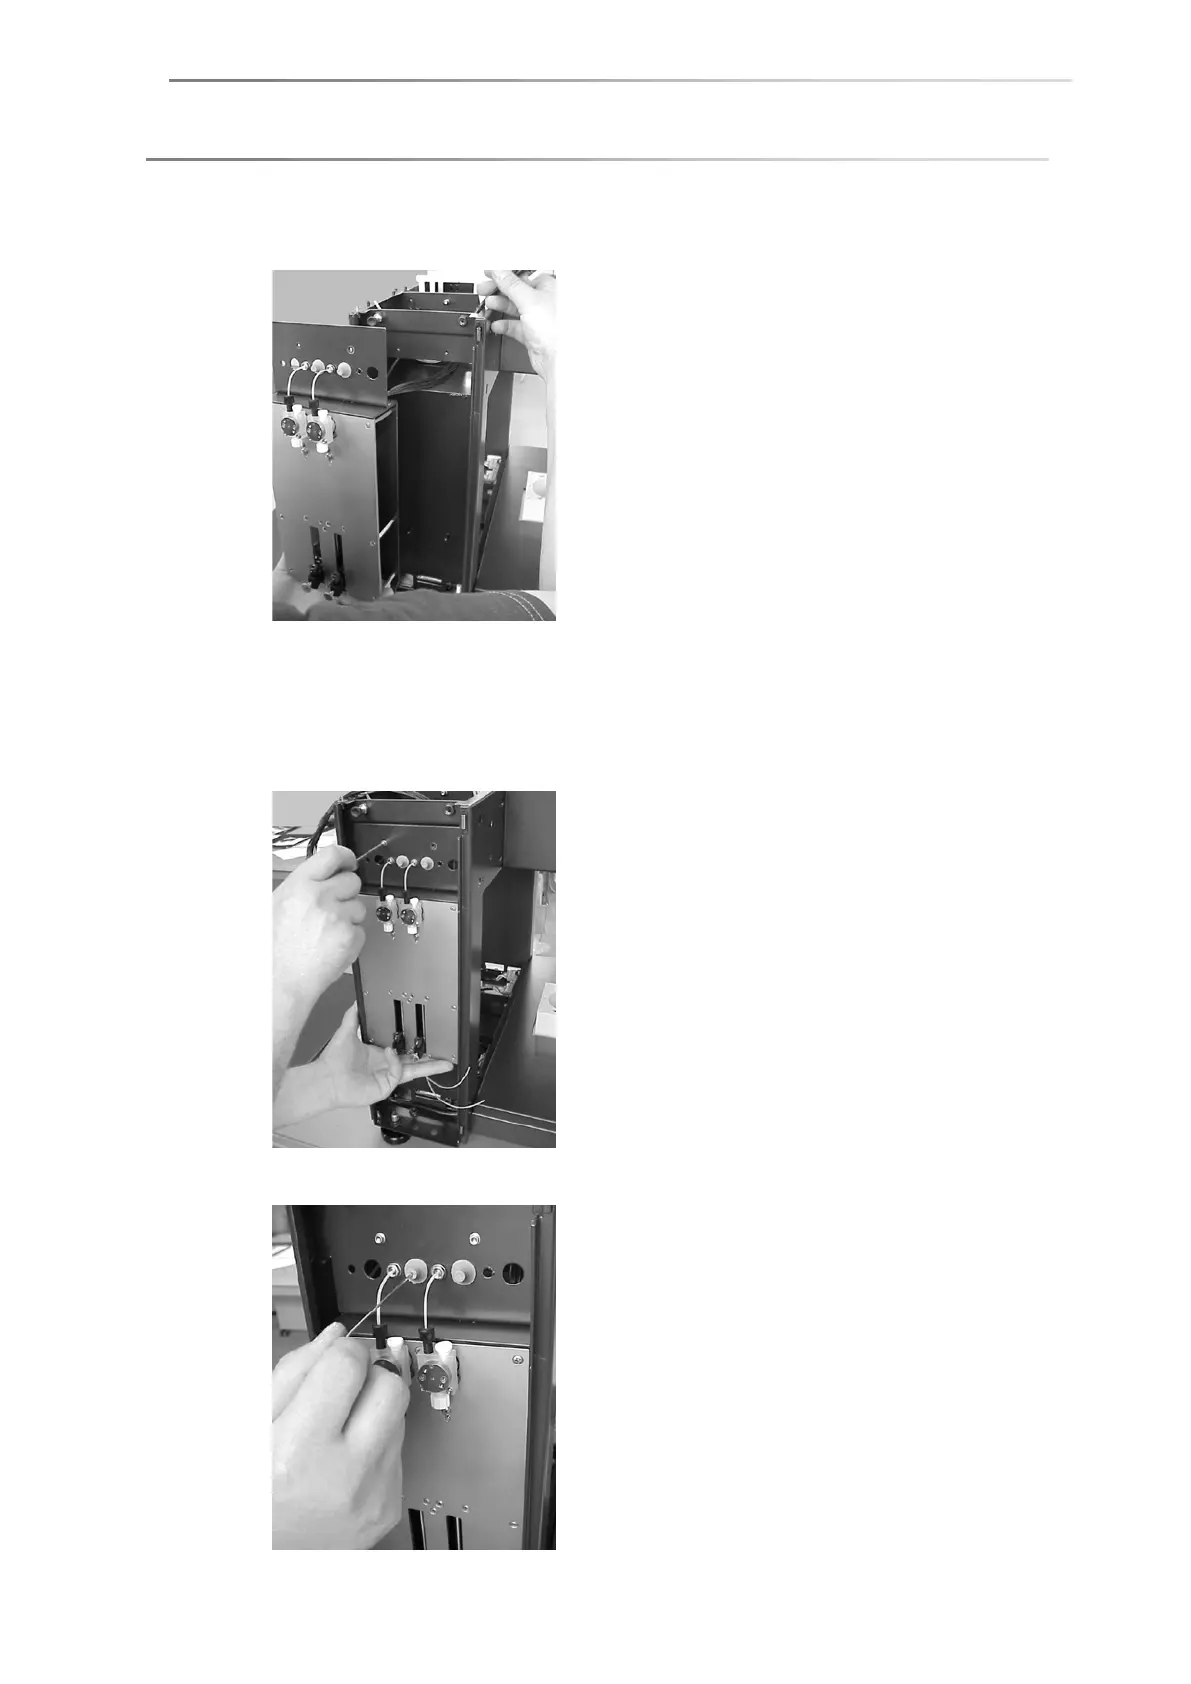
7. Lift the syringe driver unit to be assembled into the compartment and lead the
connecting cables through the gap that was previously covered.
If two different syringe driver units are to be assembled please pay attention
to the correct assignment to the left and right-hand compartment.
8. Fix the syringe driver unit (in example picture: unit with two drivers) with the
four previously removed hexagon socket screws using the corresponding holes.
9. Push through the rubber stoppers with a pointed object.