page 104 Appendix
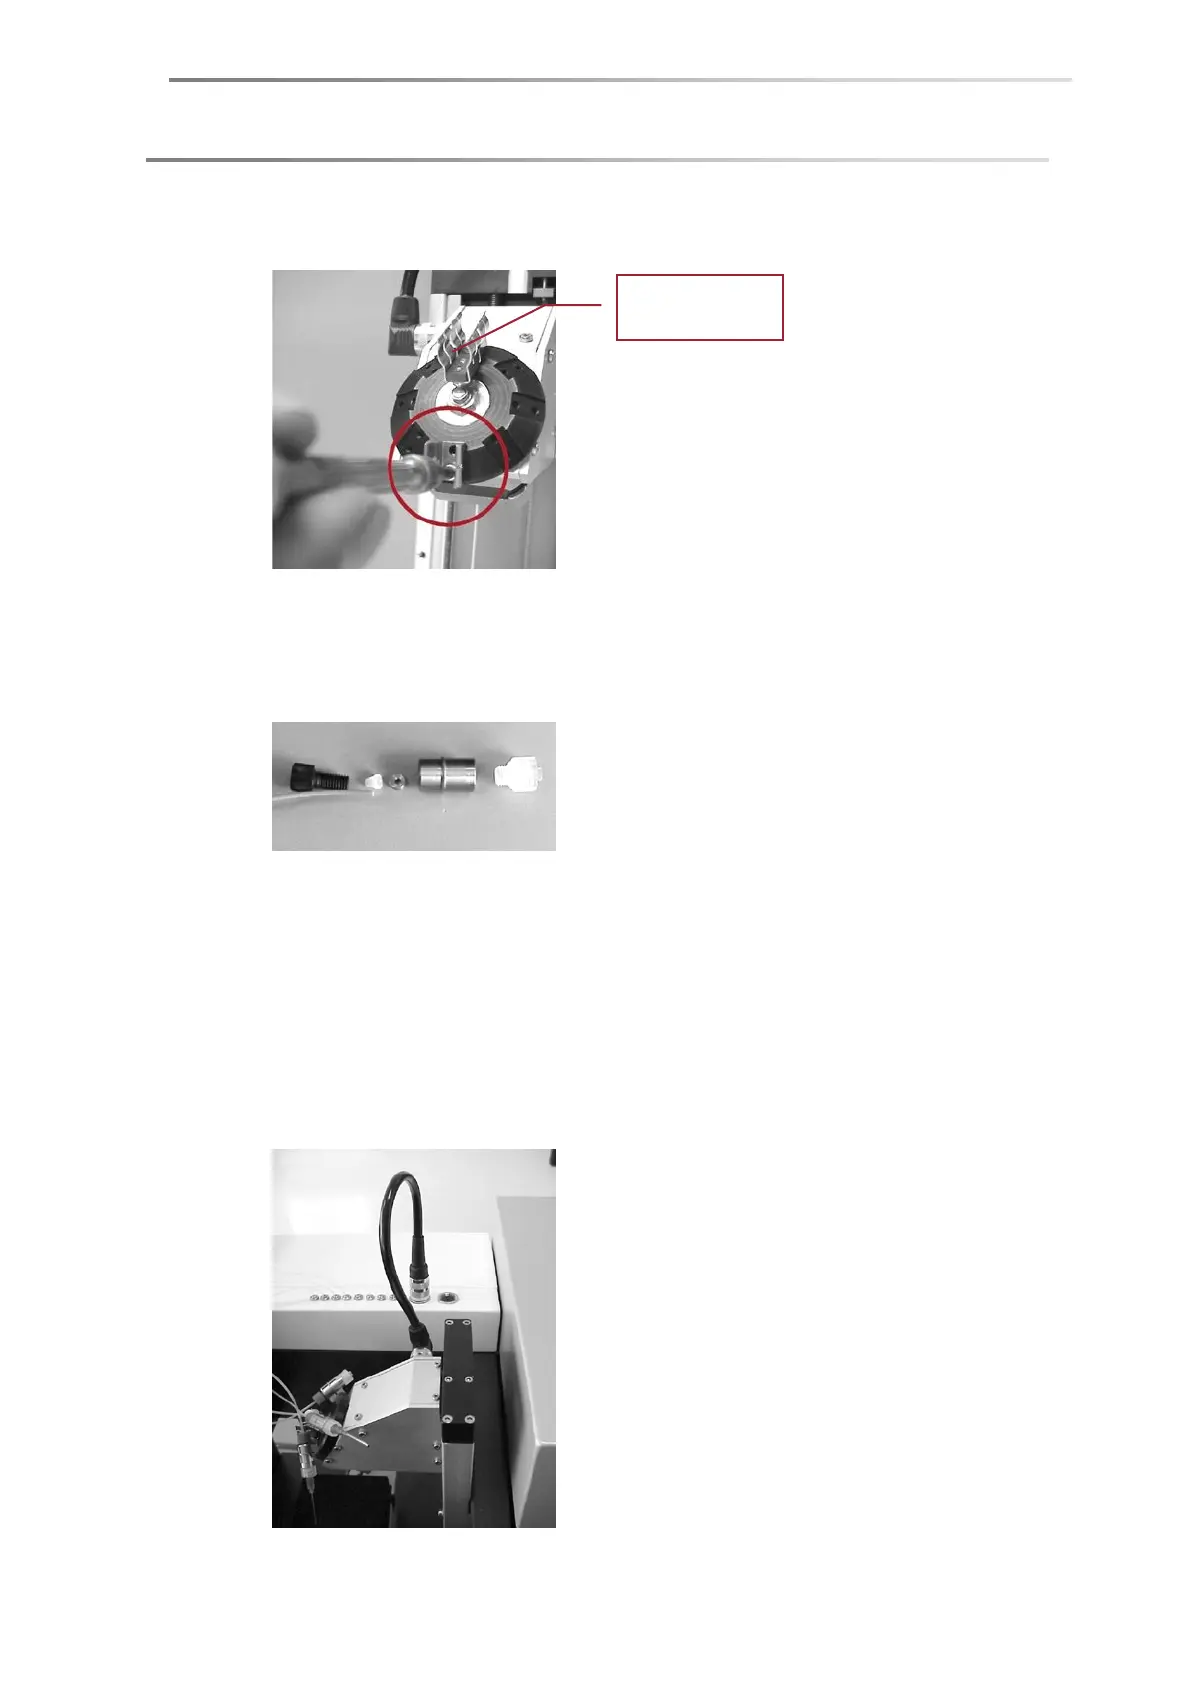
2. Screw the clamps with two screws each onto the required positions of the
syringe revolver. An extended clamp is to be used for the manual syringe.
3. Assemble the needle carriers onto the free tubes for the test liquid. You require
a needle adapter, a metal shell with a small ring, a fitting and a ferrule from the
accessories case.
Put the components together like this:
The metal rings are already located in the shells, please take care not to lose
them.
Choose the colors of the fittings matching to the tubes.
4. Click the needle carriers into the clamps of the syringe revolver. Make sure that
the bottles and liquids are correctly assigned to the syringe positions.
5. Connect the syringe revolver to the left-hand connector on the upper side of
the DSA100 housing.
SPAC SPAC SPAC SPAC
Clamp for
manual syringe