177 of 206
BA KR 6, 16 F, KR C4 12.10.07 en
1
2
3
4
5
6
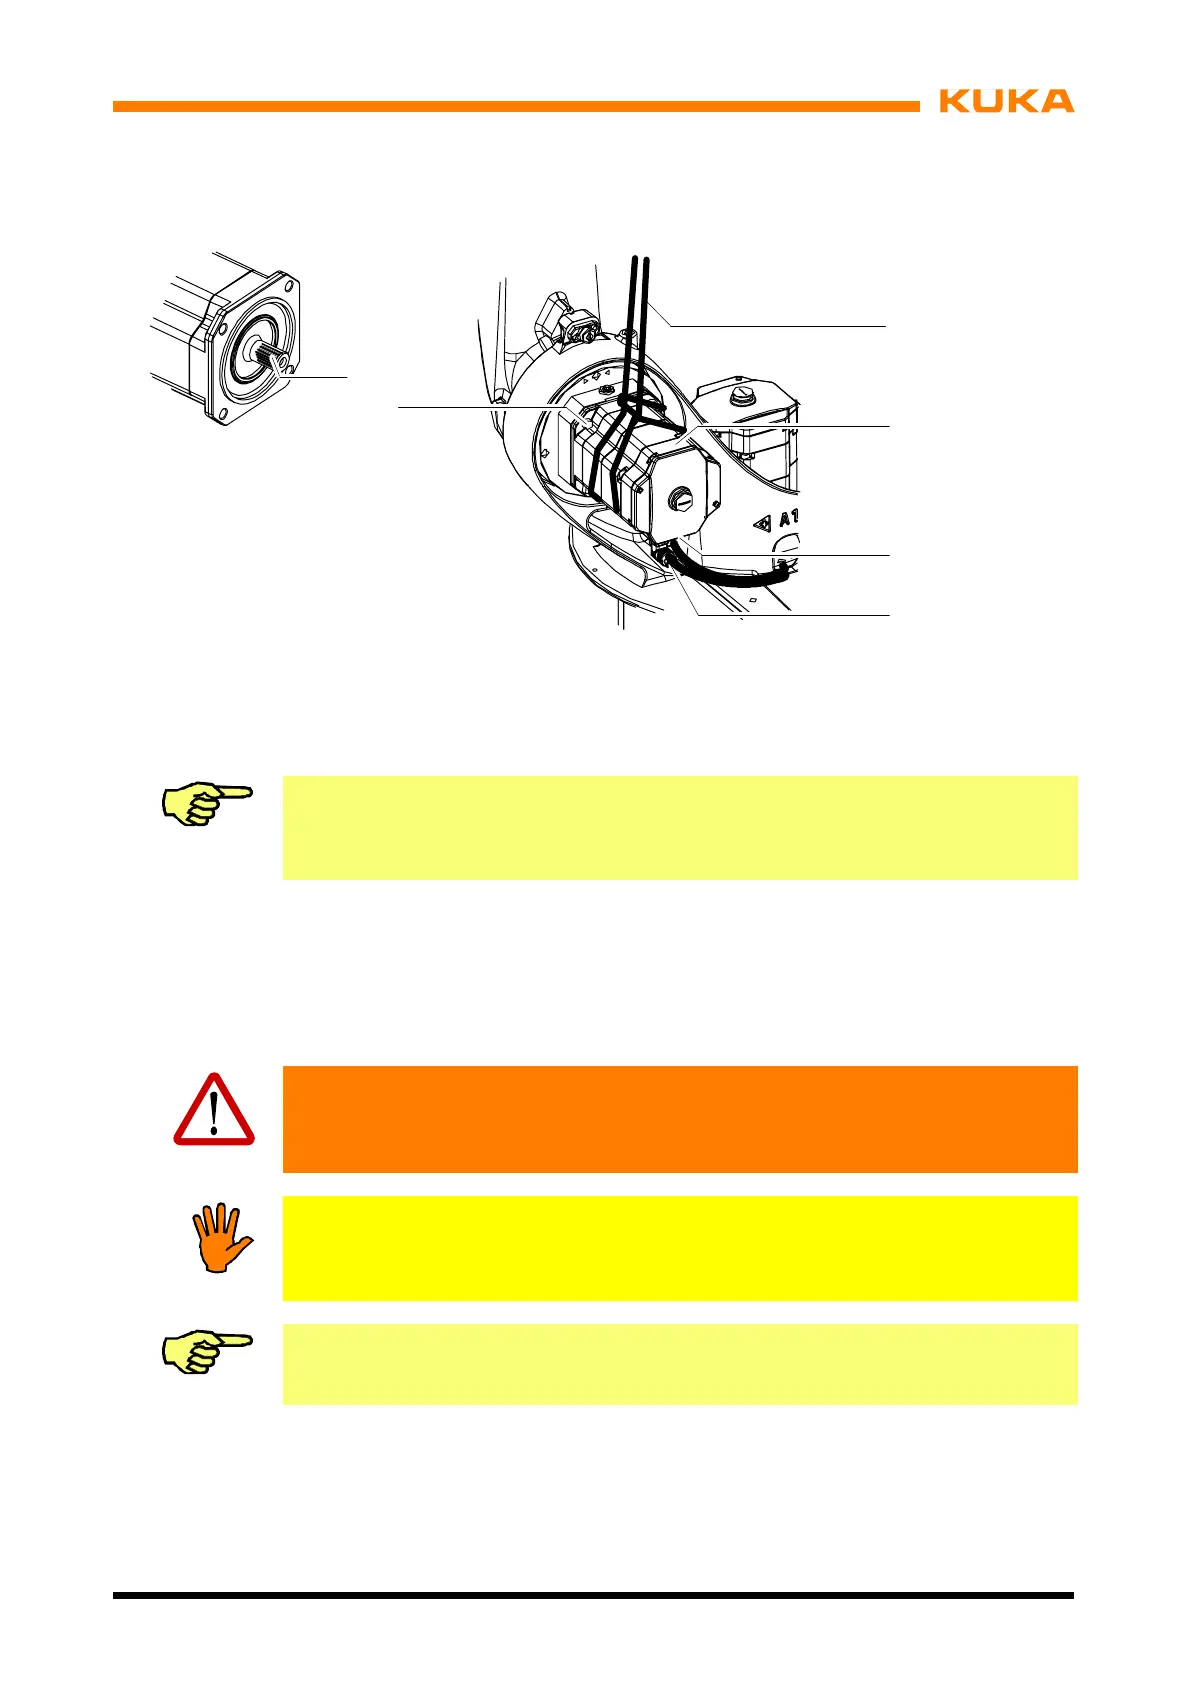
Fig. 122 Removal, installation of main axis motor unit A2
Information!
If the main axis motor unit is not to be reinstalled, it must be protected against corrosion
before being put into storage.
D Installation
(1) Remove all protective coatings and oil from new main axis motor unit A2, if applicable.
(2) Clean the toothing (Fig. 122/6) before installation and apply a thin but continuous coat
of Microlube GL 261.
(3) Insert main axis motor unit A 2 (2) by means of lifting tackle (1).
Caution!
When inserting main axis motor unit A 2, care must be taken to avoid any injury
by crushing!
Notice!
Main axis motor unit A2 must not be tilted while it is being installed. Ensure that
the sockets (3, 4) are in the correct position.
Information!
Insertion of main axis motor unit A 2 can be facilitated by turning it gently.
(4) Fasten main axis motor unit A2 with four M10x25 Allen screws (5) and lock washers.
(5) Tighten the Allen screws (5) with a torque wrench in diagonally opposite sequence, in-
creasing the tightening torque M
A
in several stages to the specified value (M
A
= 45 Nm).
(6) Insert connectors XM2 (3) and XP2 (4).
(7) Remove the lifting tackle (1).
 Loading...


