Do you have a question about the Lorex LNR360 and is the answer not in the manual?
Covers essential safety guidelines for operating the product and accessory equipment.
Provides detailed instructions and safety considerations for installing the NVR and connected devices.
Details on who should service the product and conditions requiring professional service.
Instructions for proper usage, cleaning, and maintenance of the NVR.
Contains FCC/IC compliance information, modification guidelines, and RoHS compliance details.
Highlights key features of the Network Video Recorder and its connectivity capabilities.
Details on configuring recording modes, schedules, and viewing recorded video.
Covers camera settings, including image adjustment, motion detection, and alarms.
System and network settings configuration, including display, mouse, network, and warning settings.
Procedures for system information, log management, firmware upgrades, and system shutdown.
Managing NVRs within the client software, including accounts, devices, and settings.
Steps for remote access via client software, including system requirements.
Common NVR errors, their possible causes, and recommended solutions.
Overview of system components and initial setup procedures for the NVR.
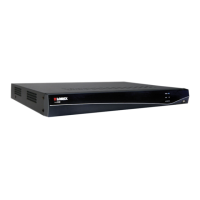
Details the front panel and rear panel connections for 4/8-channel NVR models.
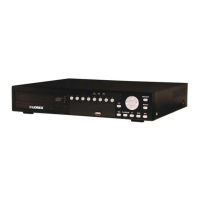
Details the rear panel connections specifically for the 16-channel NVR model.
Step-by-step guide for connecting the mouse, Ethernet, and monitor, and powering on the NVR.
Instructions for connecting IP cameras directly to the NVR or via a local network.
Information on default login credentials and cloud connectivity service for NVR access.
Provides guidance on optimal camera placement, wiring, and mounting for effective surveillance.
Instructions for connecting IP cameras to the NVR via a LAN, including PoE switches or adapters.
Explains how to use the NVR's USB mouse and remote control for system navigation.
Guide to navigating menus and utilizing features like Camera Toolbar, Digital Zoom, and Image Settings.
Accessing playback controls via Quick Menu and using the virtual keyboard for input.
Essential steps to accurately configure system time, DST, and NTP synchronization.
Details on system recording modes, icons, and default recording schedules.
Options for viewing recorded video, including quick playback, all-day playback, and search.
How to search for video by event/tag and protect files from overwriting.
Procedures for backing up video footage to USB drives or external hard drives.
Procedure to select and save specific durations of video clips during playback.
Instructions on how to play back video files saved from the NVR.
Steps to enable/disable password protection and change the admin account password.
How to create new user accounts with specific permissions for system access.
Overview of the main menu structure and access to various NVR functions.
Instructions for configuring manual recording options for individual cameras.
Guides on formatting hard drives, configuring drive types, and managing HDD settings.
Configuration options for recording groups, HDD detection, and overwrite feature.
Steps to set up continuous, motion detection, or custom recording schedules for cameras.
Details on configuring camera recording parameters like resolution, frame rate, and quality.
How to set durations for recording before/after events and substream quality for streaming.
Procedure to configure special recording settings for holidays.
Management of connected IP cameras, including synchronization and on-screen display settings.
Adjusting image parameters and configuring motion detection settings for cameras.
How to block video areas with privacy masks and configure tamper-proof alarms.
Configuring alarms for when a camera's video signal is lost or disconnected.
Detailed steps for remote access via client software, including system requirements.
Instructions for physically connecting the NVR to your network router via Ethernet.
Guide to using the client software wizard to establish an internet connection to the NVR.
Overview of the client software's Control Panel and its main features.
Accessing live video streams from IP cameras through the client software's main interface.
Viewing recorded video from cameras within the client software's main view.
Adding tags to video footage during playback for easier event marking and searching.
Accessing and viewing all recorded video files, including manual recordings and downloads.
Viewing saved screenshots of camera feeds using the client software's Pictures option.
Instructions for opening and playing back backup video files using the client software.
Creating visual maps to represent camera locations and statuses for easy monitoring.
Searching for recorded events, such as motion detection, within the NVR.
Using the playback controls within the event search results for detailed viewing.
Procedure to download event recordings directly to your computer's hard drive.
Viewing recorded video from the NVR remotely on your computer.
Using the interface controls for remote playback of recorded video.
Methods for downloading video files by file, duration, or tag using remote playback.
Managing camera groups within the client software for organized monitoring.
Changing names of cameras or camera groups and deleting them.
Searching for system logs on the NVR to track events, operations, and warnings.
Marking specific days as holidays to apply special recording schedules.
Customizing camera names and on-screen display text, including position and format.
Configuring camera recording parameters like resolution, frame rate, and quality.
Setting pre-record, post-record times, and video retention durations.
Setting up motion detection sensitivity, areas, and alarm actions for cameras.
Configuring alarms for when a camera's video signal is lost or disconnected.
Setting parameters like screen switching interval, log keeping time, and network performance.
Configuring default save folders for screenshots and video files within the client software.
Configuring outgoing email settings for alerts and notifications from the client software.
Steps to connect to the NVR using the Lorex netHD Stratus app on an iPhone.
Connecting to the NVR using the Lorex netHD Stratus app on an Android smartphone.
Connecting to the NVR using the Lorex netHD Stratus Plus app on an Android tablet.
Navigating the live camera view on mobile devices, including taking screenshots.
Accessing and viewing recorded video from the NVR on mobile devices.
Managing NVR connection details, including modifying or deleting NVRs.
Enabling password protection and checking for software updates for mobile applications.
Step-by-step guide to connecting the NVR to an Android tablet using the app.
Managing NVR connection details for Android tablets.
Detailed technical specifications for the NVR system, including hardware and software features.
Comprehensive guide on installing and replacing the 3.5" SATA hard drive in the NVR.
Instructions for formatting the hard drive to ensure proper functionality with the system.
Steps to confirm NVR connectivity on the local network before Internet setup.
Prerequisites and steps to set up remote connectivity for viewing the NVR via Internet.
How to use DDNS or local IP addresses to access the NVR via a web browser.
Steps to connect to the NVR using Internet Explorer, including plug-in installation.
Steps to connect to the NVR using Safari, Chrome, or Firefox browsers.
Overview of the web interface controls for live view, playback, and configuration.