112
Client Software for PC or Mac
Network
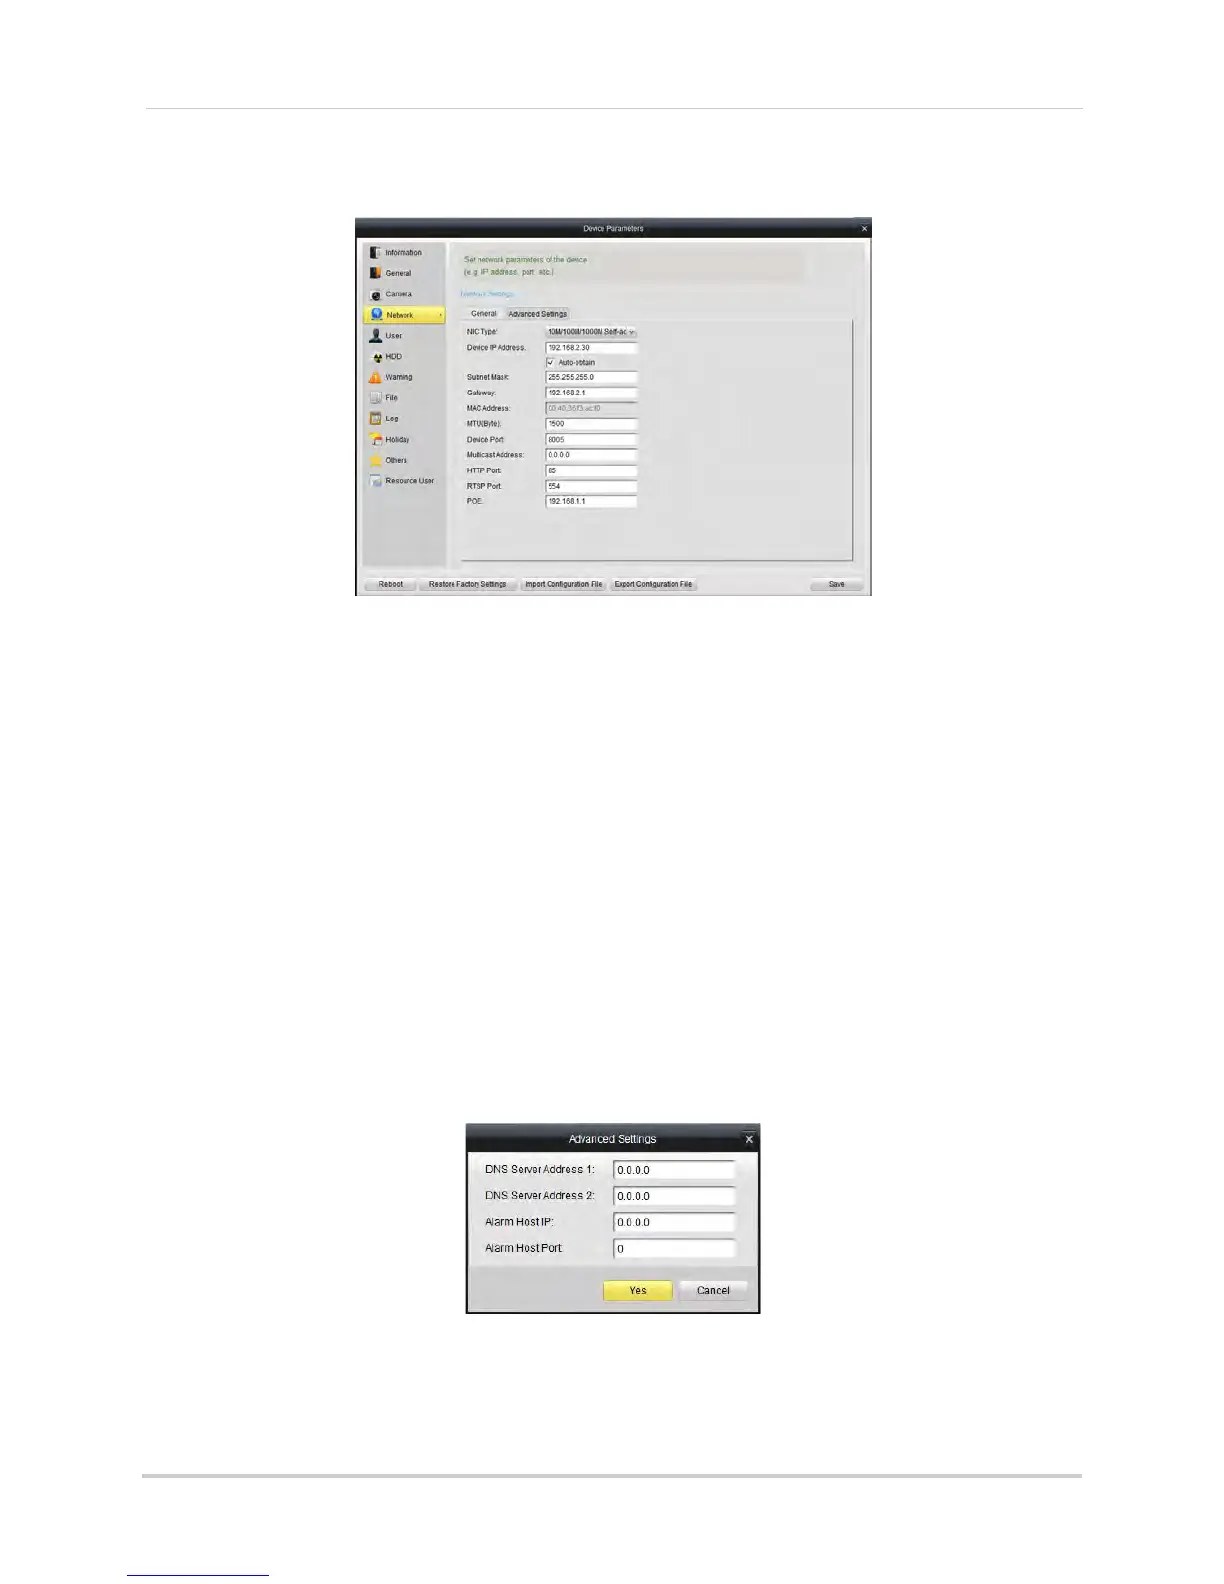
The Network sub-menu allows you to configure networking settings. The Network
sub-menu is divided into the following tabs:
The General tab allows you to configure the IP address
of the NVR for fixed IP or DHCP
mode. It also allows you to configure system port numbers.
The Advanced tab allows you to configure additional
advanced networking settings.
To configure your
NVR’s IP a
ddress for fixed IP or DHCP mode:
1 Select the General tab
.
2 Check Auto-obtain t
o use DHCP mode and have the router automatically assign an IP
address to the NVR. Un-check to use a fixed IP address to your NVR.
3 If y
ou un-check Auto-obtain:
• Under Device IP Address, enter the IP addr
ess your NVR will use. Please note that additional
configuration may be required on your router. See your router’s user manual for details.
• Under Subnet Mask, ent
er the subnet mask.
• Under Gatewa
y, enter the default gateway address.
• Click Advanced Settings>Advanced Settings. Under DNS Serv
er Address 1 & 2, enter the
DNS address and click Yes.
4 Click Save. Your NVR may restart.
NOTE: If you change the NVR’s IP address and you h
ave configured port forwarding, you will
need to re-configure it using the newly selected IP address.