163
Appendix C: DDNS Setup (Advanced)
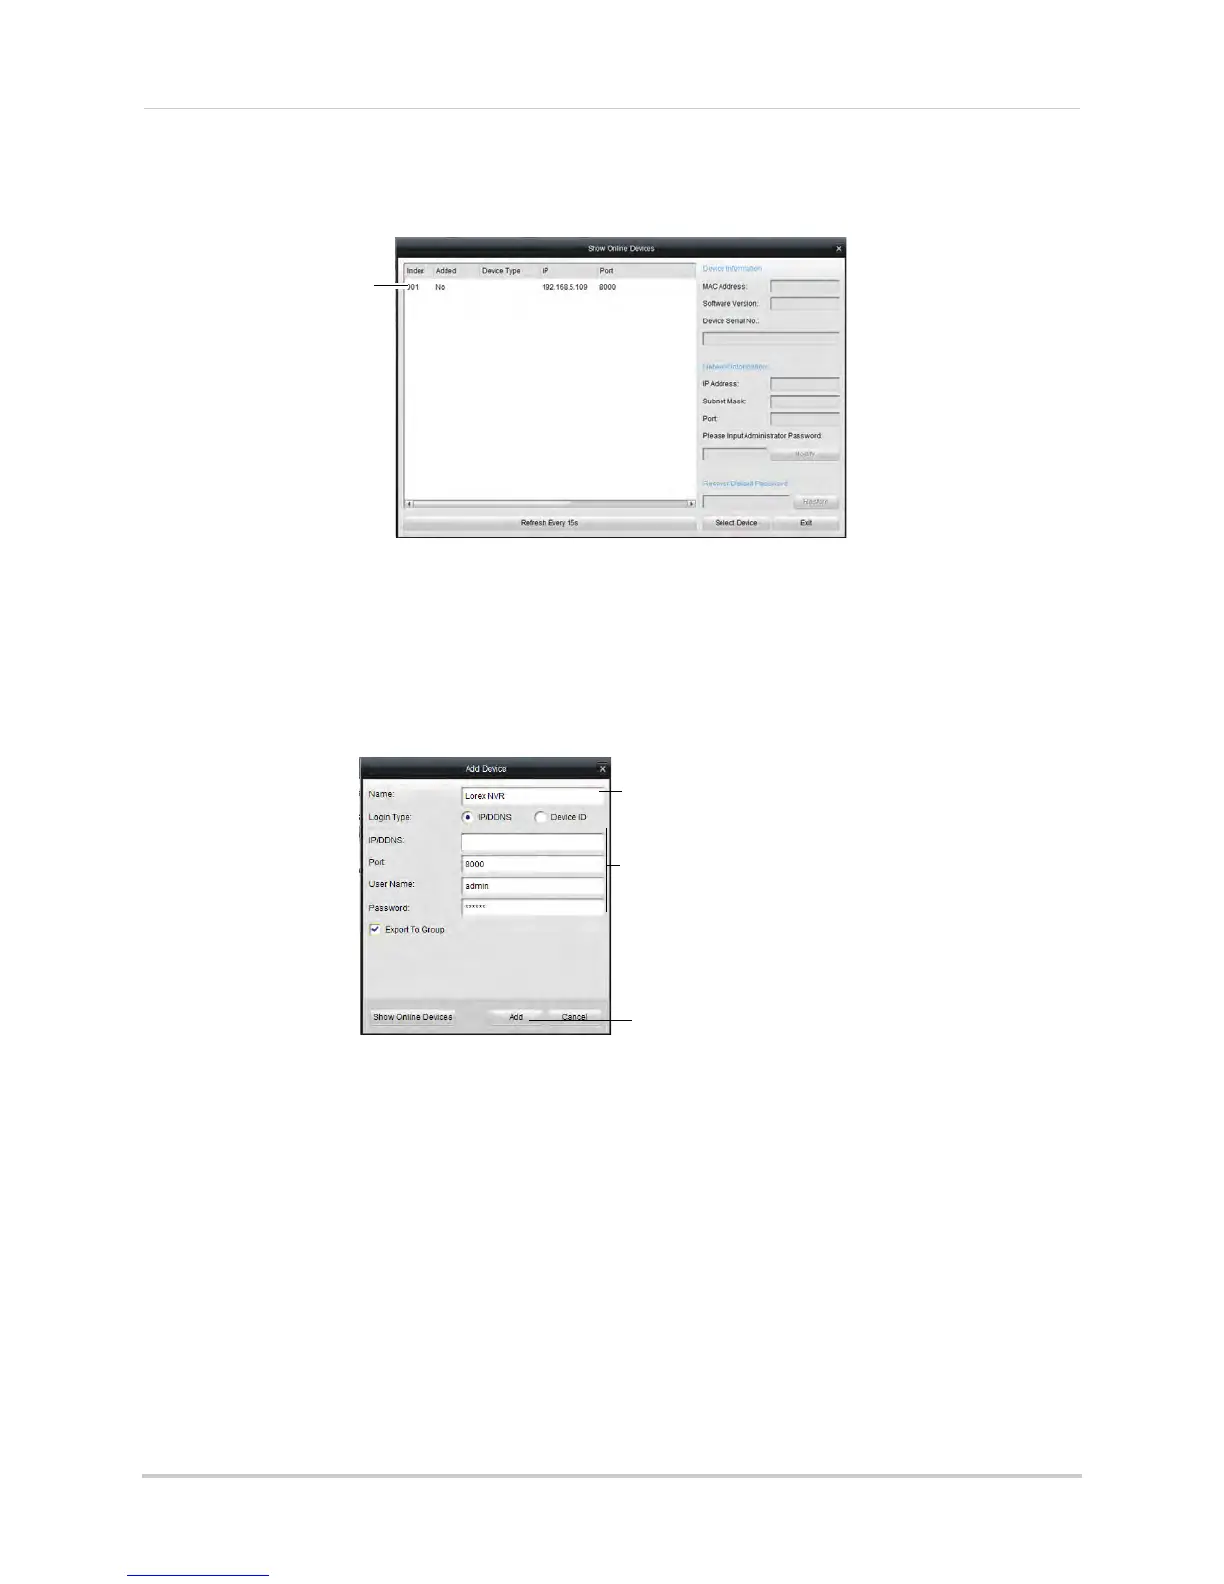
5 Double-click your NVR in the list and click Yes. The Add Device screen opens and populates
the NVR’s IP Address, Port, User Name, and Password.
Double-click your NVR in
the list and click Yes
NOTE: If you have changed the User Name, Password, you must enter your new User Name
and Password.
NOTE: If your NVR does not appear in the list, click Ex
it>Add. Then enter the IP Address you
recorded previously under IP/DDNS and go to step 6.
6 Under Nick
name, enter a name for your NVR of your choice (e.g. home, business, etc.).
7 Click Ad
d.
192.168.5.121
Enter a name for your NVR
Automatically populated
Click Add
8 If this is the first time connecting to your system, you will be prompted to change the
password. Enter a custom 6 character password and then click Yes.
9 Cl
ick Ne
xt 3 times, then click Finished to complete the Wizard. The Client Software opens to
Main View and streams live video from your cameras.
Accessing your NVR Remotely over the Internet
Setting up remote connectivity allows you to view your NVR from any computer or
compatible mobile device with Internet access.
To set up remote connectivity wit
h
your NVR, you must:
1 Port forward the HTTP, Client, and Mobile ports (def
ault: 80, 8000, and 1025) on your router
to your NVR’s IP address.
2 Create a DDNS account.