71
Configuration
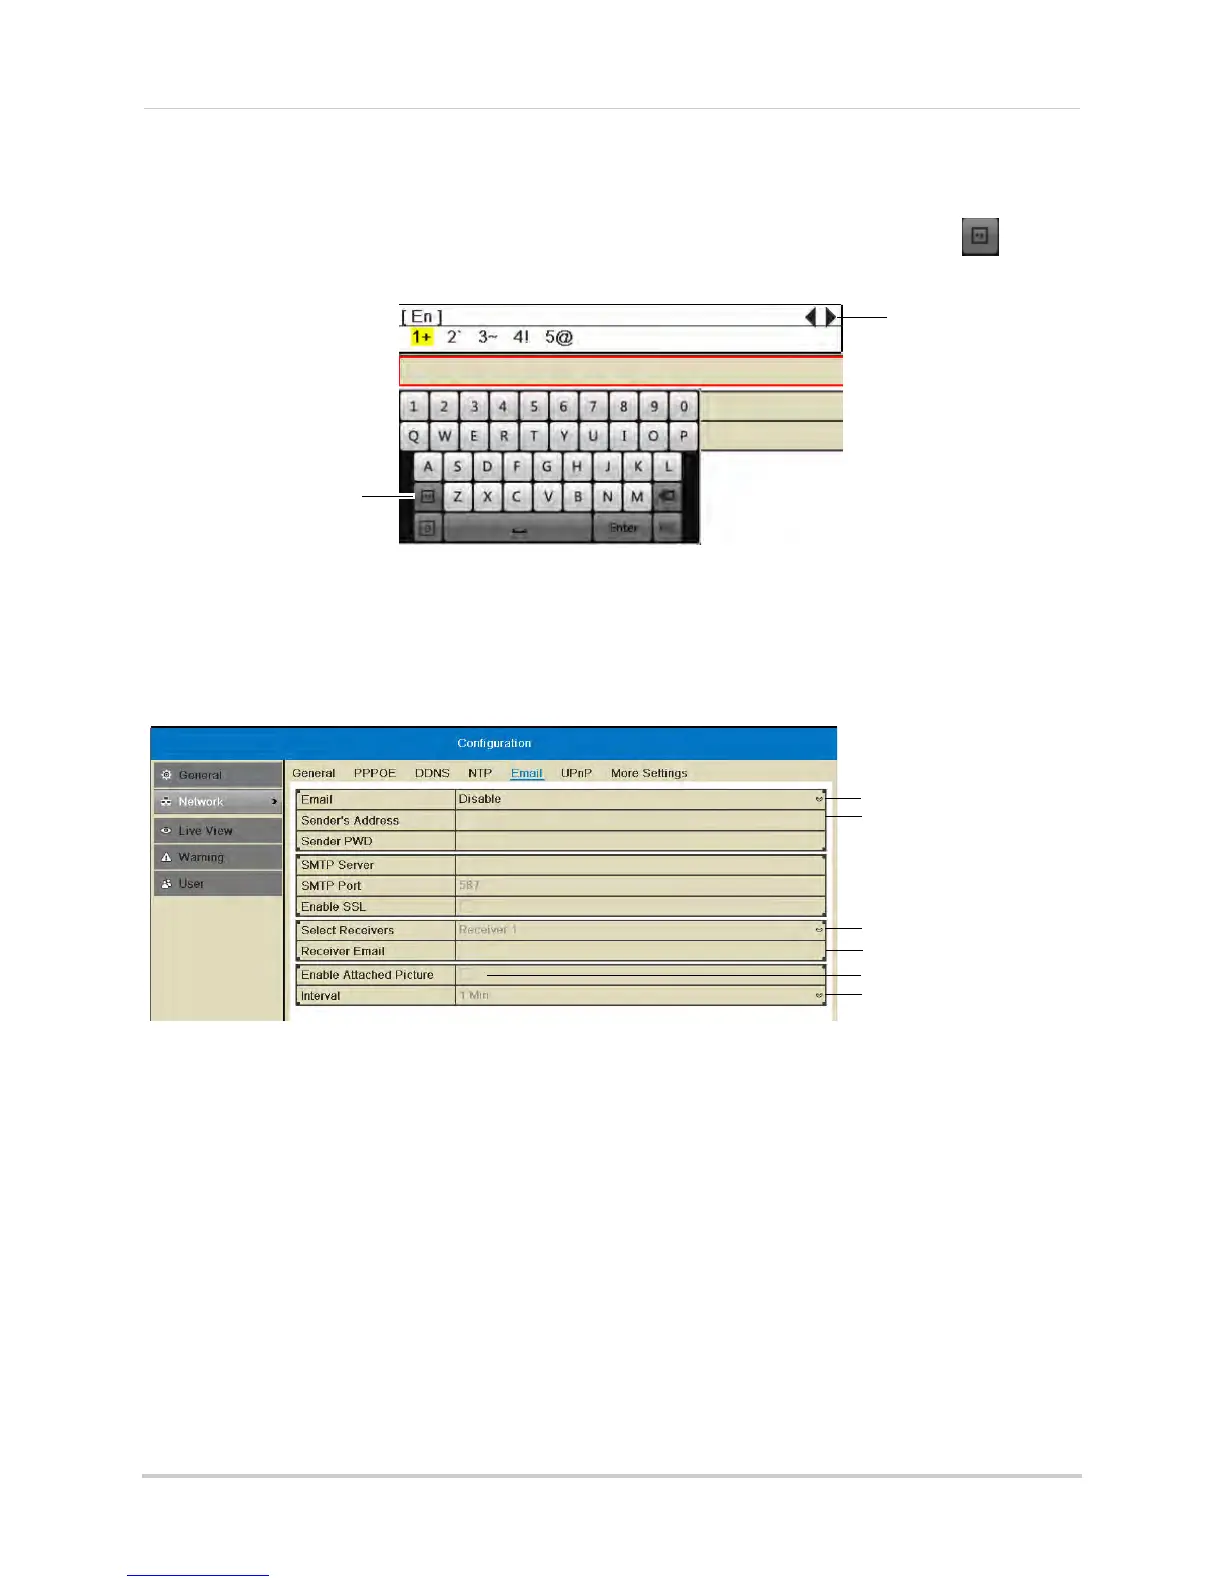
• Sender’s Address: Enter the sender’s email address.
NOTE: To enter ’@’ or other special characters using the on-screen keyboard, click
to bring
up special characters. Click characters to input a
nd click the arrows to view other
characters.
Click to open special
character selector
Click to view other
special characters
• Receiver Email: Enter the email address that will receive alerts.
• Select Receivers: Use t
o enter additional email addresses that will receive alerts. Alerts may
be sent to up to 3 addresses.
• Enable Attached Picture: Check to include an image attachment from the camera that
trigger
ed the alert.
• Interval: Se
lect the interval the NVR will wait between sending out emails when events occur.
Select Default
Enter sender’s address
Enter additional
receivers
Enter receiver’s address
Enable picture attachment
Select Interval
5 Click Apply to save your settings. Click Test to send a test email.
NOTE: Before the NVR will send out email alerts for motion detection, you must enable the
Send Email action
for each camera. See “Configuring Motion Detection Alarm Settings”
on page 59.
Configuring DDNS Settings
Lorex DDNS is available as an optional connectivity option. Please see “Appendix C: DDNS
Setup (Advanced)” on page 160 for details.
The primary connectivity option uses the Lorex Stratus service to connect to your system
over the Inte
rnet
without requiring port forwarding or DDNS registration. For details, see
“Connecting to Your NVR Over the Internet on PC or Mac” on page 83.
To configure DDNS settings:
1 Right-click and then click Menu.