7
Let’s Get Started!
3. You will notice that the two corners of the metal flange are bent down slightly. The bent corners
will clamp the base into the cabinet.
4.
Insert the left corner of the metal mounting flange into the slot in the cabinet. Slide the inserted
portion of the mounting flange to the left until it meets the left edge of the mounting slot.
5. Pivot the Music Rack Extender base so that the rest of the mounting flange meets the slot in the
cabinet. Be sure that the left edge of the mounting flange remains inserted and rests against the left
edge of the slot.
6. With the mounting flange aligned with the slot in the cabinet, push the Music Rack Extender base
so that the mounting flange becomes fully inserted into the cabinet slot. You may need to alternately
nudge each end of the Music Rack Extender base with the heel of your hand to fully
insert the mounting flange.
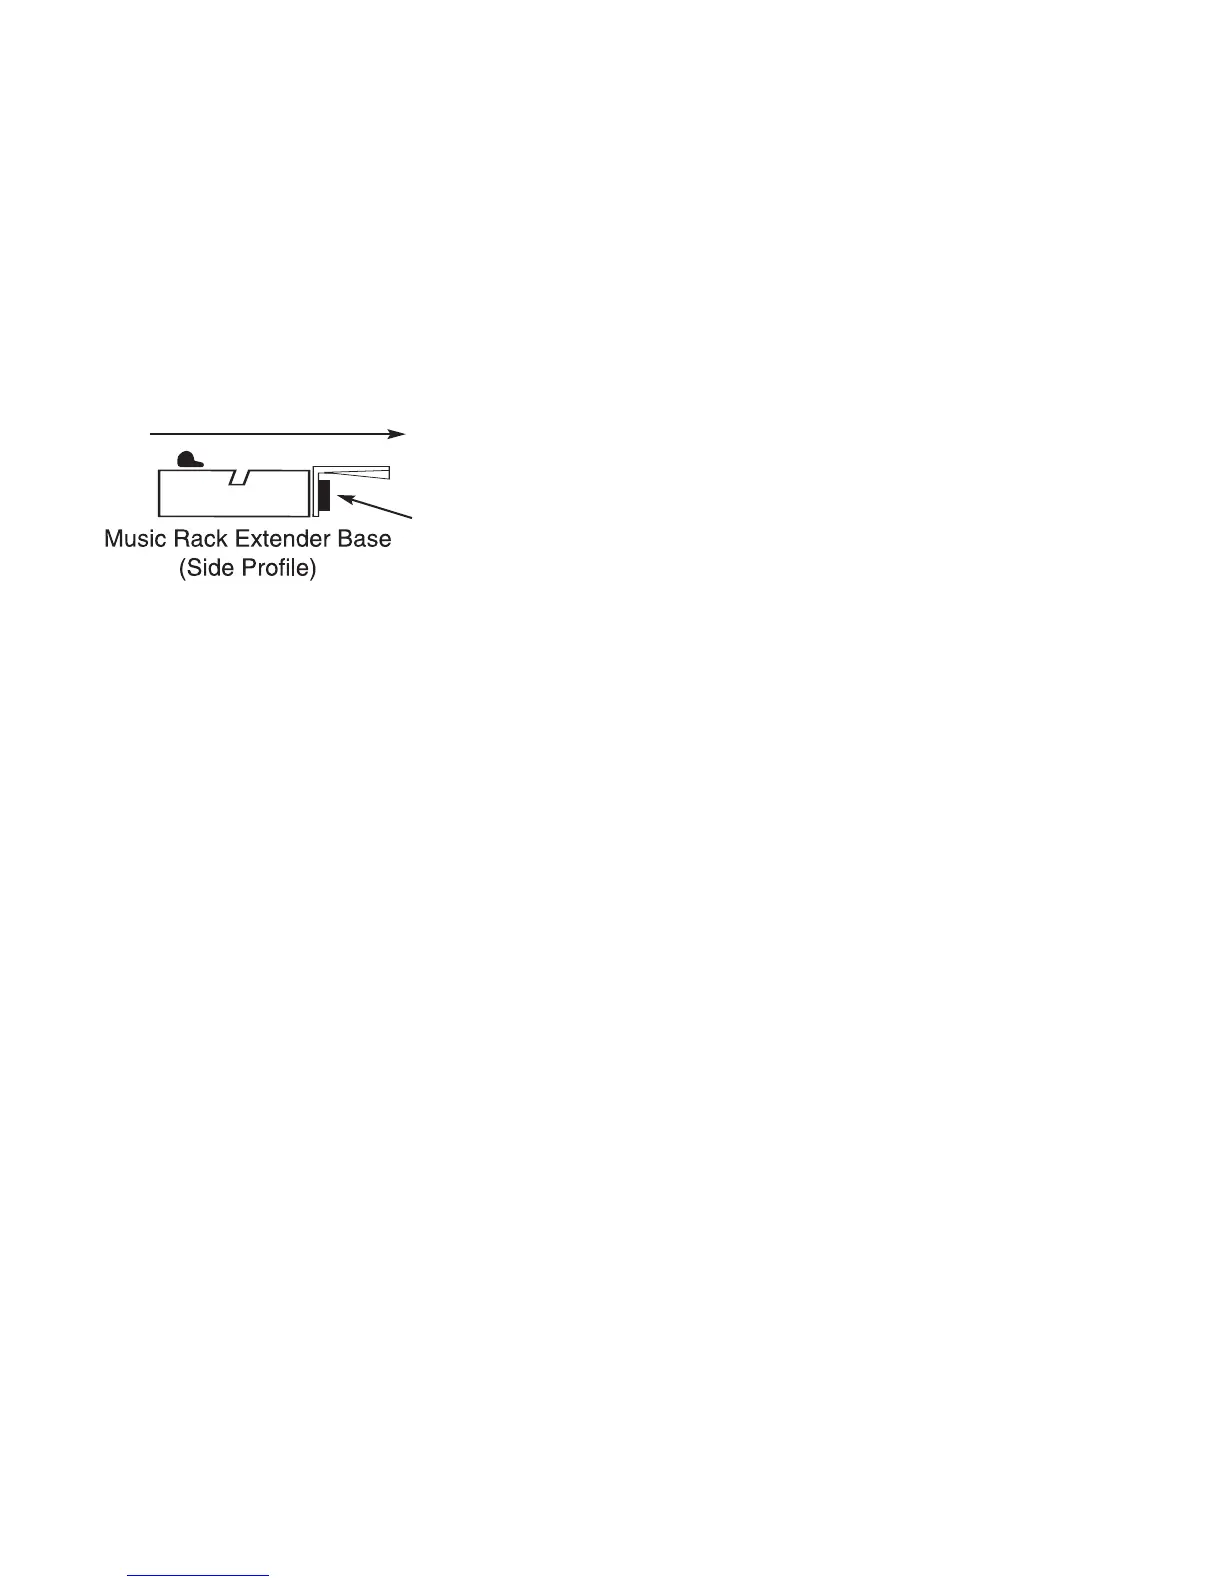
You will notice that a padded strip has been applied to the metal mounting flange to protect the organ
cabinet. This padded strip should rest against the cabinet when the Music Rack Extender base is
fully inserted.
7. After the Music Rack Extender base has been properly installed place the plexiglass Music Rack
into the slot in the Music Rack Extender base.
8. To remove the Music Rack Extender...
Remove the Music Rack from the base. Grasp the base by each end and pull. You may need to
work the base out of the slot by pulling alternately on each end to work the mounting flange out of
the cabinet slot.
Insert the metal mounting flange
into the cabinet slot.
Padded Strip