83
Feature Pages
In the case of preset 0, press any of the numbered buttons that may be on, turning them off.
•When the desired bank letter and preset number are displayed in the
BANK section of the screen, press the
SELECT button. The NAME section of the screen will become highlighted.
A preset name displayed is many times divided by a slash mark. The name to the left of the slash mark rep-
resents the sound on the upper keyboard. The name to the right of the slash mark represents the sound
assigned to the lower keyboard, to the right of the split point.
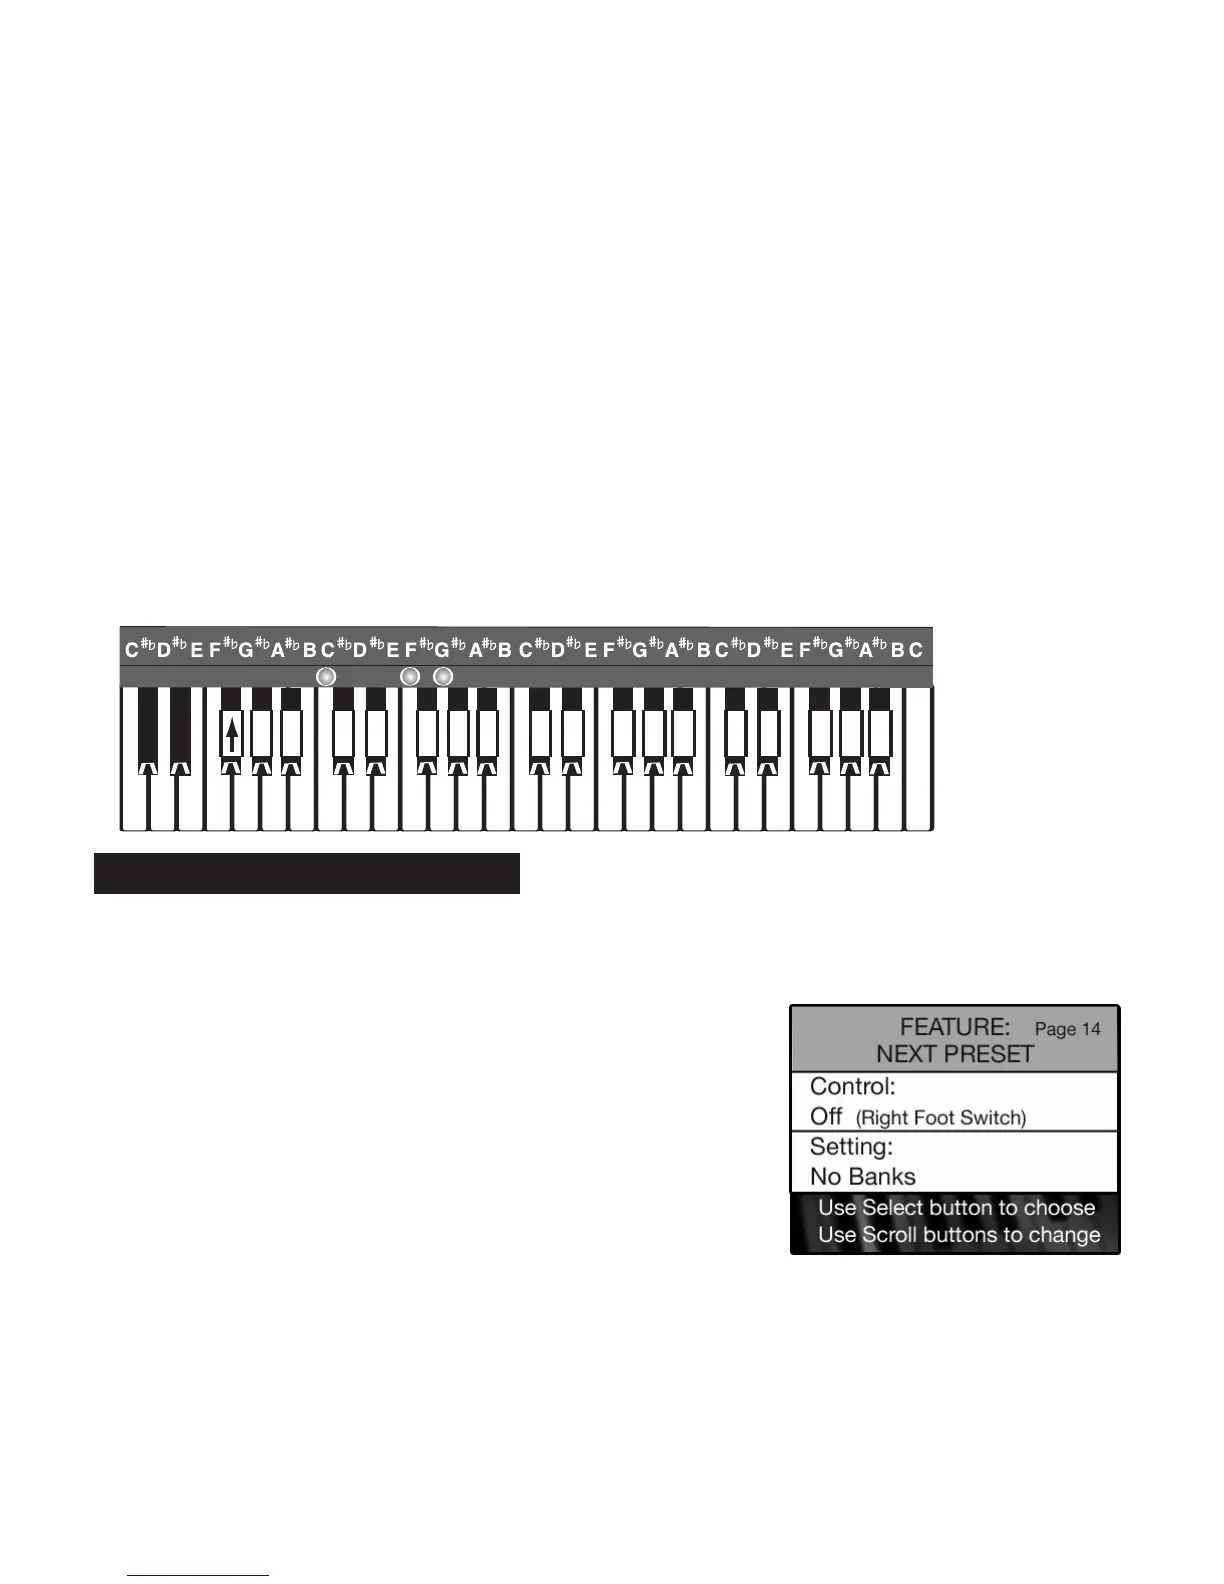
•Assign a new name to your presets using the lower keyboard keys, which will now access letters,
numbers, and symbols like those of a typewriter.
A keyboard overlay for the lower keyboard was provided. Place the overlay on the lower keyboard to make
locating the letters easy and fast. The first F# key (marked on the overlay with the up-pointing arrow) is the
Shift key for upper case.
The line under a letter of a preset name is the cursor. The cursor represents the location where your typing
will occur. Begin typing the title you want. After each correctly typed letter press the first lower keyboard
A# key (marked on the diagram with a >) to advance the cursor to the next space. The last A# key (marked
on the diagram with a -) is the ERASE or DELETE key for correcting any typing mistakes or creating a
blank space.
The title can be up to 16 characters in length.
PREVIEW:
NEXT PRESET FEATURE PAGE
activates the feature that enables you to move from one preset to another
without having to actually press a preset button. Presets can be selected by pressing the right foot switch.
•Press the
SELECT button to highlight the CONTROL section of the screen.
•Press either SCROLL button to select between the options: ON or OFF.
•Press the SELECT button. The SETTING section of the screen will become highlighted.
•Press either
SCROLL button to select between the two selections: WITH BANKS or NO BANKS.
WITH BANKS gives you the ability to go from one set of BANK PRESETS to another.
For example, using the NEXT PRESET and starting with BANK A-0, the presets advance through A-10, then
continue advancing
B-0 through B-10.
How To Use It:
•Press the Feature (Clear) button and then press the bottom
SCROLL button repeatedly to highlight FEATURE: NEXT PRESET,
as illustrated to the right.
14. Next Preset
CBAGFEDCBAGFEDCBAGFEDCBAGFEDC
A
a
B
b
C
c
D
d
E
e
F
f
G
g
H
h
I
i
J
j
K
k
L
l
M
m
N
n
O
o
P
p
Q
q
R
r
S
s
T
t
U
u
V
v
W
w
X
x
Y
y
Z
z
><
!
1
"
2
#
3
$
4
%
5
&
6
'
7
(
8
)
9
-
0
;
,
:
.
?
/
*
+
_
A
a
B
b
C
c
D
d
E
e
F
f
G
g
H
h
I
i
J
j
K
k
L
l
M
m
N
n
O
o
P
p
Q
q
R
r
S
s
T
t
U
u
V
v
W
w
X
x
Y
y
Z
z
><
!
1
"
2
#
3
$
4
%
5
&
6
'
7
(
8
)
9
-
0
;
,
:
.
?
/
*
+
_
><
!
1
"
2
#
3
$
4
%
5
&
6
'
7
(
8
)
9
-
0
;
,
:
.
?
/
*
+
__
A
a
B
b
C
c
D
d
E
e
F
f
G
g
H
h
I
i
J
j
K
k
L
l
M
m
N
n
O
o
P
p
Q
q
R
r
S
s
T
t
U
u
V
v
W
w
X
x
Y
y
Z
z