Operation ProtoMat S
70 HB V0.9/Mrz-11 © 2011 LPKF AG
6
■ Manual setting of milling depth
Note
Only for circuit board plotters with manual setting of the milling
depth the milling depth has to be adjusted using a micrometer
screw.
1. Preparative activities are described in detail on page 61.
➨ The PCB material is fixed on the working table.
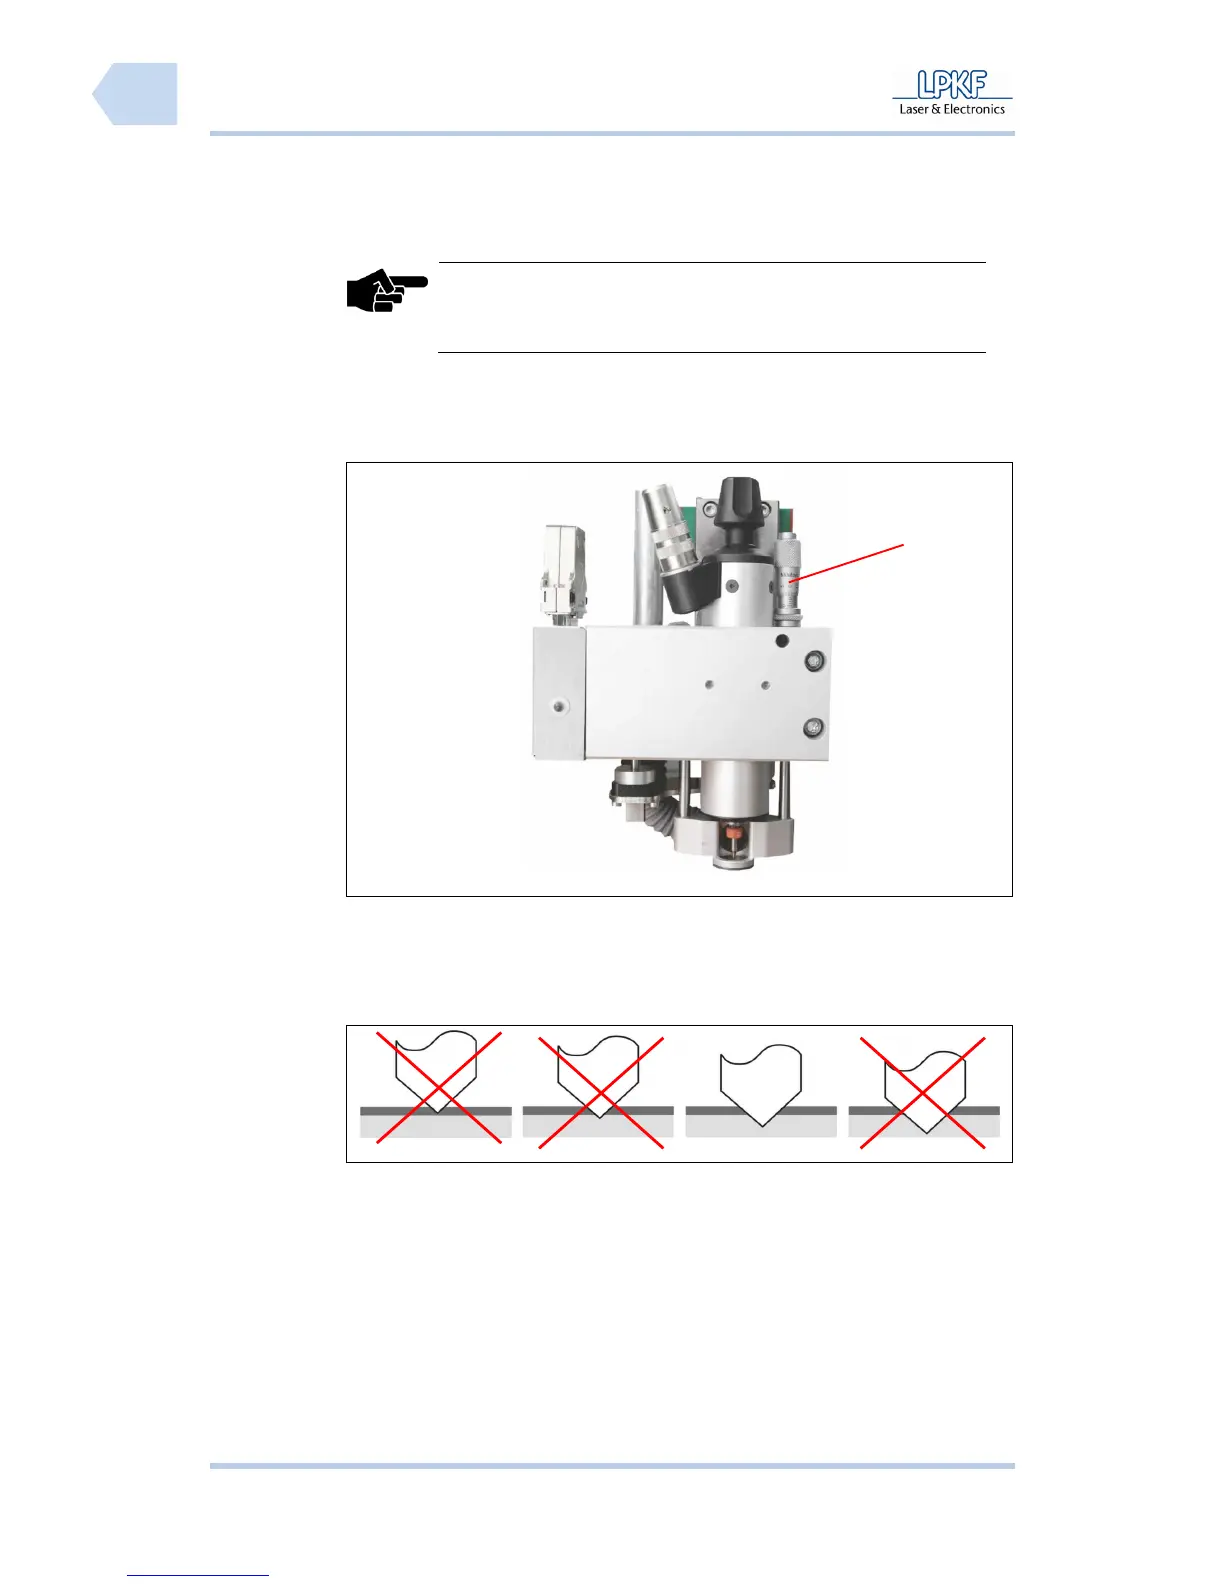
Fig. 40: Mill/drill
head
2. Adjust the milling depth with the micrometer screw /1/.
3. Produce a test track.
4. Check the result using a measuring microscope.
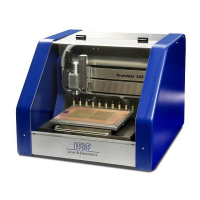
Fig. 41: Optimal
milling depth
5. Repeat the process in necessary until a sufficient amount of material has
been removed.
♦ The milling depth is now adjusted.
1