214325 158 Revision A
NOTE:
If float was set heavier to complete ground calibration procedure, adjust to recommended operating float after
calibration is complete.
13. If unit does not function properly, conduct maximum stubble height calibration.
Setting Preset Cutting Height (Case 7010/8010, 7120/8120/9120, 7230/8230/9230)
To set preset cutting height, follow these steps:
NOTE:
Changes may have been made to combine controls or display since this document was published. Refer to
combine operator’s manual for updates.
CAUTION
Check to be sure all bystanders have cleared the area.
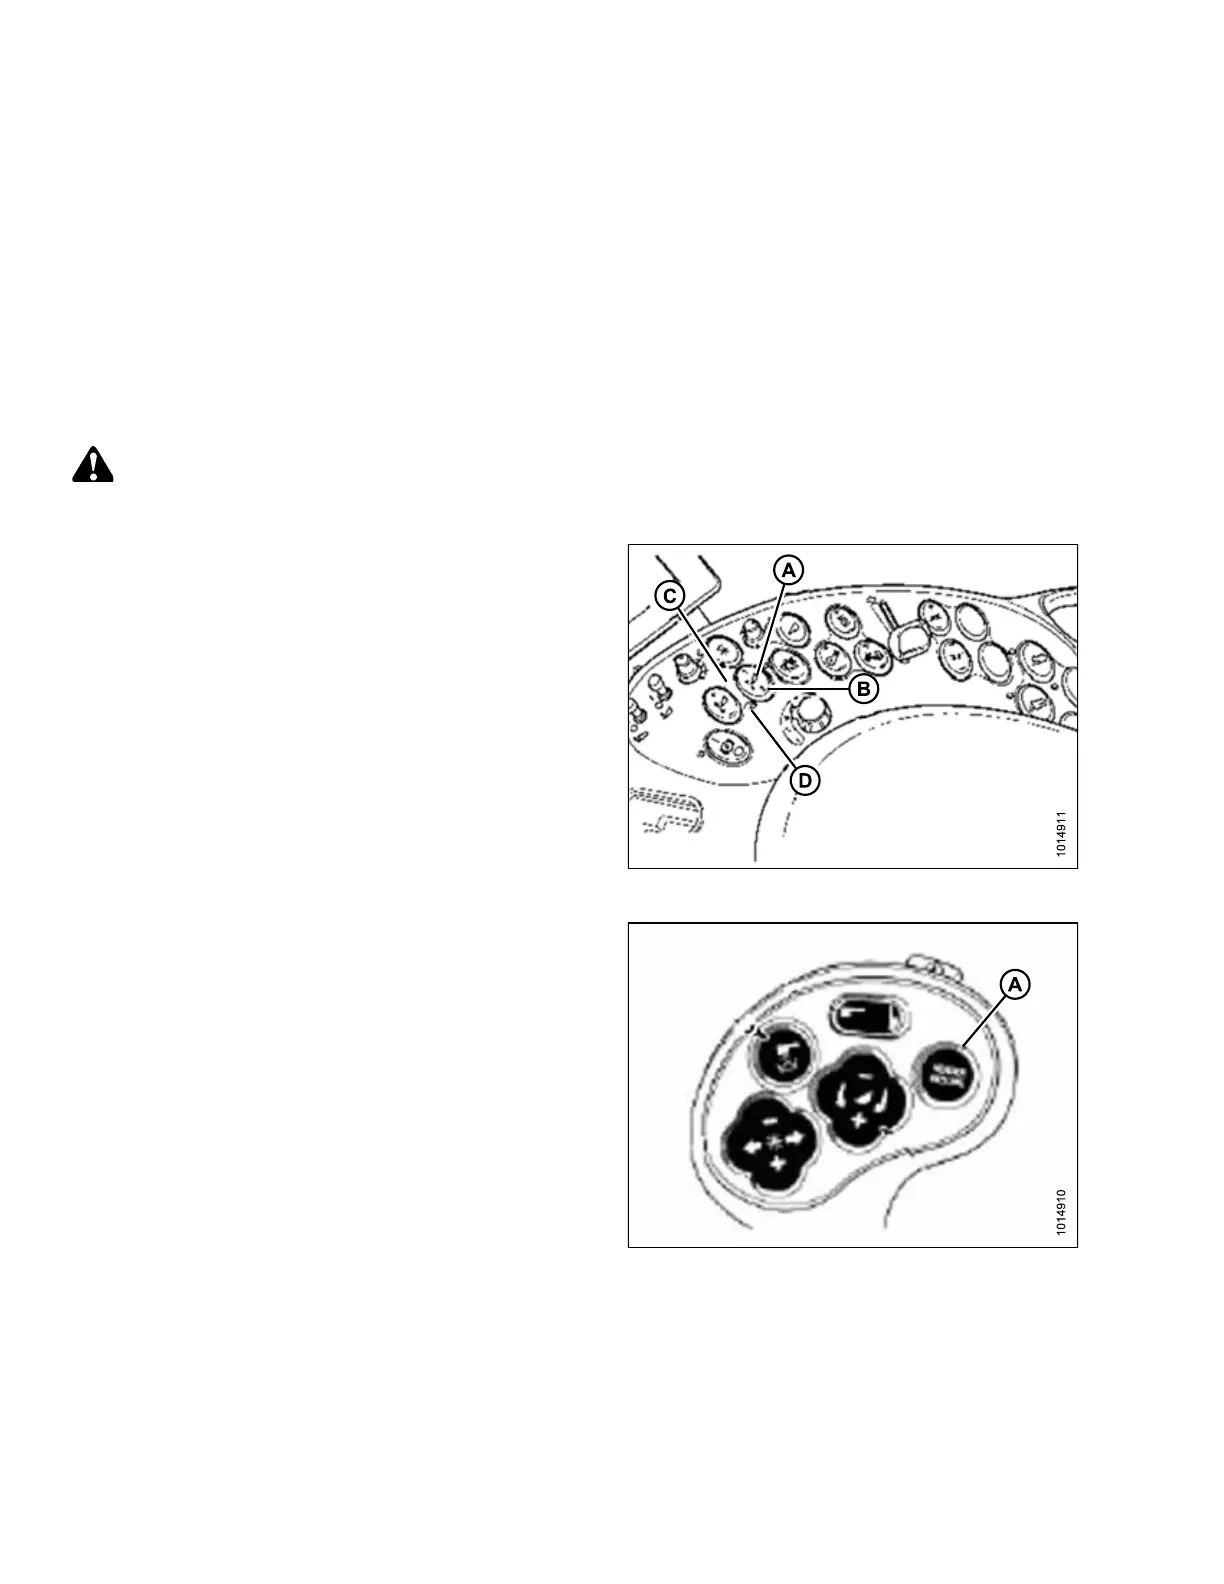
Figure 5.44: Case Combine Controls
1. Engage separator and header.
2. Manually raise or lower header to desired cutting
height.
3. Press SET #1 switch (A). The HEADER HEIGHT
MODE lamp (C), next to SET #1 switch, turns on.
4. Manually raise or lower header to a second desired
cutting height.
5. Press SET #2 switch (B). The HEADER HEIGHT
MODE lamp (D), next to SET #2 switch, turns on.
Figure 5.45: Case Combine Controls
6. To swap between set points, press HEADER
RESUME (A).
7. To pick up header at headlands, press HEADER
RESUME (A) twice. To lower, press HEADER
RESUME (A).
NOTE:
You can fine adjust these set points by using FINE
ADJUST switch.
NOTE:
Pressing HEADER RAISE/LOWER switch will
disengage AUTO HEIGHT mode. Press HEADER
RESUME to re-engage.
SETTING UP AUTO HEADER HEIGHT CONTROL