MAINTENANCE, LUBRICATION AND SERVICE
ENGINE AIR FILTER
NOTE
For recomended intervals, refer to Engine
Maintence Tables in the Engine section of
this manual.
The air cleaner prevents dust, dirt and
other harmful contaminants from
entering the engine through the air
intake system. Maximum engine
protection can only be achieved through
regularly scheduled maintenance
practices that include periodic air intake
system inspections and air lter element
changes.
The most efcient method of
determining air lter element change
intervals is by regularly checking the air
lter restriction gauge, which may either
be mounted directly to the air cleaner
canister, on the air cleaner outlet tube or
inside the cab. The restriction gauge
measures the amount of restriction in
the air lter element. Some chassis may
have a dash-mounted dial-type
restriction gauge which measures lter
restriction in mm/inches of water.
Change the air lter element in
accordance with the procedures as
outlined, or the dash-mounted gauge
indicates inlet restriction as follows:
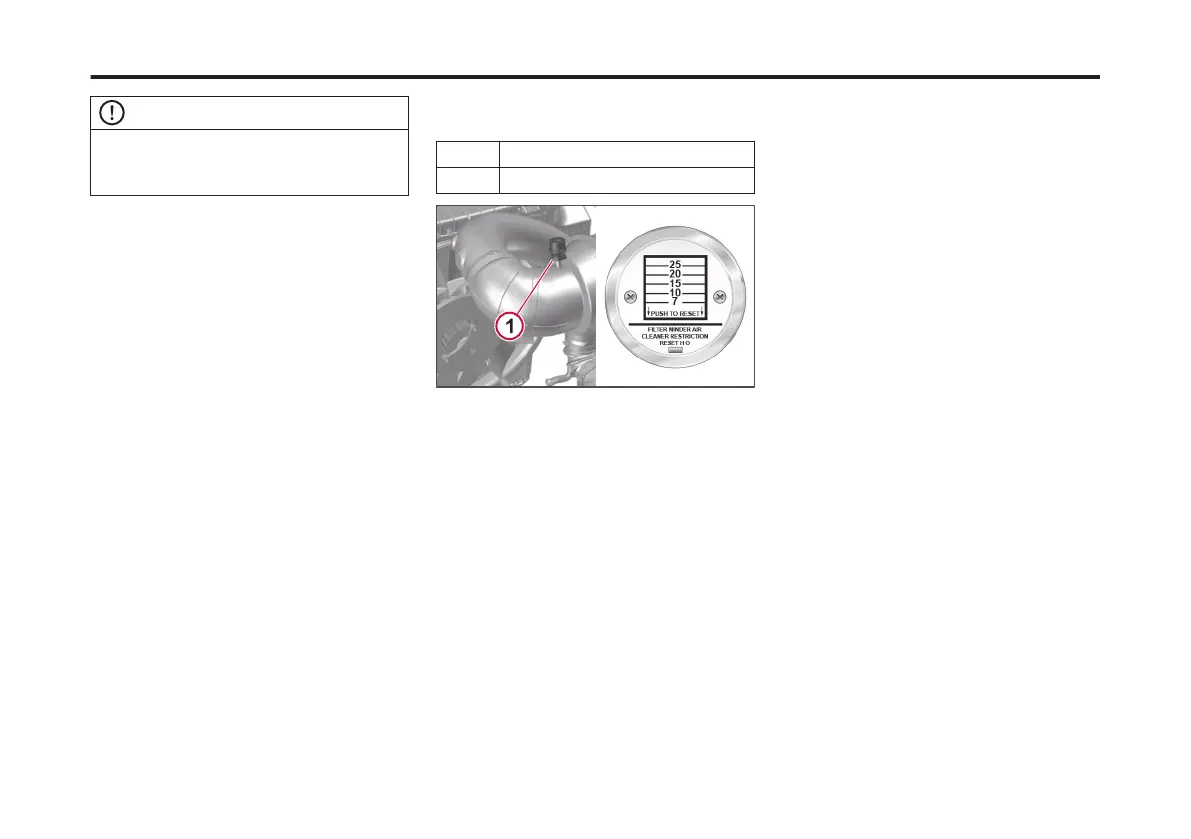
Mounted Gauge Inlet
Restrication Indication
Engine
Milimeters (Inches) Water/KPa
MP7
™
510 (20) /5 kPa
1 Air Filter Restriction Gauge
Damage to the air lter element, such as
holes in the lter media, will give an
inaccurate restriction reading. Therefore,
even if a maximum restriction is not
indicated, the air lter element should be
changed yearly or at recommended
intervals, as described in this manual.
When replacing the air lter element, or
whenever the air inlet system has been
disassembled, inspect the inlet air ducts
between the air cleaner canister outlet
and the turbocharger inlet as follows:
• Inspect the rubber elbows for cracks,
splitting and/or holes. Rubber
components must be exible so that
they conform to the plastic ducts and
ensure a tight seal.
• Inspect plastic ducts for cracks and/or
holes.
• Ensure that all hose clamps are
properly installed and tightened to
specications.
• Make sure the plastic ducts do not rub
against any components such as air
conditioning hoses, wire harnesses, etc.
Filter Element Installation
1
Wipe the air cleaner housing clean.
2
Remove the lter element(s).
3
Inspect sealing areas for dirt tracks
which would indicate that dust has
leaked past the seal. If dirt tracks are
found, the cause must be
determined and corrected.
4
Thoroughly clean the inside of the air
cleaner canister with a damp cloth or
vacuum cleaner.
5
Inspect the sealing areas of the
housing for damage. Repair or
replace as necessary.
6
If equipped with a metal canister,
inspect inside the canister for rust. If
rust is present:
1 Remove the air cleaner canister
from the chassis.
2 Remove all loose rust with a wire
brush or a coarse Scotch Brite pad.
284
X Publication_PC28